Zenith Royal 500 Series Transistor Radios – The “Owl Eye” Radios

L – R: Original & 2nd Generation Royal 500’s, Royal 500E, Royal 500H
Back in the mid 1950’s through the 60’s transistor radios were all the rage. The technology was new and exciting. There had already been tube-based portable radios but the greater bulk and power requirements of a tube design meant that the radios needed larger, more expensive specialty batteries which kept most tube radios larger and more expensive to run. Transistors were a post-World War II development and when they became practical, shirt-pocket-sized radios became possible. Even larger radios which could offer better reception and sound could now be powered by common flashlight or penlight cells.
Regency TR-1
In 1954 the Regency TR-1 became the first mass-produced transistor portable radio…it is now a very desirable and expensive collector’s item. Although it was a breakthrough design its performance was marginal by today’s standards. In November 1955 Zenith, drawing on its pioneering work in hearing aid miniaturization and transistor design jumped into the transistor race with their Royal 500. These early “transistors” (as we called them) were AM only, and that was OK because AM radio was king…FM was still considered an audio specialty Hi-Fi band for classical music. Most radios in cars, on kitchen counters and night stands, were AM only.
")
Original Hand-Wired 7 Transistor Model

Early Royal 500D In Red
")
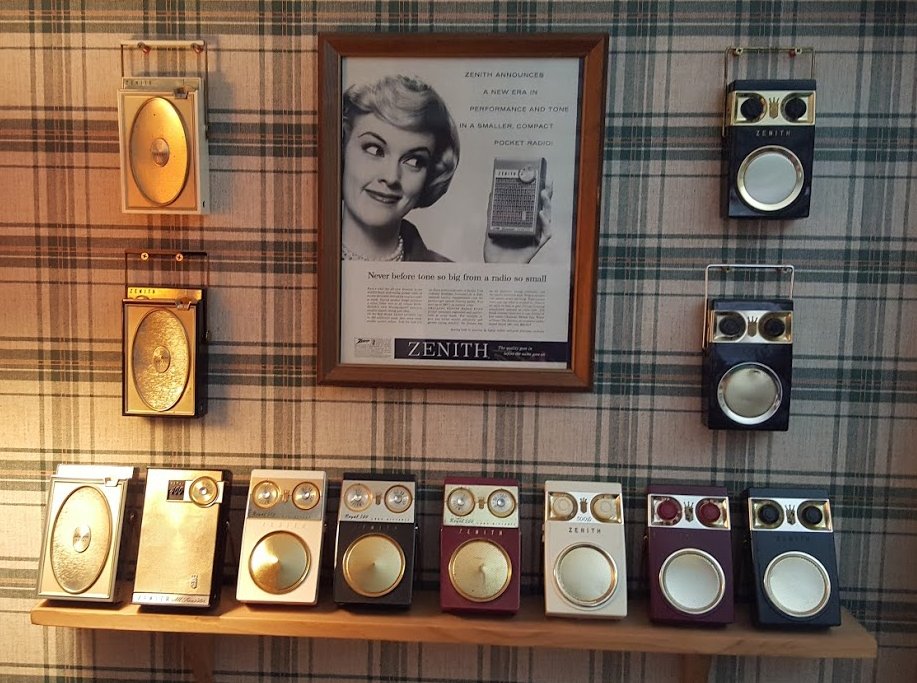
The Royal 500 was destined to become one of Zenith’s most enduring and most copied series of radios. Unofficially dubbed “Owl Eye” because of its appearance, the first Royal 500 was a hand wired 7 transistor design (Left – Chassis 7XT40) and proudly displayed the word “Tubeless All Transistor” on the back of the cabinet. It was designated a “pocket radio” but at 5 ¾ x 3 ½ x 1 ½ it would only fit into a large coat pocket or purse. Zenith also made much of the fact that it ran on 4 AA cells (then referred to as penlite cells), where many radios such as the Regency required special batteries that cost more and gave far shorter life. One of the reasons the 500 performed so well was that Zenith manufactured many of its own components rather than using generic parts which would compromise performance. The radio had a clever three-position bail handle which could swivel back to prop the radio at a nice angle, lifted straight up to become a carrying handle, or folded down out of the way against the back of the set. The Royal 500’s transistors were socketed* rather than soldered in directly, and the radio outperformed most of the competition for its ability to receive distant AM signals and to play loudly and clearly. Zenith marketed these radios aggressively and additionally offered attractive gift boxes as an add-on option. Zenith was proud enough of their new model that some were released in a semi-transparent maroon case, so in bright light you could see through it. The Royal 500 sold for $75.
*Most early Zenith sets had socketed transistors, clearly with the thought that they would need to be replaced occasionally, as in tube sets. While some early transistors did suffer a higher defect rate than later ones, transistors turned out to be very stable and reliable. We have since learned that transistors are usually longer-lived than the electrolytic capacitors which often require replacement in vintage electronics.
Those early days of transistor technology saw rapid development so manufacturers, including Zenith, updated their models frequently. In 1956 the 500 was upgraded for better performance with chassis 7XT4040Z and 7XT40Z1. In 1957 the hand wired chassis gave way to a modern printed circuit board (PCB) design with chassis 7ZT40 and 7ZT40Z1, along with the addition of vernier tuning. A big improvement came in 1958 with the release of the Royal 500D (the D stood for Distance). Now featuring 8 transistors and chassis 8AT40Z2 a new RF amplifier stage was added along with other improvements providing better reception and stronger sound. There was also a newly designed speaker called the inverted cone which was convex rather than concave which helped Zenith achieve better sound quality. Strangely it was not put into all 500D’s so the only way to know if a radio had the new speaker was to take it apart. Also note that some 500D’s say “Long Distance” on the front, later ones say 500D.

My but that radio looks familiar…
")
Original 500 On Left, Black & Two-Tone Gray 500H’s On right
1959 saw the introduction of the 500E which kept the same basic format of the original models but with a totally freshened look. The new chassis was designated 8CT40Z2 but was almost identical to that of the 500D. Initially introduced at $75 Zenith eventually was forced to reduce it to $59.99 to compete with the flood of inexpensive sets available from Japan. In fact, while the 500 remained the flagship of the portable line, Zenith introduced many smaller, less expensive sets, some of which were great performers for the money.
In 1961 the radio underwent a complete redesign and was now called the Royal 500H, chassis 8HT40Z2. The owl-eye knobs were gone replaced with thumb-wheels and an ingenious new 3 x 5 extended range speaker was introduced which elevated the audio quality to a whole new level for this size radio. The new cabinet design highlighted this speaker and Zenith featured it in their advertising. The new speaker was powered by an amplifier which put out more than three times the power of the previous 500…Zenith really went all out to keep their top of the line pocket radio a top performer. Unfortunately, even though the 500H was a bargain at $59.95 given it’s trend-setting performance, many imported sets were selling for $20 – $30 and this price pressure brought an end to the improvements the 500 series. The 500H was produced through 1964, after which the 500 series started a downhill slide.
In 1964 Zenith released the 500E-1 (chassis 8KT40Z2) and 500H-1(chassis 8LT40Z1) models. These were somewhat cheapened chassis fit into the existing 500E and H cabinets, so you have to look inside to see if you had an old or new model. They were still decent performers but were a notch below their predecessors. They both sold for $39.95 and were certainly much better performers than competing sets at that price.
Following models which are not coveted much by Zenith collectors include the completely different (yet excellent) 500L, N and G models – although some sources claim these were not good radios I’ve found that not to be true…they perform very well. For a look at the entire portable Zenith line of the era I strongly recommend Norman Smith’s excellent book, “Zenith Transistor Radios – Evolution Of A Classic” from Schiffer Books.
Minor Variations: Repair technicians know that even within the main versions of any given model there were often minor changes and upgrades made along the way, and Zenith was no exception. Even within a given chassis number you may find several slightly different versions, often referenced by a color dot in the battery compartment. This was usually done to accommodate changing parts availability and although it seldom affects performance it is something a repair person must be aware of. These sub-variants may have different components and the circuit boards may have different layouts. Always check your radio against your service information to see if there are differences.
")
Royal 500H In Black & Two-Tone Gray
Finding & Restoring the Royal 500 Series: Strategies for collecting Royal 500’s will depend on your interest. Dyed-in-the-wool collectors may want to obtain minty samples of every model and color as well as the gift boxes. Most of us will be happy to settle for one nice set, or perhaps a few to represent some of the major versions and a few colors. Personally I have several representing all the major versions, and I have restored several to original operating condition. Some are beautiful to look at but some are beyond cosmetic restoration. I have learned that (for me) it is better to concentrate on getting cosmetically good samples because although you can fix many internal problems there are many cosmetic issues, such as rusted metal, worn off plating, yellowed clear plastic or chipped cabinets, that are beyond reasonable repair. Sometimes I buy cosmetically-challenged radios as parts donor sets to repair other, better looking samples.
Performance: As found, before any repairs, performance can vary from nothing (a totally dead radio) to poor (weak reception and audio) to just about perfect. Although I have found a few 500’s that worked very well as received, most of them did not until I went through them, and even the ones that seemed quite good got better with a few adjustments. After all repairs are done one can hear the steady improvements as you progress from the first 7 transistor set to the 500H which was the pinnacle of the 500 series. For any kind of regular use today I suggest the 500D, E and H models as the best performers. The 500D and E are sensitive radios and have strong audio, although the later 500 H is even better on both counts. As a general reference, these later 500’s are quite competitive and outperform many of the small radios available today.
")
Royal 500H In White, Black & Two-Tone Gray
Common Problems, Repairs & Adjustments: Before you start you should be sure to obtain the Service Manual for any models you are going to work on. They can be ordered from Sam’s Technical Publishing (https://www.samswebsite.com/), and you can also occasionally find the original Zenith Factory Service Manuals for sale on-line. Serious restorers try to get every version of service manual for a given model as sometimes one version matches your radio better than another and sometimes one manual is more helpful in certain areas than others. Although in a pinch some routine work can be done without a manual, you are always better off with one.
Disassembly is straight-forward for all of the 500 series. On the owl eye sets through the 500E pull off the front knobs first. On the 500H the knobs can stay in place for now. Earlier sets had a battery cover retained by one screw, later sets have a one-piece back, but all remove similarly. Remove one screw from the back and one from the bottom, and remove the rear cover. Remove the threaded stud near the top center which the rear cabinet screw came out of along with two screws in the battery compartment and carefully lift the chassis free of the front cabinet. On the 500H models the speaker will come out with the front cover, on earlier sets remove two speaker retaining screws on the raised portion between the two pairs of batteries. Be careful of the speaker and headphone jack wires and especially the loopstick antenna and its delicate wires at the top of the chassis. I suggest taking notes and/and pictures if possible at every step of disassembly in case you need help getting things back together properly. On the 500H there are two more screws to remove before you can remove the PCB.
If the radio seems to work but sounds weak or distorted with known good batteries in it you probably have only bad electrolytic caps to deal with…see below. If it is completely dead there are a few things to check first.
")
Original Hand-Wired Model
")
Royal 500H
Static & Audio That Crackles In & Out When Tuning is usually caused by dirt between the plates of the tuning condenser. Usually some blasts of compressed air will clear this. In extreme cases you may have to go further…I have often had good results by dripping 91% isopropyl alcohol into the condenser then blowing that out with air. If you do this be aware that even after the compressed air drying some moisture usually remains which can take several minutes to dissipate before normal operation returns. I have occasionally used small strips of paper wetted with alcohol to “floss out” noisy condensers. However, in the rare event that the plates are actually bent and shorting you may not be able to fix them depending on how bad they are.
Earphone jacks contain a switch which disconnects the speaker when an earphone plug is inserted. They are often badly corroded and can prevent the speaker from operating. Unlike later jacks these are an open design and should be manually cleaned as a preventative measure.
")
Original Hand-Wired Version With New Caps
")
Use Care With Ferrite Rod Wires
Power Switches are an often seen problem. The lubricant inside them dries out and they fail to make contact. You can carefully disassemble the power switch from the rear of the volume control to clean it. Be very careful not to rotate the control beyond its normal stop points while disassembled or you will have lots of trouble getting it all back together properly.
Socketed Transistors can cause problems. I suggest slightly pulling each transistor out a bit without removing it fully from its socket, applying a drop of contact cleaner (I recommend De-Ox-It from Caig Labs) (also available At Amazon) to the leads and working each transistor in and out before firmly seating each one back in place.
By far the most troublesome components in these old radios is deteriorated electrolytic capacitors. These radios generally have 4 of them and you can expect to find many bad ones, although I have found several H sets that were fine as is. Symptoms of bad caps usually mimic weak batteries; thin, distorted audio and greatly reduced sensitivity. If you are routinely restoring old electronics I strongly recommend the purchase of an ESR meter such as the EDS 88A (http://www.eds-inc.com/cap.html)…it lets you check electrolytic caps in circuit and will save lots of time. Without such a meter you will simply have to replace caps until the radio (hopefully) springs back to life. If you are only working on one or a few radios I would just replace all the electrolytics in them…they generally cost about .20 apiece from the electronic on-line retailers…perhaps $2 apiece if you can still find them at Radio Shack. The audio coupling cap in series with the wiper of the volume control is often a culprit…I’d start with that one.
")
500H With Extended Range Speaker
")
Electrolytic Cap Replacement
Hopefully your Royal 500 will now work properly and will only need cleaning and alignment to be restored to full operation. If you still have problems after all of the above have been checked standard trouble shooting methods will be necessary to isolate the defective component.
")
Alignment Using A Sound Level Meter
Alignment: Alignment is the natural last step to any radio repair. The manuals for each model call out the specific steps, which are very few and simple in these AM-only sets. I have seen radios improve dramatically with nothing more than alignment…they can sometimes be quite far out of adjustment as found. At left I am using a sound level meter to align a 500H…this method often works better than using a direct connection to the speaker outputs which can add noise which makes low signal level measurements more difficult. The sound level meter works with no direct connection.
Use Tests & Comparisons: The Royal 500’s in general (and the 500H in particular) got such a good write-up in the Smith book that I was curious to see how my fully restored “H” would compare with some other popular radios. I did some informal midday sensitivity tests to compare them with some modern day PLL portables. I compared a Royal 500H, 500D, a much less expensive Royal 150 Zenette, along with some new radios, the Tecsun PL310, PL210 and a Sangean DT400W.
The Royal 500 Family (Royal 400 2nd From Left)
The two 500’s were the best of the group. They brought in medium to weak signals more loudly and with less background hiss than any of the other radios. The Royal 150 was a notch lower in sensitivity and was comparable with all of the modern radios…the PL310, PL210 and DT400W. All were quite close and each was best on certain signals. How much better was the 500 H than the 500D? Well, the sound improvement was bigger than the reception improvement. The H sounds quite a bit more extended and natural…it has a wider, flatter frequency response, proving that their new extended range speaker was just that. It is a joy to listen to. On reception the H sometimes seemed a bit stronger than the D but on other signals they seemed about the same. So I would judge the Royal 500H to have slightly better reception but much better audio than the 500D. I also compared a fully-restored original hand-wired 7 transistor 500…it was noticeably less sensitive and powerful sounding than the later 500’s, just as it should be. For perspective the 500H earned three stars in my AM Radio Mega-Shootout: https://radiojayallen.com/am-portables-mega-shootout/, which means that although there are better radios available, the 500H does still outperform several typical modern radios you might buy today.
Zenith truly was a quality leader. Their old slogan, “The Quality Goes In Before The Name Goes On” was never more true than during their pioneering days of the Royal 500 and the equally well-received Trans-oceanics. As a company they just got it right.

You must be logged in to post a comment.