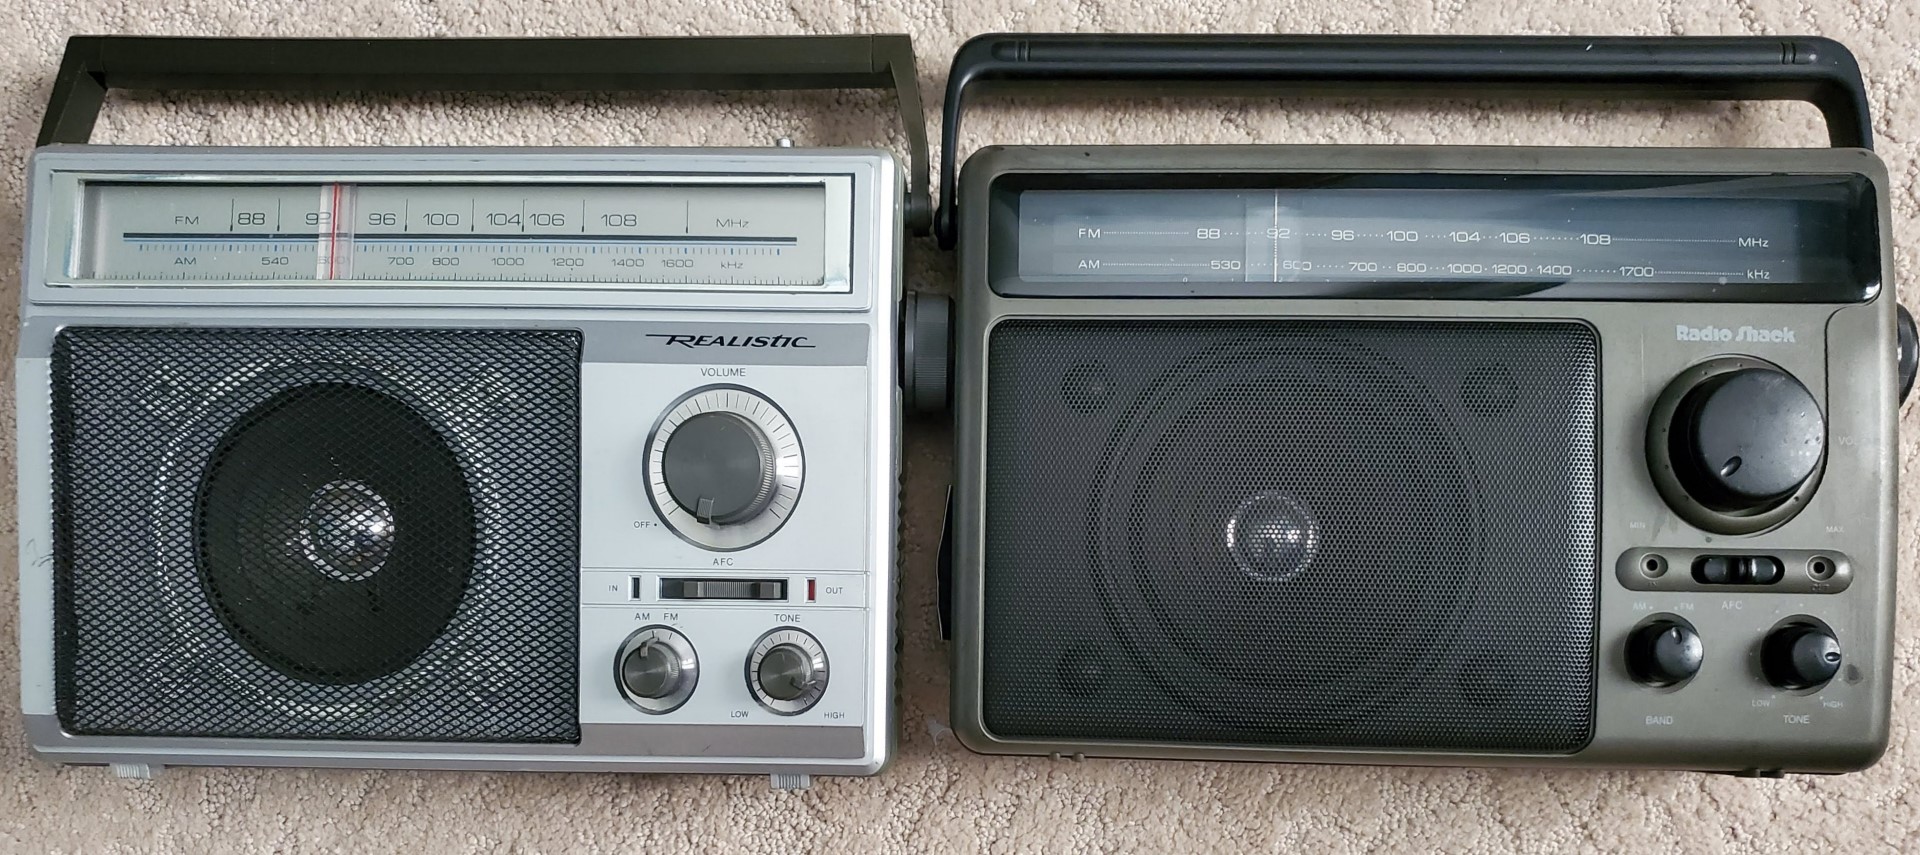
Radio Shack 12-625/12-639 AM/FM Portables
The Radio Shack 12-625 was available between 1985 – 1993 and sold for $39.95. Described as “Our Best Full-Size AM/FM” in some ads and “High Performance” in others the 12-625 was a step up from the less costly 12-716 “Budget Priced” ($24.95) model. The 12-625 boasted switchable AFC on FM, a 4” speaker and a variable Tone Control knob. In 1994 the 12-625 was replaced with the seemingly similar 12-639 which was sold through 2000. Personally, I like the styling of the earlier model but the later model had a more modern look which many might prefer…both are nice looking radios.


I settled on the 12-625 because my mom had relied on one of these as a constant companion back in the day although I had never paid much attention to it. At the time, I considered most Radio Shack portable radios to be pedestrian – nothing special. I also decided to check out the replacement model 12-639 since it looked like the same radio with updated cosmetics and I was curious to see how similar or dissimilar it was inside. In retrospect I thought it would be interesting to see how these radios would compare with my favorite portable of the day…a Sony “Super Sensitive” TFM-7250W I owned at the time (and still do) which I thought was as good as it gets in this size class. The Sony was an earlier model having appeared in 1973 and generally selling for around for $69.95. I will compare it with these Radio Shack models later in this article.
I searched eBay and finally found each RS model at $22 plus shipping. Of course, when they arrived, they were both basket cases and far grungier than I had thought they would be. Both eBay sellers had described them as “working” but neither was actually usable as received…not an unusual experience. Yes, they both turned on and made noises but little else. How anybody in good conscience could describe these as working totally escapes me. I think if you spend a bit more, you could find some nicer samples but at least this would give me good reason to go inside them to see how they’re made.
First, the 12-625 only emitted loud screeching noises on both bands and I was not able to tune even a single station on either band. The negative battery terminal was so rusted it would not work on batteries at all, although the AC power was working. It was also incredibly sticky and messy…I wasn’t sure it would even clean up adequately, so it became a basket case challenge.

The 12-639 would not turn on at all or tune. It was completely dead and as I rotated the tuning knob it felt loose and the tuning indictor merely wiggled a bit…another basket case. I had intended to merely review these two radios but now it was obvious each would need repairs before I got anything at all out of them. So, to the workbench they went.

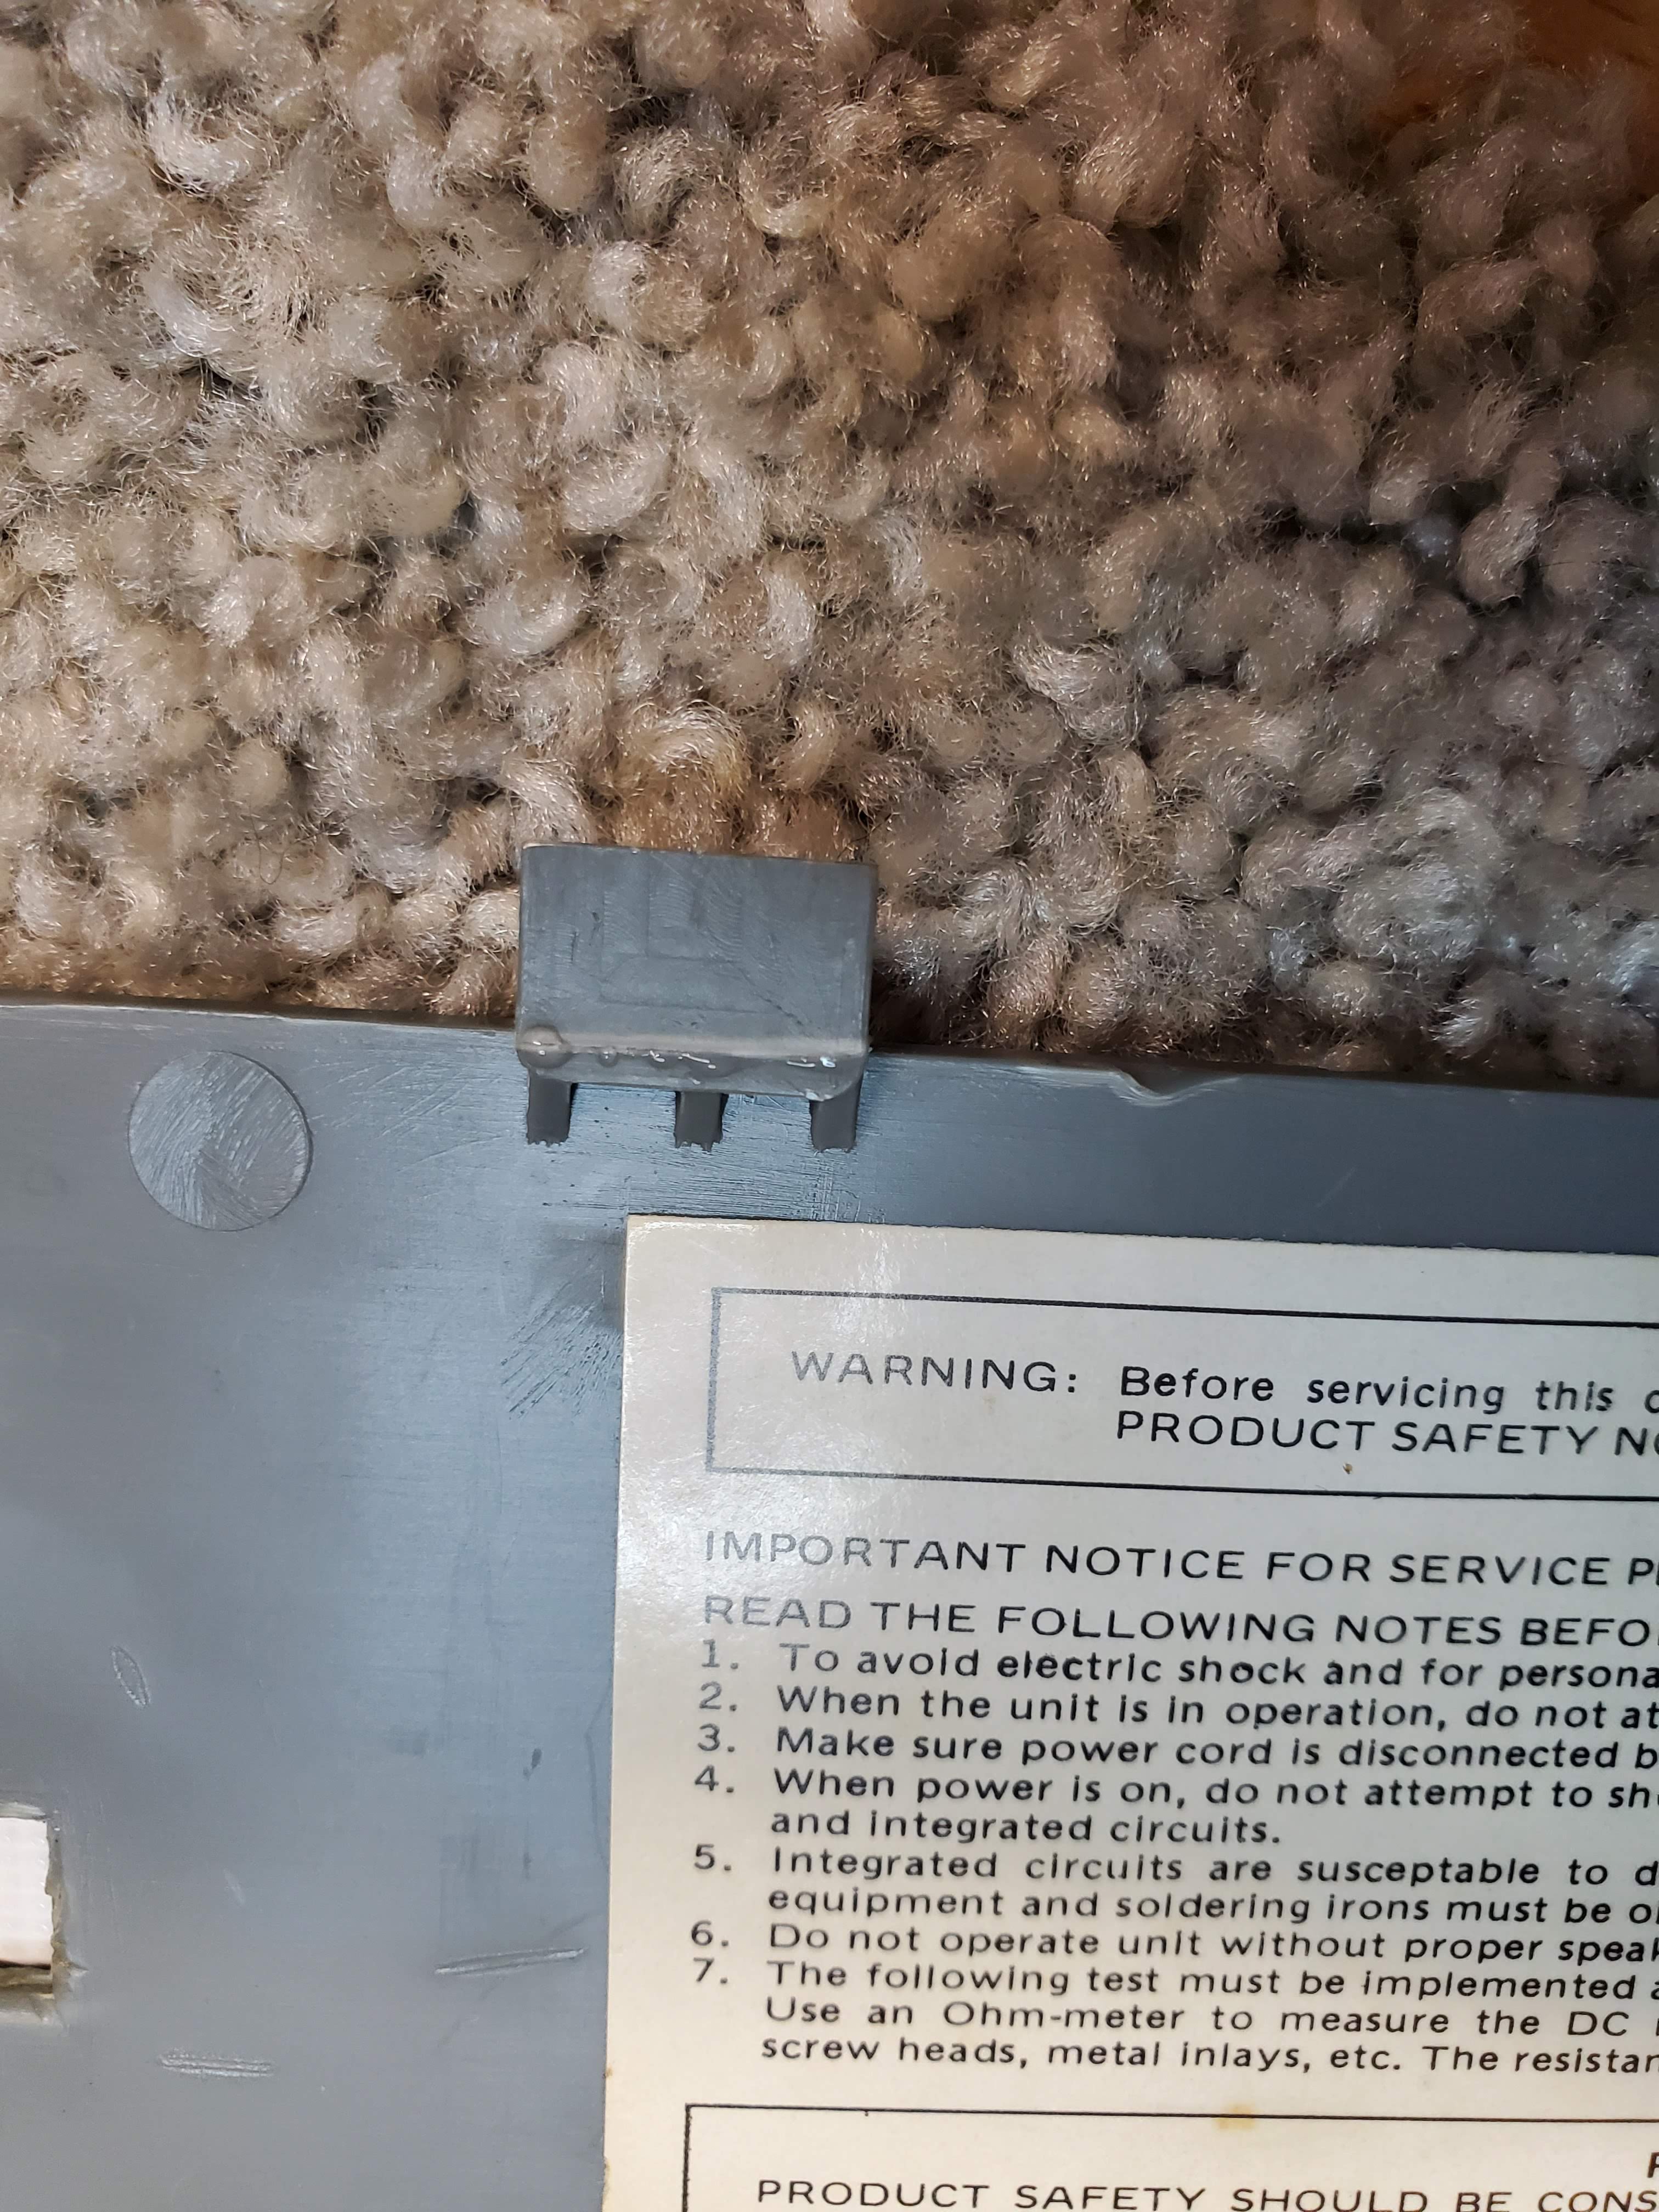
12-625 First Step – Initial Assessment: Before spending too much time and effort I had to determine what the major squealing problem was – could I make it work at all? Such symptoms are often caused by bad electrolytic capacitors, or even broken solder connections and I had no service manual or schematic but hey…this is a simple old-school analog AM/FM portable, and often times small problems produce big symptoms so it was worth a general look over. Disassembly was easy – 5 screws to separate the front and rear cabinets and two more to lift the circuit board free and access for service was good. Two small plastic pieces were loose in the bottom and not knowing where they came from I saved them just in case. I powered the unit up once it was opened and started playing with the controls and every now and then I got a burst of noise with a station or interference behind it. I suspected the band switch but that wasn’t it. It turned out to be the volume control. Although volume controls are often noisy and intermittent, I never saw one produce the squealing this one did. It looked to be pretty well sealed but I found one small opening that might let some switch cleaner (De-Ox-It D5) get into it. I taped all around the pot because I knew more spray would end up outside the pot than inside it but after a few applications and lots of rotations it began to respond. The tape contained much of the excess spray but I used Q-Tips and isopropyl alcohol to clean up remnants on the PCB then I used a pinpoint applicator to add a final drop or two of De-Ox-It for good measure.
It was easy to de-solder and slide out that rusted negative battery terminal…a coil spring. I used tiny grinding stones in my drill to remove some of the crust but I could only go so far with this so I soaked it overnight in rust remover – I used Rust-oleum Rust Dissolver Gel but there are many effective rust removers available. The next morning I attacked it with a small wire brush and was able to remove almost all of the discoloration so it could then be re-installed. The cabinet halves were pretty gross with gunk at the bottom of the radio from the leaked batteries but most of it cleaned up given time and patience. I also discovered a small schematic diagram glued to the inside of the case so I took a closeup photo, enlarged it and printed it out. It actually produced a clear full-size schematic which turned out to be very helpful with both radios. (Too bad manufacturers can’t do this today but that’s another story).
There was also a broken tab on the battery compartment door which turned out to be one of those plastic pieces I found earlier. I used a very special glue to fix it – Loc-Tite Plastic Repair – an astonishing product. Over the years it has fixed some plastic pieces which I could not fix with Super Glue or any other. I have repaired plastic screw mounting studs which I thought were unrepairable…sometimes this stuff is nothing short of a miracle. It worked in this case and that was fortunate because without it the battery compartment would not stay closed.

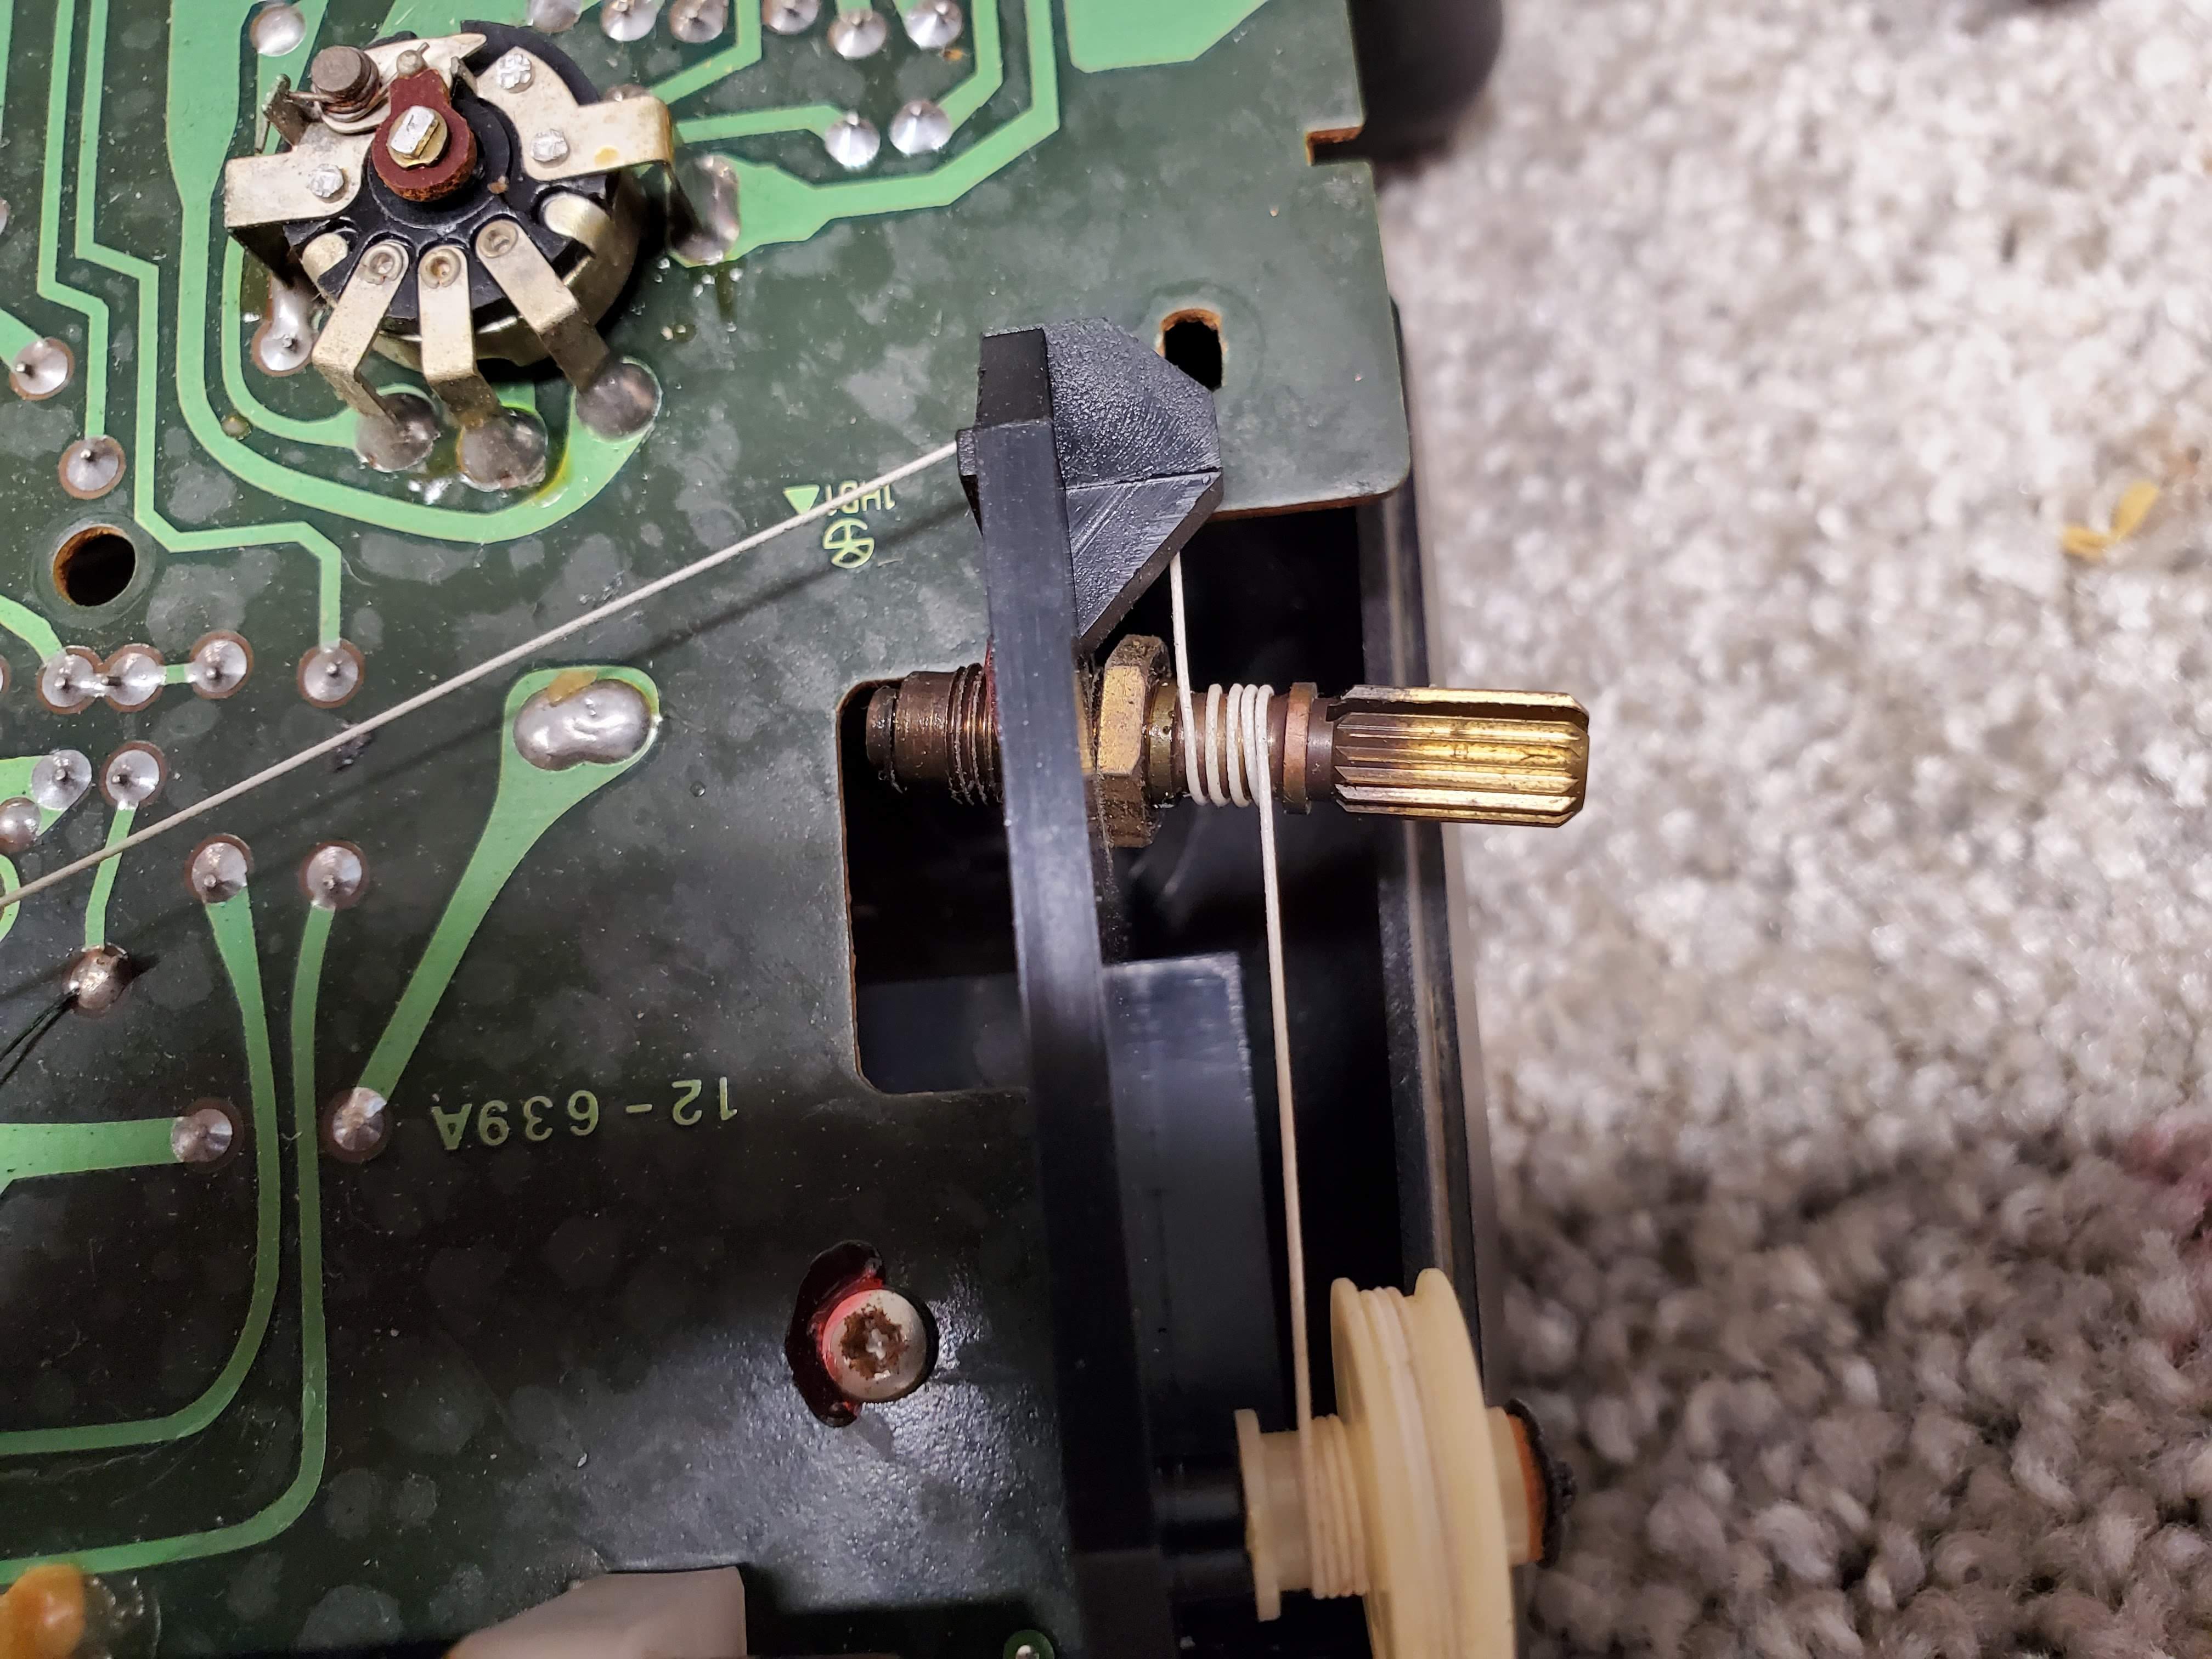
Next, the 12-639: I was lucky here. The tuning problem was caused by a nut which had worked loose and fallen off of the tuning knob shaft…I found it stuck to the speaker magnet. It was a simple matter to re-install it and I locked the two opposing nuts in place with locking compound. I also discovered the intermittent operation to be a sticking On/Off switch at the back of the volume control. The giveaway was that the On/Off click was barely detectable…it wasn’t a sharp click. This switch is completely open and easy to clean, then I added a touch of oil to the switch pivot and De-Ox-It to the switch contact to restore normal operation.
The 12-625 eventually cleaned up pretty well and is quite presentable for display and use. The 12-639 doesn’t look as good because its issue is paint that is worn away and nothing can be done about that, but at least it is clean. It’s far from museum quality but it’s not too bad.

Two Models Compared: With both radios working it was time to compare them to see how the updated model was changed. In a nutshell they are virtually identical with only some very minor component changes and I would guess that most of the differences are the result of component availability. The primary difference is that the newer version adds the Expanded AM band and thus is spec’d to tune to 1710 KHz whereas the earlier model was spec’d to 1620 KHz. Actually, each model exceeds its published tuning range considerably at both ends of the AM band. My particular 12-625 covers approximately 527 – 1650 KHz, and the 12-630 gets up to about 1738 KHz). There were a few component differences between the two radios but by looking at the comparison photos you can see they are really pretty much the same radio. The audio amp IC 1 was updated to a newer version, most likely due to the original having been discontinued, but I would judge that the new chip is spec’d the same as the original…in side-by-side comparisons they sound the same.
Performance Evaluations: Before I did anything else I tested each radio against the other and some reference radios to get a general feel for their performance and I was pleasantly surprised that overall, they worked very well on AM with pretty good reception and sound. Their ferrite rods are only 4″ long but nevertheless the radios performed well. There were alignment differences with the 12-625 having very good dial calibration on AM whereas the 12-639 was off quite a bit on both bands. On the other hand, the 12-625 had decreased sensitivity at the low end of the AM band compared with the others. On FM they each needed dial calibration because neither would tune down to 88.1 MHz, each bottoming out around 88.9. I hoped an alignment would bring both sets into specs so back to the test bench they went.
AM alignment proceeded as usual with both radios and in the end, they were very similar with typical unit to unit (as opposed to model to model) differences. Such differences are often seen in older radios even after they have been adjusted as well as possible. The 12-625 ended up with slightly less perfect dial calibration at the bottom of the AM band in order to achieve maximum sensitivity. That is, I could get perfect dial calibration but only at the expense of reduced bottom end performance so I opted for best performance. On the other hand, the 12-639 had good performance across the dial but could not achieve perfect dial calibration between 1200 – 1400 KHz no matter what I did, even though it was very good on the rest of the band. But the two radios had equal AM performance and both performed very well overall. They both rate *** on the AM Mega Shootout which is very good for AM…these radios are great for general use and if used with a loop make excellent DXers. And you just can’t beat their natural analog tuning characteristics.
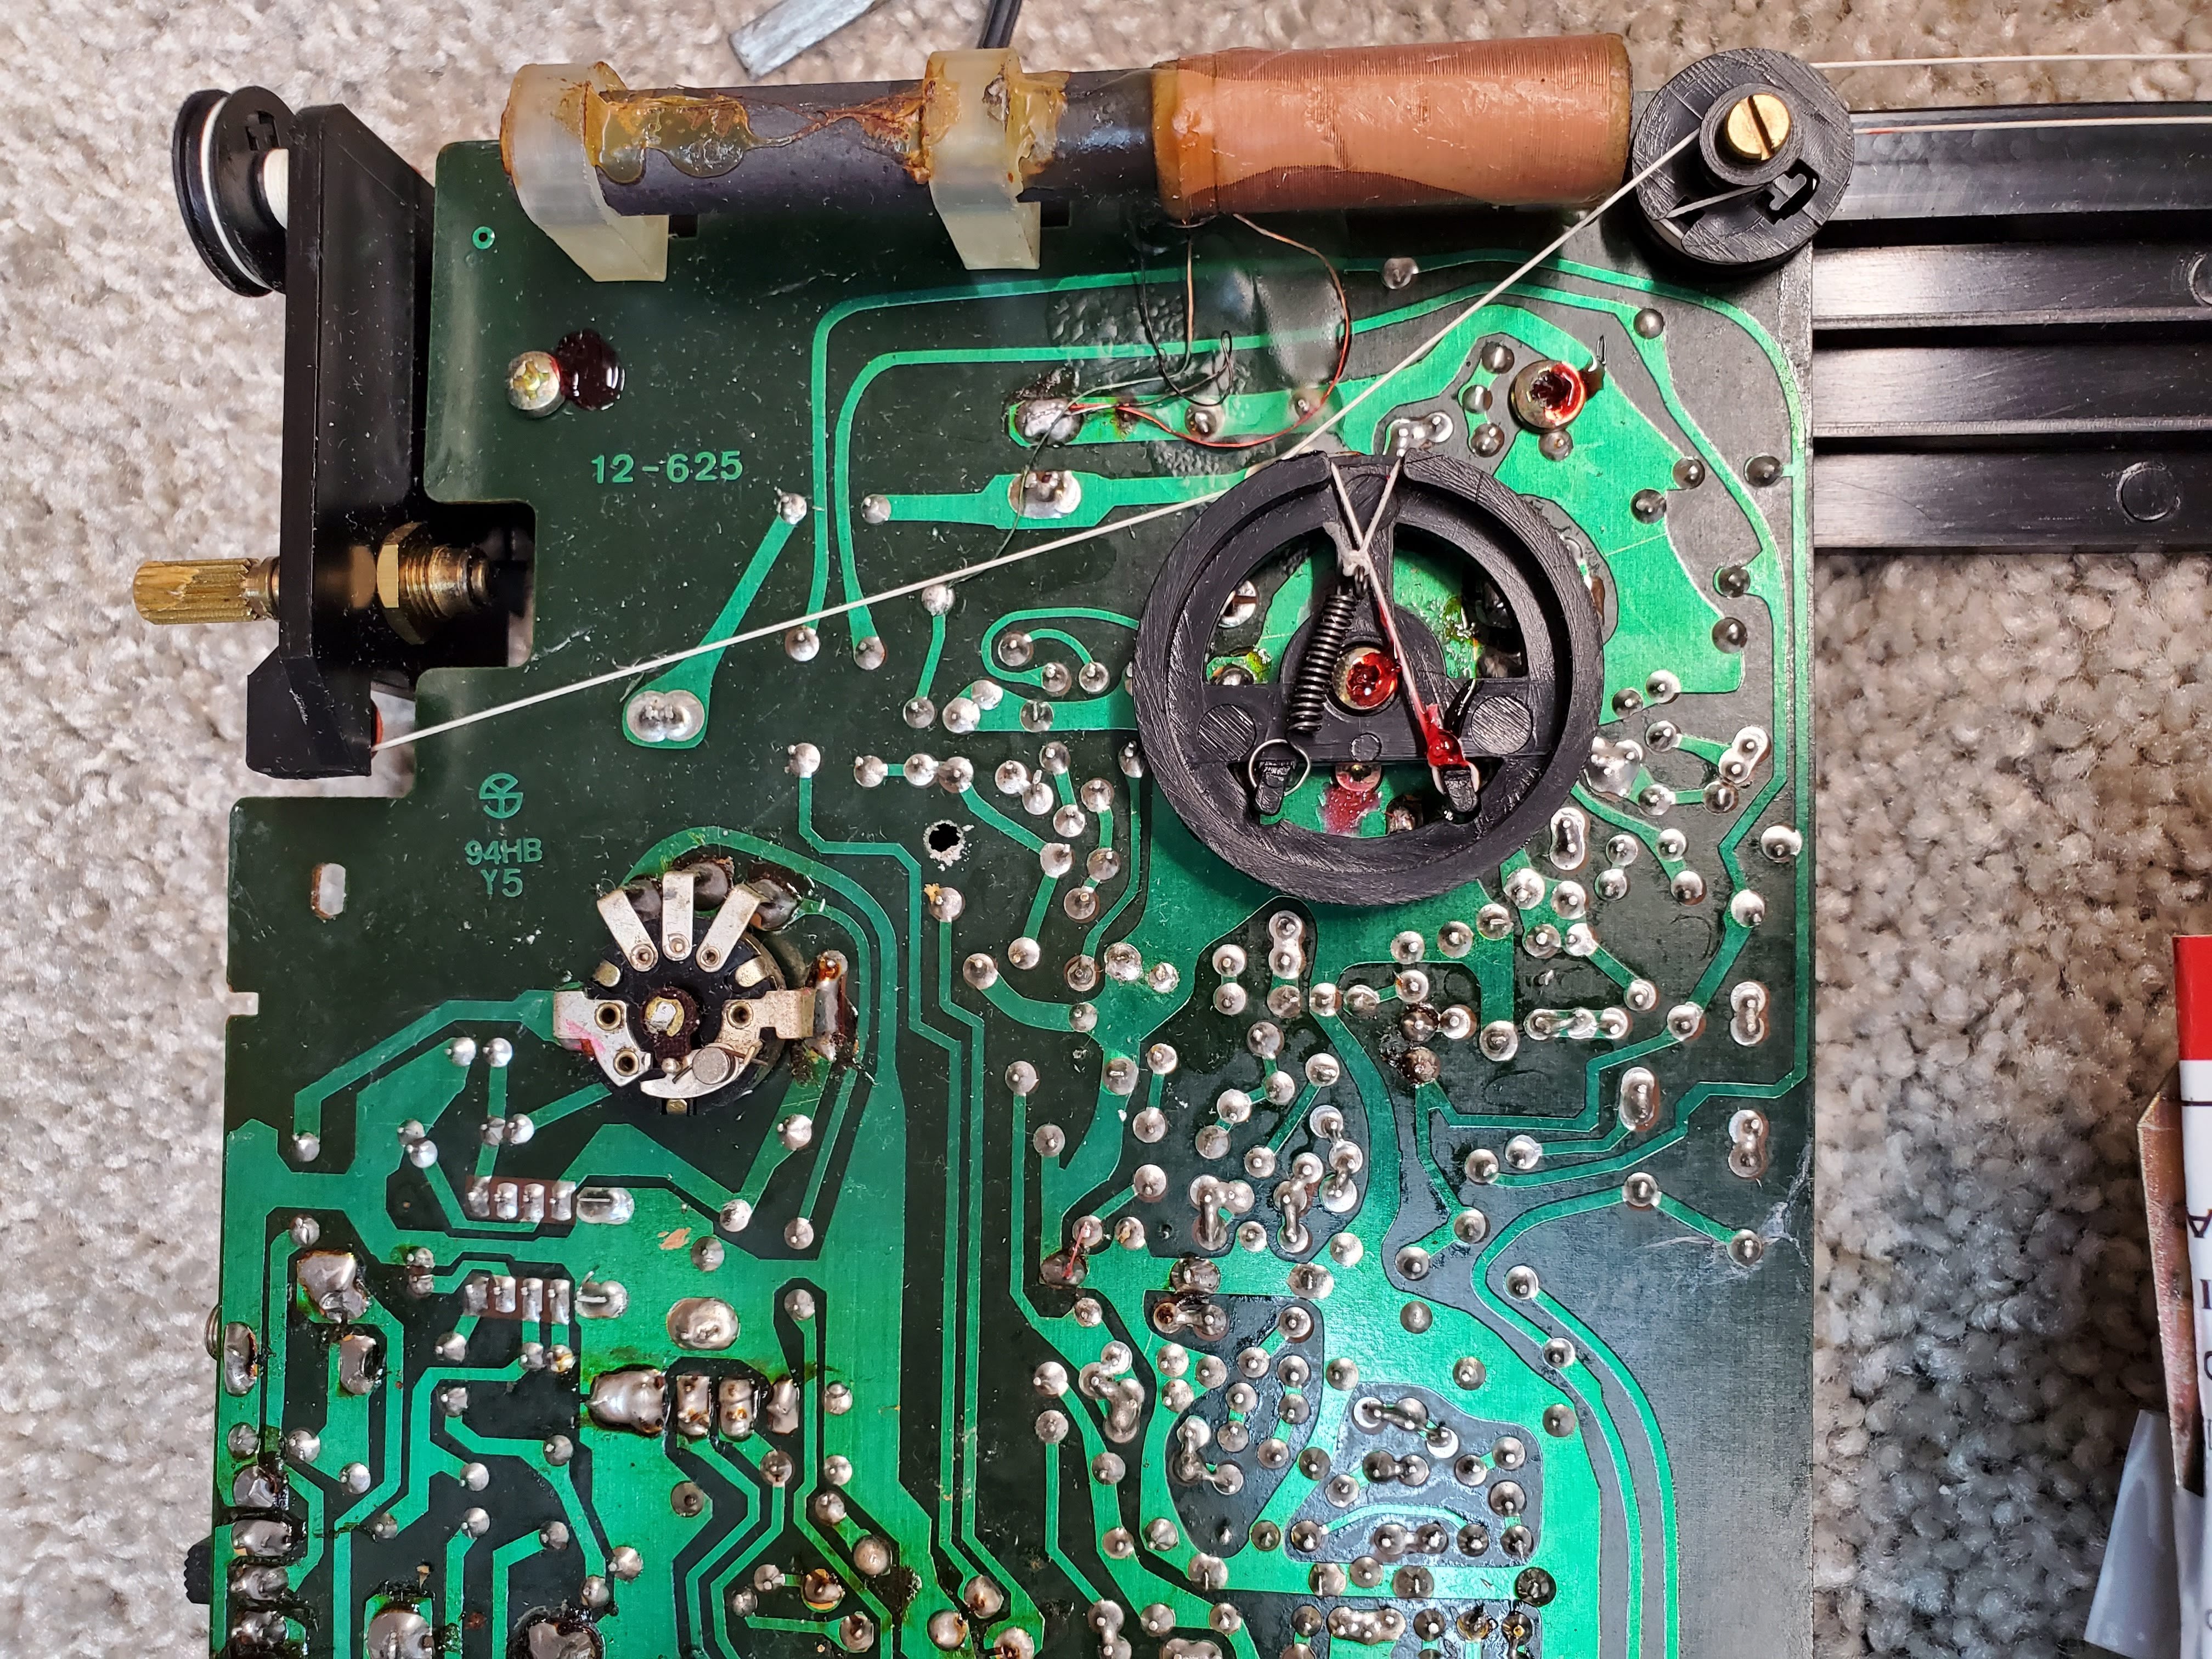
FM performance on these radios is not impressive by today’s standards. Each radio needed FM alignment to bring the dial calibration into adjustment and to restore full band coverage at the low end of the band.

If you have never aligned a vintage FM portable radio it is part science and part art because the radios have coiled spring inductors (see above picture) which have to be very slightly squeezed or spread apart to adjust and they are very touchy, but after doing this a few times you get the feel of it. Both radios came into alignment with no problems but the performance on FM is not as good as on AM with only mediocre sensitivity and selectivity. They are fine for typical FM reception but decent modern radios will hear more stations than these will. No surprise as this was a totally expected result. They both rate **1/2 on FM which is not great when today’s portables generally rate 4 or 5 stars.
Conclusion: Although FM is only OK on these radios, I was not disappointed because my interest in them was to test their AM chops because I love old-time AM analog radios for their natural tuning feel. As such I liked these radios a lot…they will both rank *** on the AM Mega Shootout list which is good enough to let them hear most of what can be heard on AM. They also respond well with small AM passive loops and in that mode they become DXing champs. They have nice sound with their variable tone control which is preferable to the two-position tone switch on the less-expensive RS models and will play for hundreds of hours on 4 C cells plus they contain built-in AC power. Interestingly though, the less expensive Radio Shack 12-726 I just evaluated matches these upgraded models in terms of reception, but the better models have defeatable FM AFC, a larger speaker and bigger box for a fuller-richer sound, plus the variable tone control.

And how about that Sony Super Sensitive TFM-7250W radio I had at the time? I put it side by side with the Radio Shack radios and found that sure enough the Sony comes out a winner but more so in sound quality than in reception. At first the Sony seemed comparable in AM RF performance but after comparing many signals I found it was sometimes just a bit more sensitive, but it was not a big difference and you would have to hear the radios side by side on some very faint signals to notice it…it’s still a *** AM performer just as the RS radios are. On FM the RS 12-625 was slightly less sensitive while the 12-639 was sometimes a hair better. But overall, they were very close and I suspect this is a unit-to-unit variation. But the Sony won in the sound department with a somewhat more powerful, rich sound, but again it was not a night and day difference The Sony is somewhat better made and is more solid which gives the radio a sense of quality one step above the Radio shack units. Even the plastic case is thicker so broken tabs on the battery door are far less likely. Interestingly, Radio Shack had a clone of this Sony, the Radio Shack 12-665 sold between 1976 – 1981 for $42.95 – $44.95 and assuming this is the same as the Sony version which it strongly resembles it was a bargain with the Sony retailing for around $70 at the time if I recall. So the nod goes to the Sony by a hair but also with the realization that it cost much more than the RS models – $70 vs $40 which was a big difference in the 80’s and 90’s, making the Radio Shack models a good value.
One of the problems with any of these radios is that portables may have lived a rough life. Admittedly I got a couple of basket cases which I should have expected given their low prices – both of the radios I got were unusable as received even though they were both advertised as working. I think these are decent AM analog portables but be prepared to look for nicer samples that cost more than the $20 or so I spent on these to get one that doesn’t need the kinds of fixes both of mine did. I think if you pay around $40 – $50 or so you could get a nice sample of either, and if you love analog radios, you could do far worse.

You must be logged in to post a comment.