National Panasonic R-2500B AM/SW Radio

The National Panasonic R-2500B was sold between 1971 and 1974 and is a great example of old-school portable radio design. By that I mean it is SOLID with a heavy steel chassis and all discrete components. (Parent company Matsushita used the National Panasonic name for many years before shortening it to simply Panasonic. Matsushita also manufactured products under Sanyo, JVC, Technics and other names). Interestingly though, literature for some later Panasonic radios, still referred to National Panasonic in their documentation. But I digress…


Design: The R-2500B is big and heavy measuring approximately 13 ¼ x 8 1/2 x 4 ½ inches and weighs over 10 lbs without batteries. It has no FM but covers AM from 525 – 1605 KHz and SW from 1.6 to 30 MHz in 4 SW bands. It uses 11 transistors and has Tuned RF on all bands. Because of its size it features a very large tuning dial which is far better than most analog dials at letting you know where you are tuned. Unusually, it also features not one but TWO ferrite rod antennas, one for AM and the other for SW 1, 1.6 – 4.5 MHz and it actually works quite well. It took me a while to realize that this lets you tune the Expanded AM band at the bottom of the SW 1 band with the benefits of ferrite rod reception, which gives you directional control and less noise than using the whip as almost all other SW radios do on this band. The whip is used for the SW 2-4 bands as usual. There are two speakers (5” and 3 ½”) and the sound is strong and pleasing. I also found it interesting that it says “Super Sensitive” on the front panel which is a moniker Sony used from the late 50’s through the 70’s and which I has assumed Sony had trademarked.
Controls include On/Off Volume, Bass, Treble, SW Fine Tuning knobs, Band Switch, Wide/Narrow Bandwidth, Battery Test, Dial Light and AC/battery switches. There is a nice mechanical signal meter which is well-designed to give meaningful readings as signals vary from weak to strong. There is also a Band indicator on the right side of the dial scale and a volume indicator needle. Being an export model there is a multi-voltage selector or you can use 4 D cells to power the radio…there is a compartment for AC line cord storage on the back…unfortunately my radio is missing the cover for this compartment

Checking It Out: Although the R-2500B is an all-out design in terms of component quality it is not really repair-friendly. It came to me from a good friend (a broadcast engineer) who replaced many of the electrolytic caps and had done so by clipping their leads and soldering the new caps to the existing leads on the component side of the PCB. Most restorers (rightly) poop-pooh this approach but in this case I think it was totally justified…the amount of tedious physical disassembly required to access the solder side of the board is incredible and I would probably have approached it the same way… I’m thankful the radio had already been recapped so I didn’t have to deal with the problem. He had also replaced a broken dial string and cleaned the pots a few years ago and then evidently set it aside so it had not been used for a while until he thought I might like to see it…he also included a copy of the original factory service manual.
As received the radio had two badly intermittent switches, Wide/Narrow Bandwidth and AC/Battery…both were easily accessed for cleaning. The radio seemed quite sensitive as expected and dial calibration was reasonably good but not quite as good as I thought it could be. I had noted in the service manual one unusual aspect of the design – and it is something that anyone who has ever aligned an old analog multi-band radio will appreciate – every band has complete alignment adjustments for both the top and bottom of each band. This means there are both high and low frequency oscillator adjustments along with Antenna and Detector trimmers, so every band can be adjusted without compromise. Most radios have complete sets of adjustments for some bands while others are left to fall as they may…hopefully close, but sometimes not perfect. To me this was a dream because it meant I should be able to get each band exact with respect to dial calibration and sensitivity and I couldn’t wait to get into it.


Of course, I had to fall into a trap before that dream would be realized…working on old radios I continually find new things I’ve never seen before and this was no exception. My friend had mentioned he could not access the inside of the dial glass to clean it so, of course, I had to investigate and that turned out to be a mistake. Following the disassembly instructions in the manual it was easy enough to remove the chassis…just a handful of screws and some wires, which all had plugs so no desoldering was needed, and the chassis was out. However, I then discovered that the front panel could not be disassembled to get at that dial glass because it was molded in plastic which would literally have to be broken to take it apart and I certainly wasn’t going there. Better a bit of haze on the glass than a broken front panel. But when I went to re-assemble the radio, I noticed that the dial string, which had lifted out with the chassis was now disconnected from the dial pointer which had remained with the front panel. What???
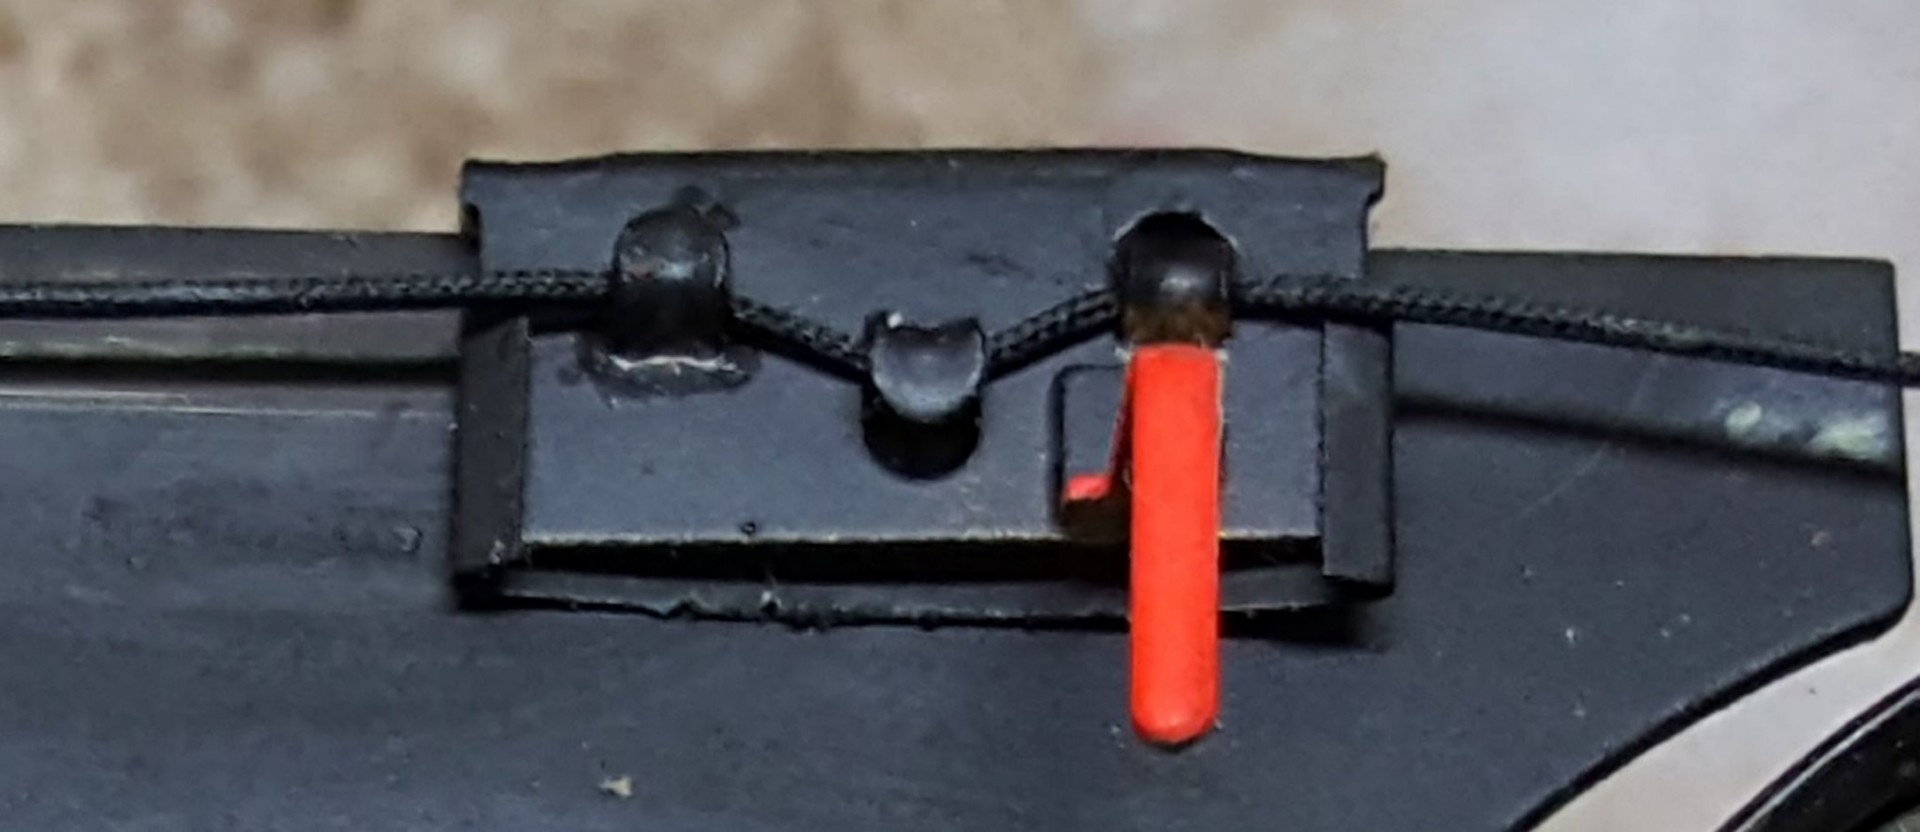
Above: Typical Dial Pointer has tabs to grab the dial sgring
Usually, these pointers have metal or plastic fingers which attach to the dial string which, in this design, would have to be disengaged before removing the chassis. Of course, nothing about this is mentioned in the service manual which seems like an egregious omission…it should have instructed you to disengage the string from the pointer before removing the chassis. Evidently this pointer was just glued to the string and has to be reglued anytime the chassis has been removed which is rather odd. That was tricky due to restricted access but soon I was ready to replace the chassis and do the alignments which luckily can all be done with the chassis in place and they all proceeded as they should. Interestingly the re-assembly instructions do tell you to position the dial pointer at a mark on the chassis and to begin with the tuning gang fully closed (counter-clockwise) and they tell you to cement the string to the pointer. This is the first time I’ve seen this.

Performance/Conclusion: The R-2500B is a joy to hold, to look at and to use. Tuning around on AM it seemed to pull in weaker stations very well as I expected it to and for any stations that come in well enough to listen to it seemed very sensitive and it will rate **** ½ on the AM Mega list. Only when I compared it with my RF-2200 on extremely faint signals did I find it just slightly less sensitive. This is in low noise locations with signals so weak they are barely intelligible. But again, on any listenable signals the R-2500B was excellent and better than most. It was also good on SW where the large dial scale and Fine Tune knob made tuning very easy…it was reasonably sensitive although not quite on a par with the best modern portables, but with its dual speakers and effective tone controls it has that big radio sound which is wonderful.
The National Panasonic R-2500B is a friendly monster. It is very large and heavy with a solid feel and great overall performance. Another great old analog radio. Yup…they don’t make ‘em like this anymore.
Jay Allen

You must be logged in to post a comment.