Eton/Grundig Field 550
 Note: This model has been replaced by an updated Eton Elite Field/Eton Field BT.
Eton/Grundig Field 550
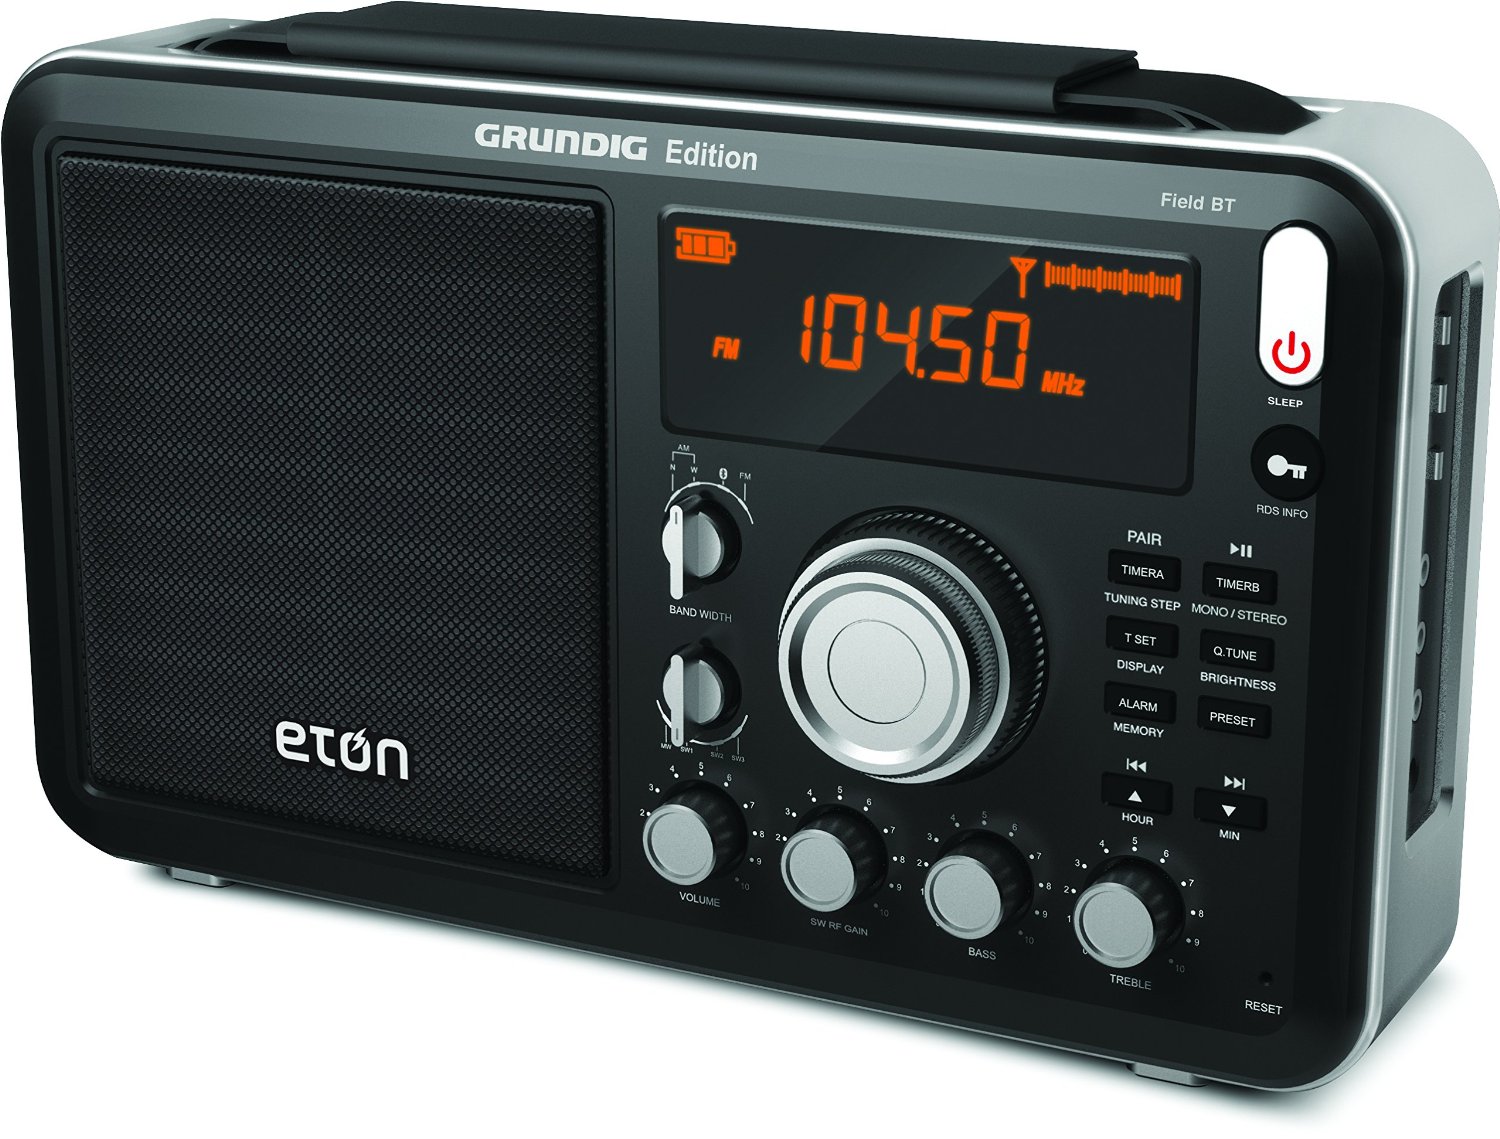
 Eton revamped their entire portable line-up in 2015 with 4 totally new models – the new Eton Satellit, the Eton Traveler III and the Eton Mini…the Field 550 (known as the “Field”) is the 4th radio in this revamped lineup. The only place I found the model given as Field 550 was on the owner’s manual…even the name sticker on the bottom of the radio simply says “Field”. Listing at $149.99 it is widely available for somewhat less…I grabbed mine at Radio Shack.com online for $99.99 with a $10 coupon bringing the final cost to $89 with free shipping…at that price it is a sweet deal.
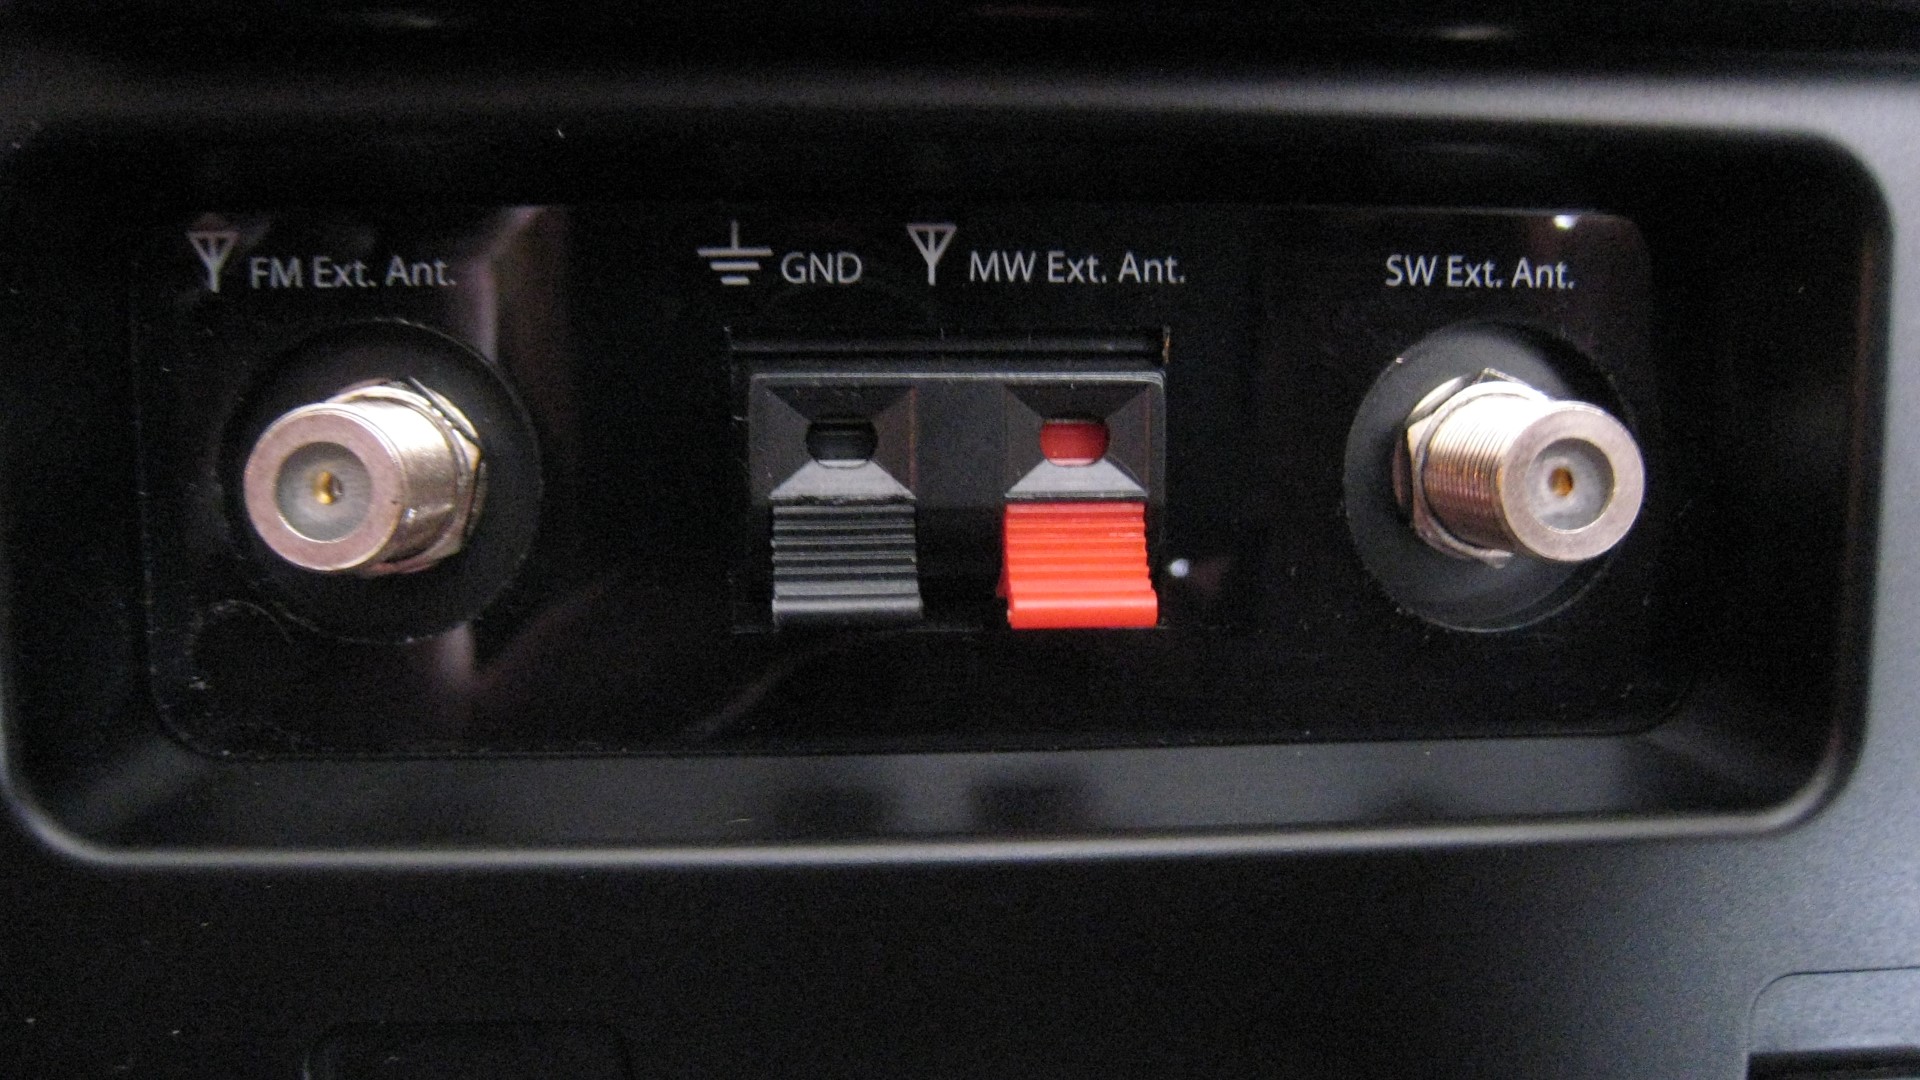
Following in the tradition of the discontinued Eton/Grundig Field S350, S350DL and S450DLX models, this is a “lunchbox” sized radio measuring 12.4” x 6.9” x 3.0“ and it runs on 4 D cells or an included AC adapter. Also following the original Field concept there is no numeric keypad for direct frequency entry. However it does have several tuning methods which makes it relatively easy to use. Its band coverage is: AM 520 – 1710 kHz, FM 87.5 – 108 MHz, and SW 1.711 – 29.999 MHz. It is a DSP chip-based design with the usual digital features such as Clock, Sleep Timer, Alarms, Snooze and 10 presets per band for a total of 50 memories (SW is divided into three SW bands). Other features include Line In/Out and Headphone jacks, three independent External Antenna jacks for AM/FM/SW, several tuning methods including a Q-Tune (Quick Tune) Button and Up/Down slewing buttons, two -speed tuning via concentric coarse and fine tuning knobs and a Fast/Slow button selection, FM RDS, bass and treble controls, two bandwidths for AM and SW, a variable SW RF Gain control and DX/Local Switch and a comfortable carrying handle which converts into a shoulder strap as on the former Field radios if desired. The internal antennas can also be disconnected on FM and SW when using external antennas…the AM ferrite bar however cannot be disabled.

The form factor resembles the earlier Field radios in size and control layout but rest assured this is a completely different animal. The original S350 series, based on the Tecsun BCL2000 and BCL 3000 radios had digital displays but were analog-tuned, single conversion radios. They were fun radios to use but suffered from image and drift problems. The later Grundig-branded S450DLX, although digital rather than analog, had serious initial quality control issues. They were finally resolved but it was still a mediocre performer easily eclipsed by the CC Radio-SW/Redsun RP-2100. No such issues exist in the new Field which is all-digital and a strong performer. Later on we’ll compare the CC-SW with the Field to see how they stack up against one another. And in a departure from my usual format, at the end of the formal review there will be a “Hot Rodding The Field” report on several upgrades I made to elevate the Field from a decent to a stellar performer. These are fairly easy mods and are well worth it for the technically inclined user.
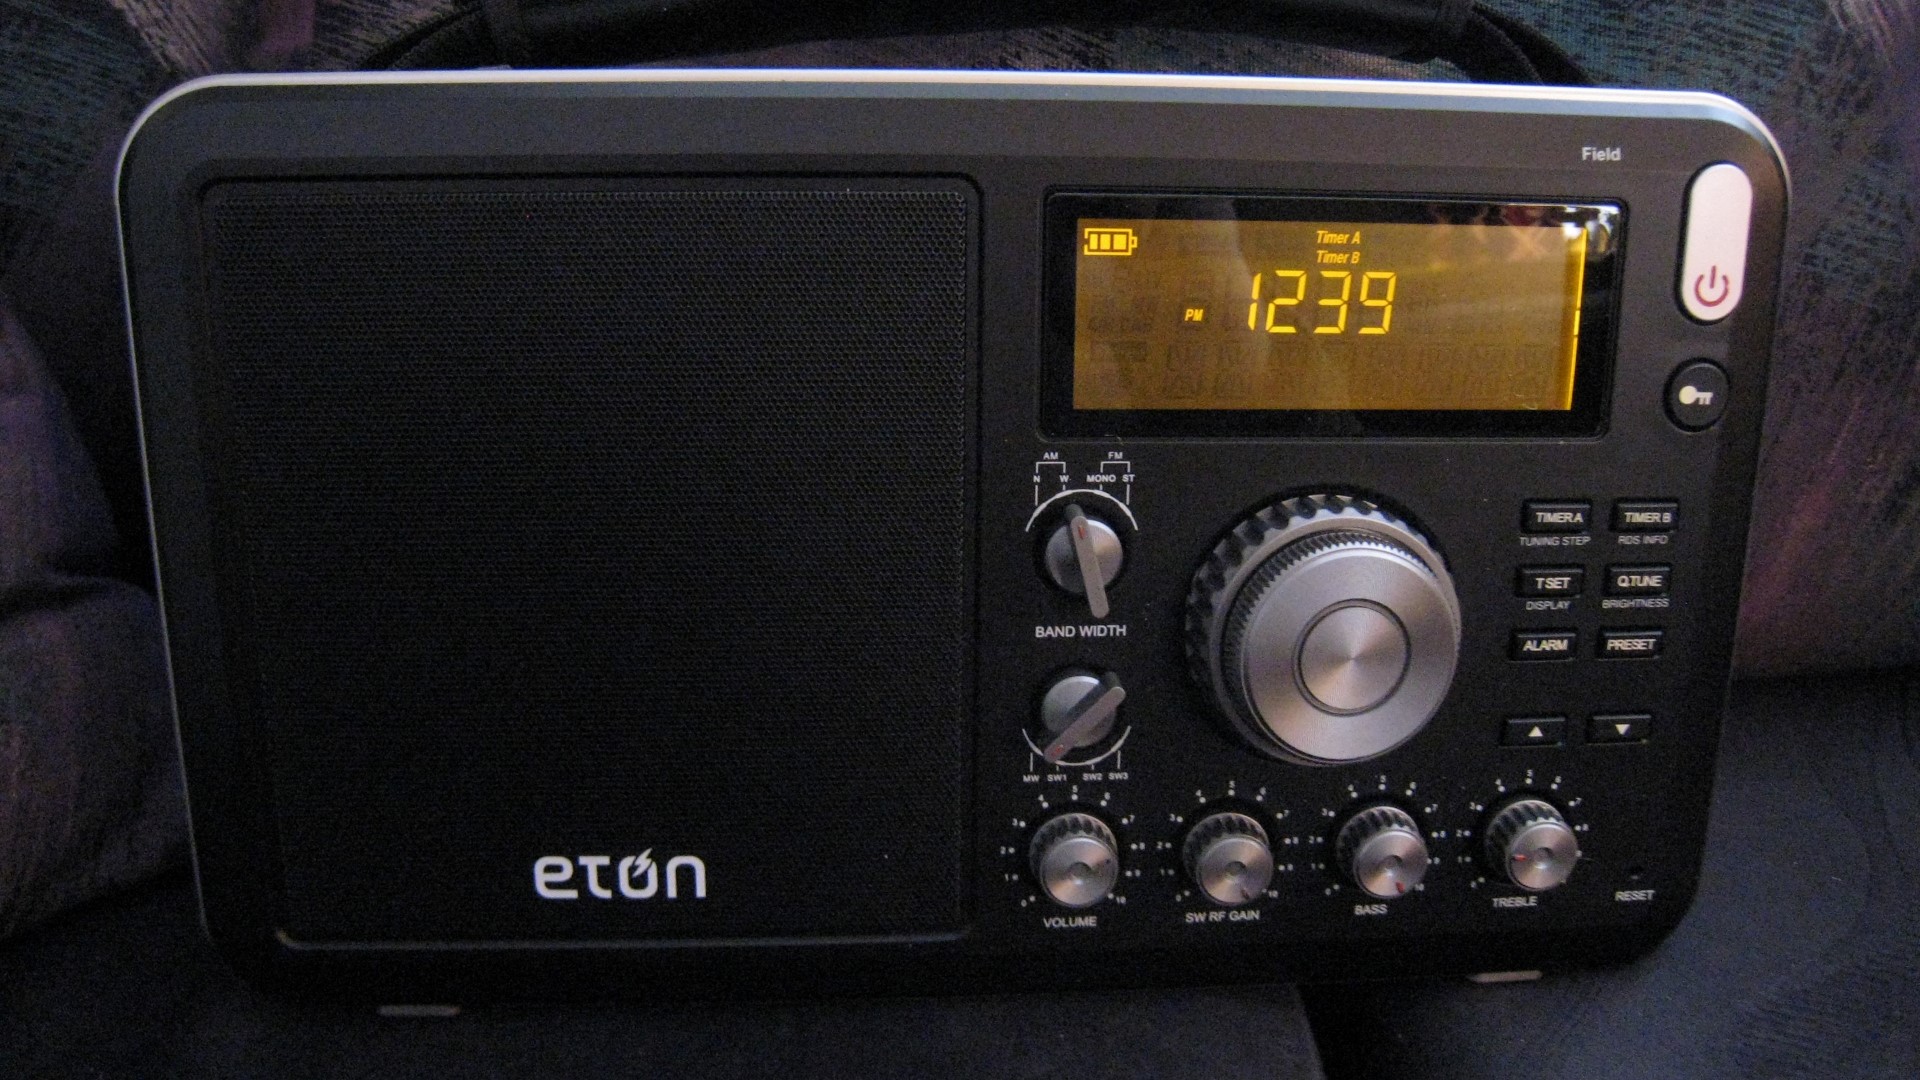
Getting To Know The Field 550: Operation of the radio is straight-forward with few surprises. As is becoming the norm with today’s radios there are a few multi-function buttons which do different things with power on than they do with power off. For example, with the radio on, a short press of the TIMER A/TUNING STEP button changes tuning speed from Fast To Slow to Lock. Similarly, with the radio off, press the Q. TUNE button to toggle the display brightness from low to medium to high. The backlight will go to sleep after 10 seconds while the radio is playing. To keep the backlight always-on slide the BACKLIGHT switch on the side of the radio to the “ON” setting. Be sure to turn it off when done using the radio.
Beep Defeat: Another hidden feature mentioned in the manual: With the Radio off, Press and hold the ALARM button. The text BUZZER ON will be displayed. In this mode, a button press feedback beep will be heard with each button press. Release the ALARM button and press and hold again to turn the buzzer off – BUZZER OFF will be displayed on the screen.
Changing The AM Tuning Steps Between 9/10 KHz: With Power Off Press and hold the Preset button…the display will toggle between 9 and 10 KHz.
Tuning: There are several ways to tune the Field which is good since the action of the tuning knobs is rather tight. The Q. Tune Button (Quick Tune) steps upward through the SW bands in 1 MHz steps, AM by 100 KHz steps and FM by 1 MHz steps. Up/Down buttons step through SW In 5 KHz Steps, AM in 9 or 10 KHz steps and FM by .1 MHz steps. The Tuning knobs can be set to Fast or Slow speeds or Locked by toggling the Timer A/Tuning Step button. As in previous Field models there are two concentric tuning knobs for coarse and fine tuning.
Performance: The Field is a definite improvement over the older S350/S450 Field models. It is a joy to use, offering good reception in a nice-looking, easy to carry package. Being digital it offers rock steady tuning which the original S350 series did not, and it also offers enhanced reception. I did note some “digititus”…DSP-induced digital noises on the AM band which was a surprise since I detected none of that on the three other new Eton DSP radios. *(See the mods section at the end of this review). It does mute while tuning as many other modern radios do which makes band scanning a little less enjoyable…your mode of use will determine how much of a factor this is for you.
I then compared it to a CC Radio-SW (based on the Redsun RP-2100) which is its nearest direct competitor. On basic AM/FM/SW reception they were very close – which is good…the CC-SW is one of my favorite radios in this category. With the exception of a few problems with DSP noises on some AM frequencies, and a few instances of reduced volume on the Field due to soft muting (again on AM) they were very close. I did a midday band scan on AM and tabulated the relative reception of the Field comparing it to the CC-SW on 37 AM station of varying strength from barely detectable faint traces through medium-to-strong signals. The Field was 10-20% more sensitive on 9 of those 37 signals. The CC-SW was better or had louder volume on 5 signals and they were equal on the rest. So the AM shootout goes to the Field but just by a hair….soft muting accounted for 3 of its losses.
Soft Muting And DSP “Digititus” On AM: Soft muting is a “feature” of the new DSP chips which is unfortunate at best. It’s obvious goal is to reduce the noise between signals by reducing the audio level when the signal falls below a certain point. It may sound like a good idea but the problem is that on AM and SW if a signal falls below a certain threshold its volume is attenuated…an annoyance. In fact, this is just the opposite of what AGC (Automatic Gain Control) does. AGC makes weak signals the same volume as stronger ones which makes tuning much more enjoyable and also helps maintain consistent volume as signals fade. All modern radios, including the Field, have AGC, yet the Soft Muting in a sense works against it. Luckily Soft Muting is relatively subtle in the Field and did not hamper reception very often. Still, my preference would be for it to be removed or defeatable.
Digititus is a word I made up a few years ago to describe another unfortunate side effect of these DSP chips – spurious noises at various frequencies on the AM band. Most of the early generation DSP chip-based radios had what I considered to be unacceptable AM performance because of these noises which consisted of whines and tones on certain frequencies, which varied from model to model and to a lesser extent even sample to sample. The DSP chips have allowed great strides in some areas of performance and in economies of production but they tend to emit RF signals which can interfere with AM reception if not properly shielded and suppressed. Some radios have completely eliminated digititus and of the four new Eton radios I’ve reviewed I’ve been gratified to see that in three of them it seems to have been eliminated. Unfortunately some of it remains in the Field 550. My sample happened to have a very strong internally-generated interference signal right on 1600 KHz which pegged the signal meter, making reception of a station on that frequency impossible. This was cured by the addition of a shield which I will outline in the mods section below. After that some much weaker spurious tones remain on a few frequencies…luckily these can be eliminated by allowing the display to turn itself off after tuning. It therefore doesn’t impact final reception but it should not exist in the first place. It seems these noises are directly related to the display and could be shielded or suppressed…we’ll have to wait and see if Eton addresses this issue in later production runs.
On SW and FM I was hard pressed to note any real differences in reception between the CC-SW and the Field 550…both radios offer superb SW and FM reception among portables and I couldn’t pick one over the other in terms of SW or FM reception. The new Field 550 is a definite step up from the older Field 350 and 450. As with AM, I scanned many active SW and FM frequencies tabulating the results and overall the two radios were on a par with each other.
Overall the Field will show greater AM/SW sensitivity using its built in antennas than any of the smaller radios I have compared it with. It may lack a keypad and SSB (Single Sideband) reception but it is more sensitive than the smaller Eton Satellit, the Sangean ATS-909X or the Tecsun PL-880/660 series radios. Its FM reception, like other recent DSP-equipped radios is simply superb.
Sound: Here the Field did not fare quite as well as its lunchbox size would suggest.. Now don’t get me wrong…the Field is a pleasant sounding radio and if you just listen to it without comparing it to anything else you will enjoy it. It has a nice clear characteristic which I like…no muffled AM/SW sound here, and its two AM/SW bandwidths are a good choice for good, crisp sound with clear signals and good selectivity with weaker, crowded ones. And it certainly sounds much nicer than most smaller radios as you would expect. But if you happen to have a CC-SW or a classic radio such as a GE Superadio of any vintage to compare with the Field you’ll find they have much more apparent bass. On a side-by-side comparison the Field is a bit thin sounding. But again…just listening to the Field by itself it sounds fine.
Bottom Line: The Eton Field is a nice radio and a good value. For a lunchbox-sized radio that covers AM/FM/SW with great reception and decent, if not boombox sound it offers great bang for the buck. It’s a handsome and fun radio and it can accommodate many types of external antennas with dedicated inputs for each band…a nice touch. Overall I give it a thumbs up!
———————————————————————————————————————————————-
*Mods – Hot Rodding The Field 550
I am not usually into modifying radios…I tend to use them as they come from the manufacturer. However some people are inveterate tinkerers and love to see how much they can improve a radio to eek more performance out of it, and as it turns out, one of my readers who wishes to remain anonymous (first name John) has done several things which have elevated the Field to a much higher level of performance. It is interesting to see how little it takes to make the Field better…it’s too bad that (evidently) the economies of modern day production don’t make these simple improvements possible at the factory. Most of them cost little or nothing.
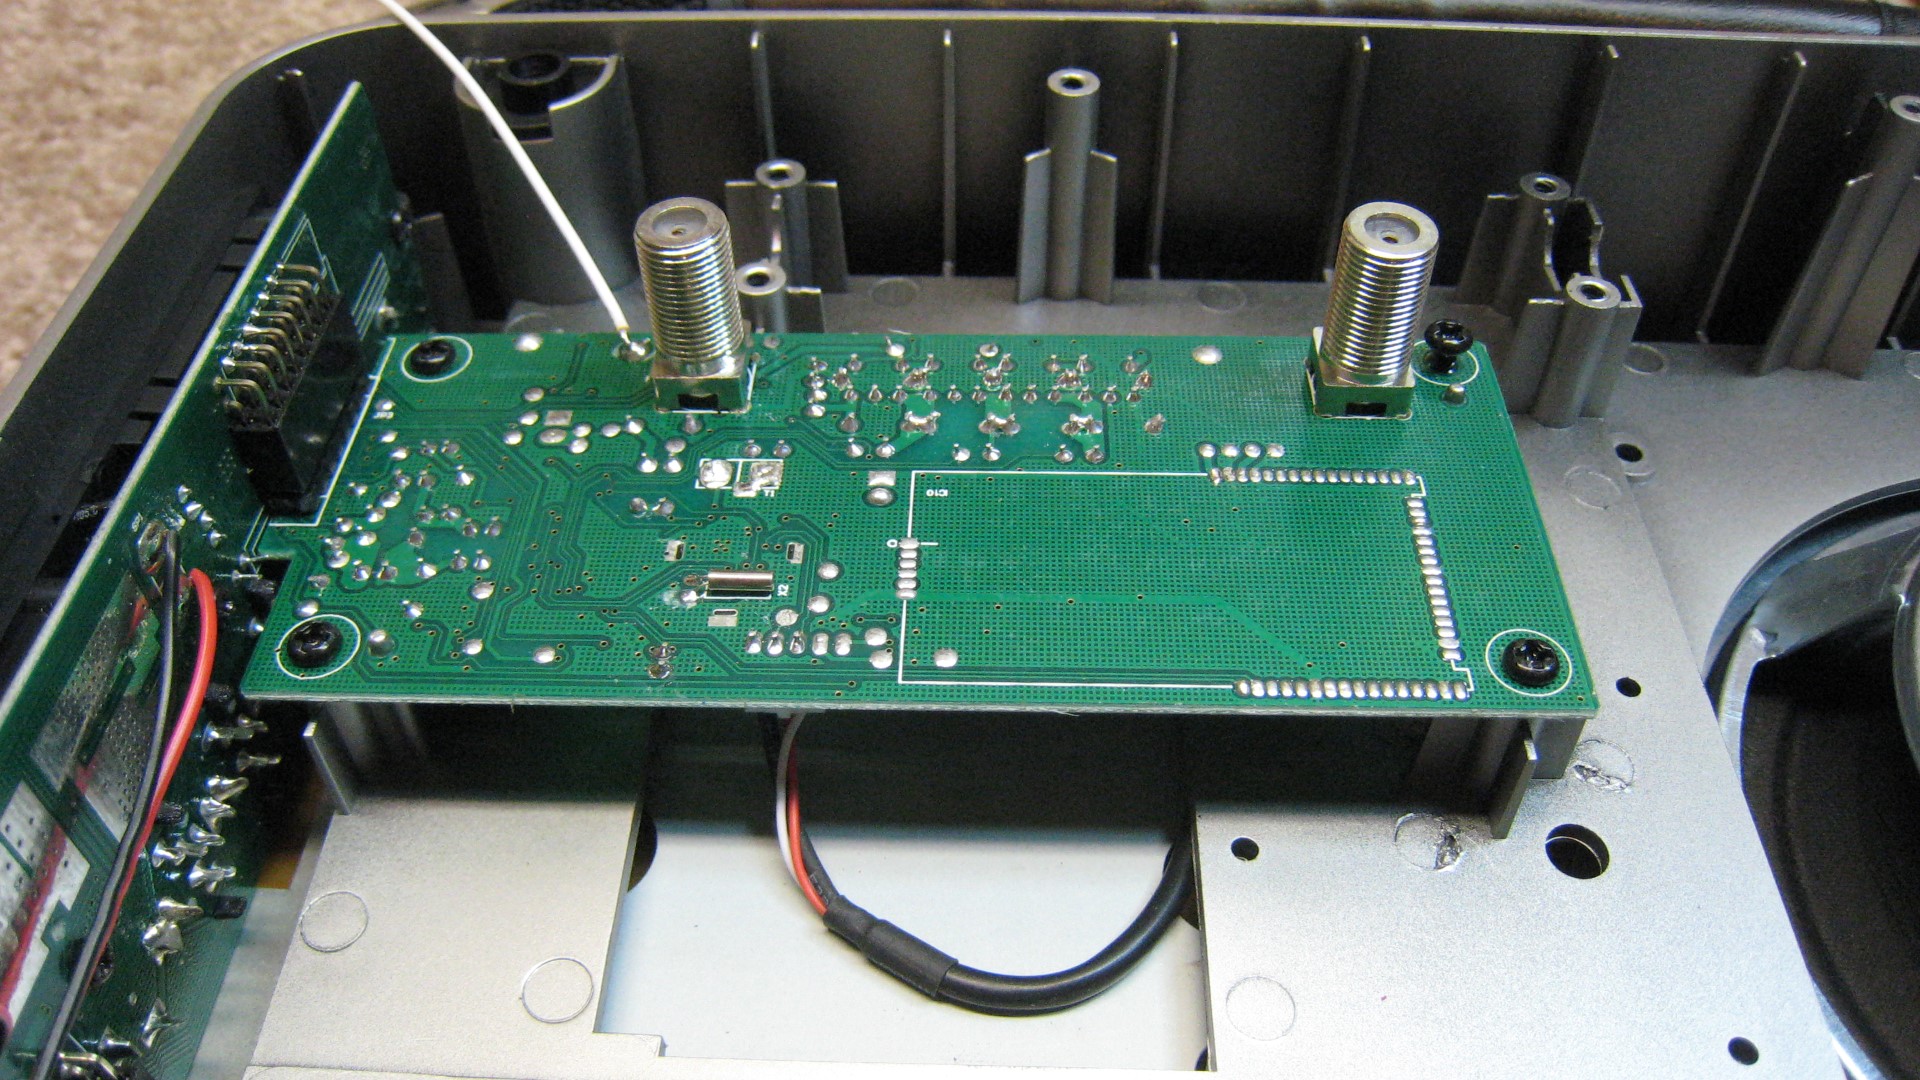
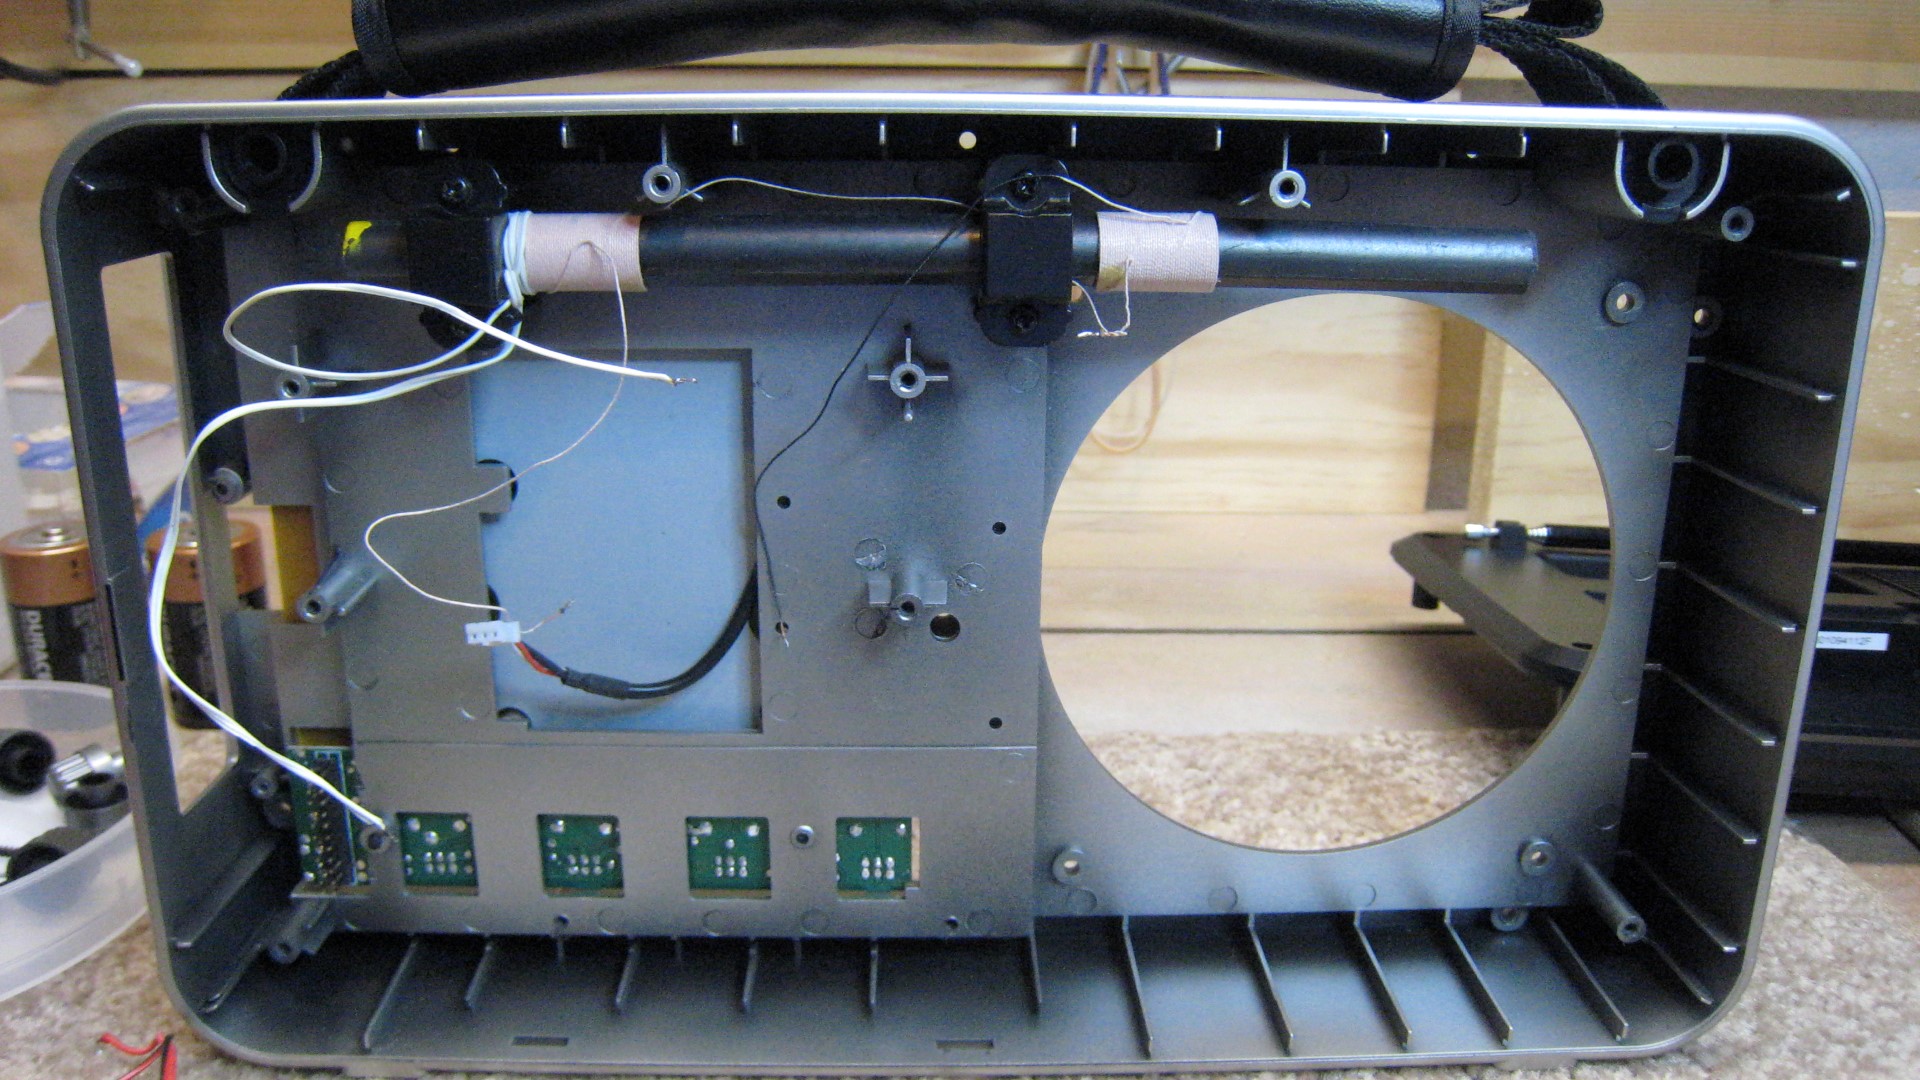
Digititus Cure: This one is so simple I think Eton should be ashamed for omitting it. A simple metal shield installed over the DSP chip completely eliminates that strong spurious signal my radio had at 1600 KHz. Even more interesting is the fact that the PCB (printed circuit board) WAS DESIGNED TO HAVE THIS SHIELD! You can see in one of the pictures below the outline where the shield fits and the 4 slots for its tabs to be soldered to the board. Shame on you Eton for deleting this obviously beneficial shield! (How much would this have cost)?
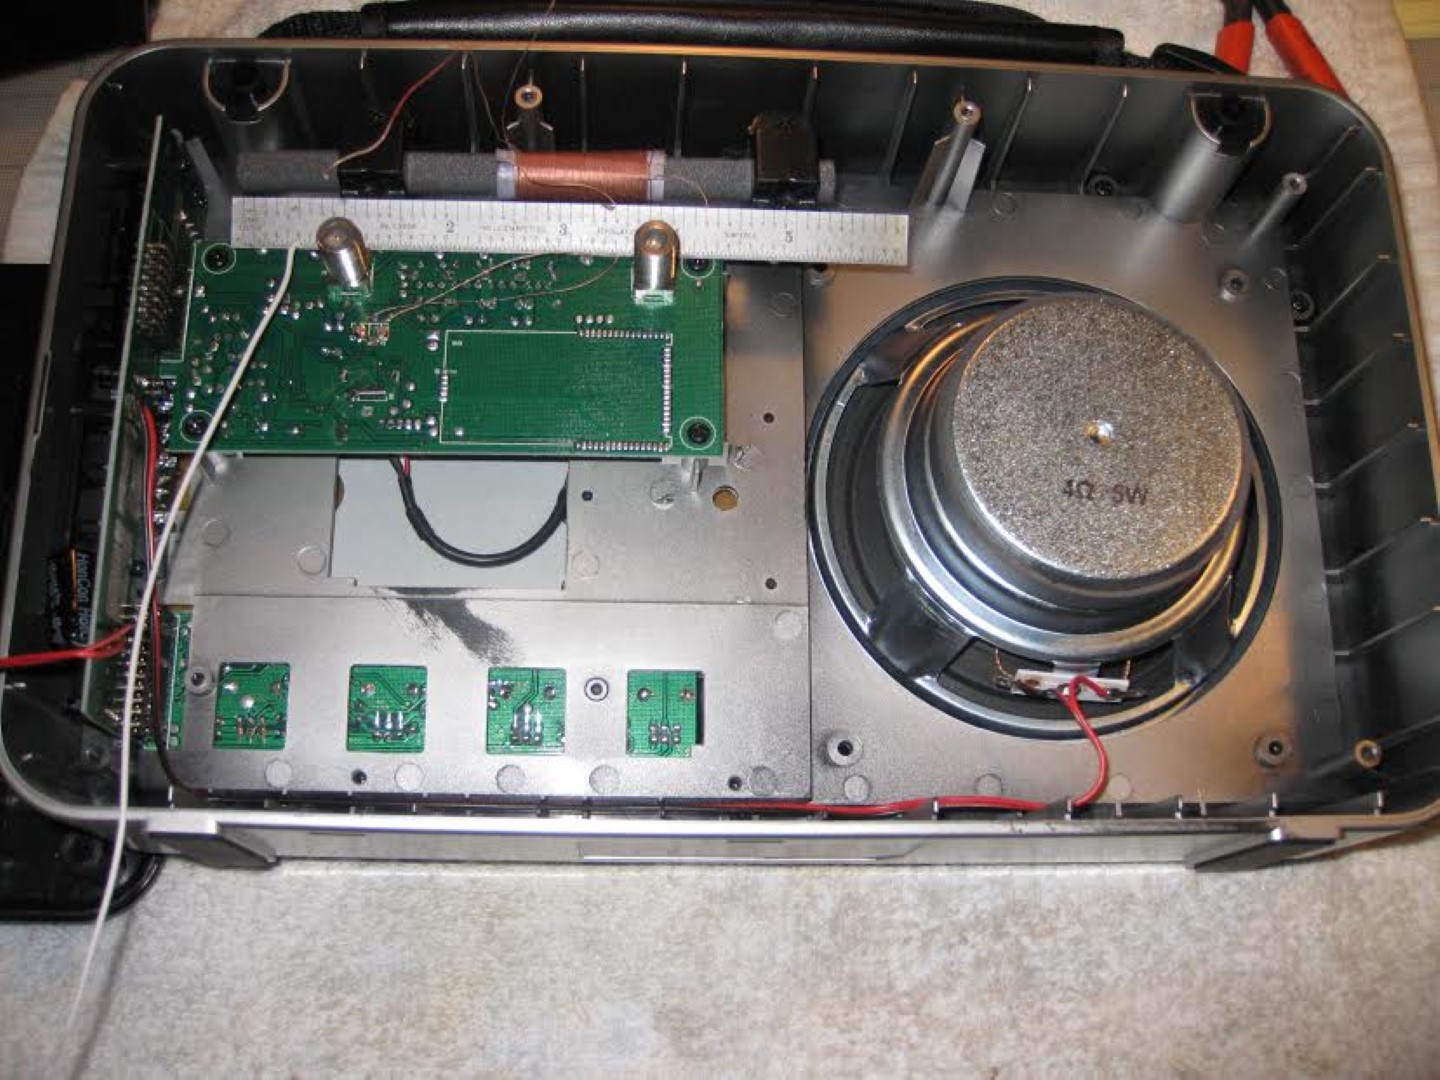
To disassemble the radio you will need a Phillips screwdriver and a soldering iron. The soldering iron is for 2 connections from the MW antenna to the external antenna input jack, two wires from the ferrite rod to the RF PCB, two wires to the battery compartment, and one for the rod antenna.
First, remove 8 Phillips screws from the rear of the radio. They are all the same size. 2 are in the battery compartment, 4 along the top, and 2 in the bottom corners. You then have to loosen and spin off the 2 nuts and washers from the coaxial connectors on the back side of the radio.
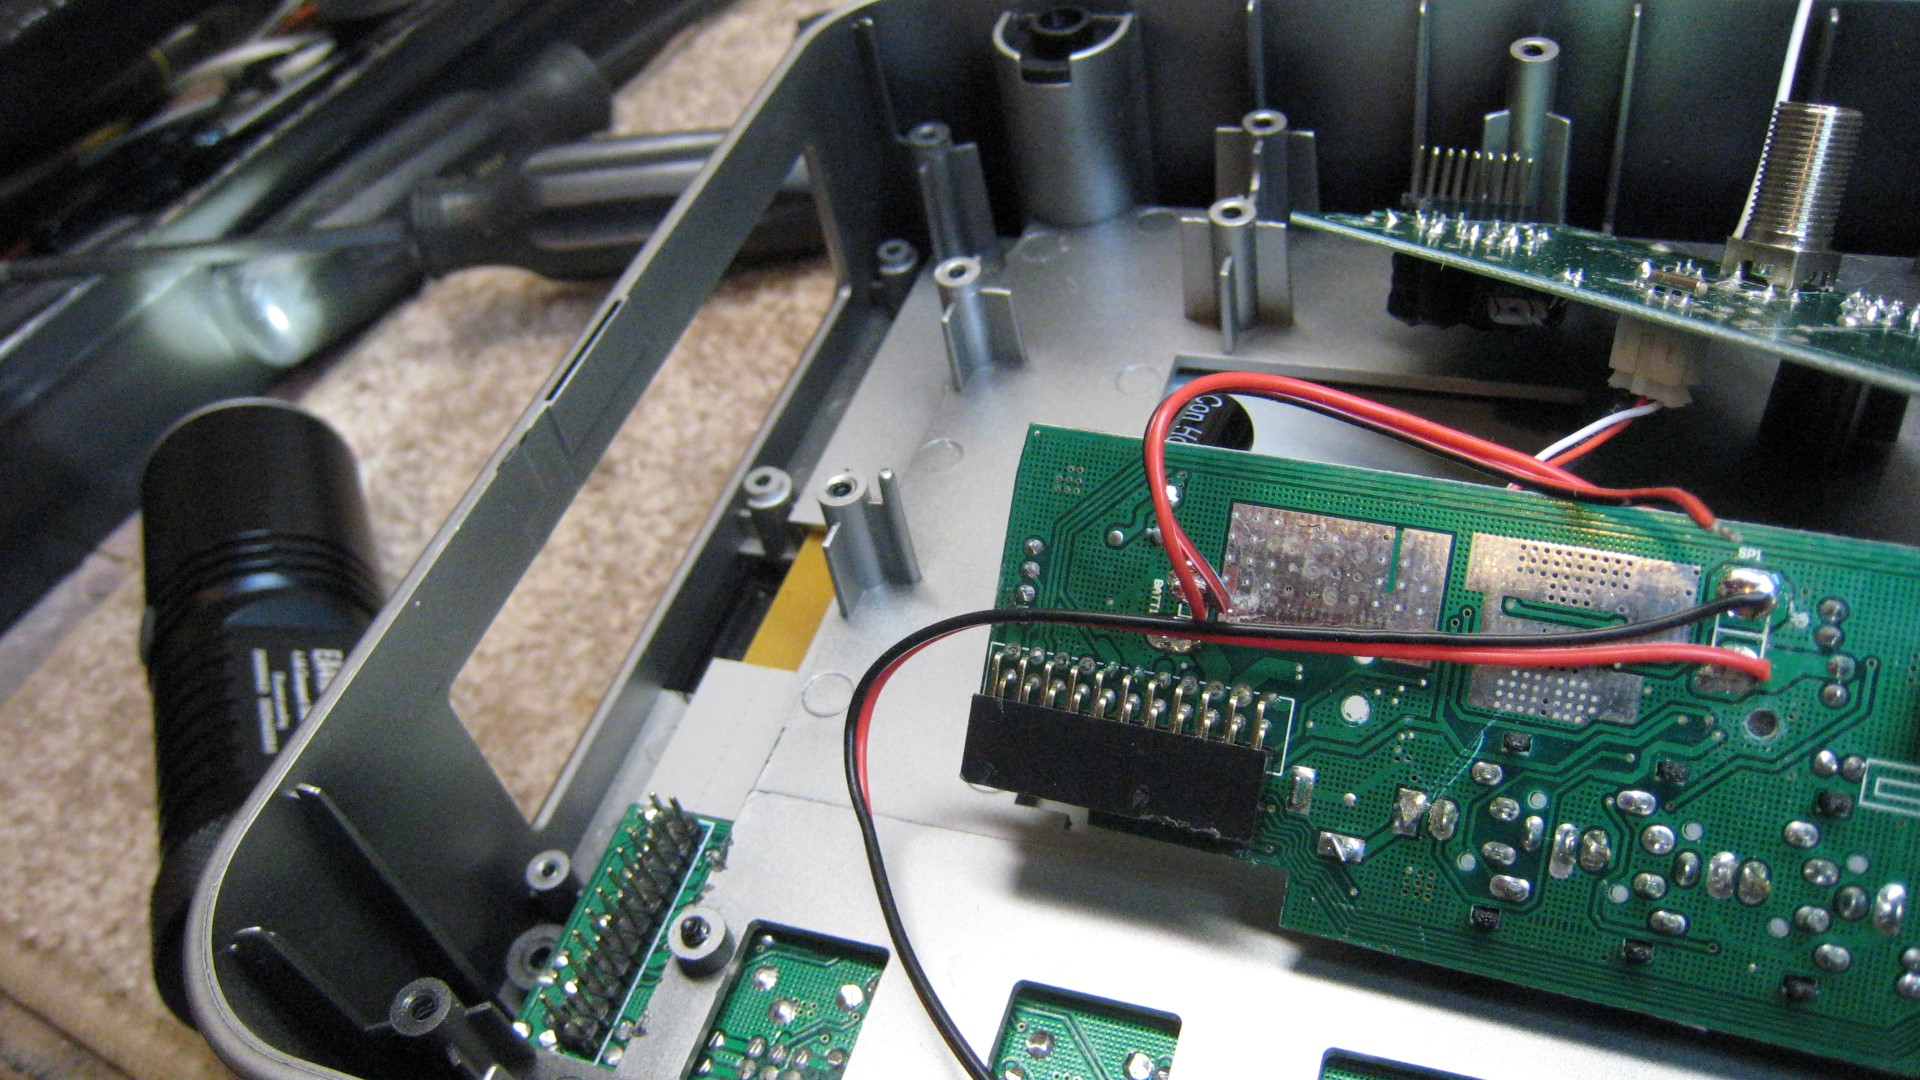
With the screws out and the 2 nut/washer sets removed, you are ready to remove the rear cover. Stand the radio up so that the rear of the radio is facing you, then slide the rear cover towards you from the RIGHT side, just as if you were opening a door. As it starts to come away from the radio, you will see a white wire going to the whip antenna. Unsolder the white lead to the small rod antenna PCB. Next, as you slide the right side open further, you will see 2 wires from the ferrite bar antenna going to the ext antenna input. Unsolder these – when re-connecting it doesn’t matter which wire goes to which pad. Finally, you can separate the rear cover from the radio body by unsoldering the 2 power leads going to the battery compartment. Here the polarity does matter so note that the black lead goes to the bottom (negative) terminal, and the red lead goes to the upper (positive) terminal.
You have to then remove the RF board and the switch board as an assembly due to the socketed connectors holding them together. You do this by removing the 4 screws thru the RF board, then 3 smaller Phillips screws from the switch board. These are on the left side of the switch board, and connect it to the front panel. With these 7 screws out, pry out the bottom of the switch board from the connector, and then lift out the assembly. You can then separate the switch board from the RF board by prying them apart from the connector holding them together. You now have access to the DSP chip for which you must fabricate a shield with tabs to match the slots on the PCB.
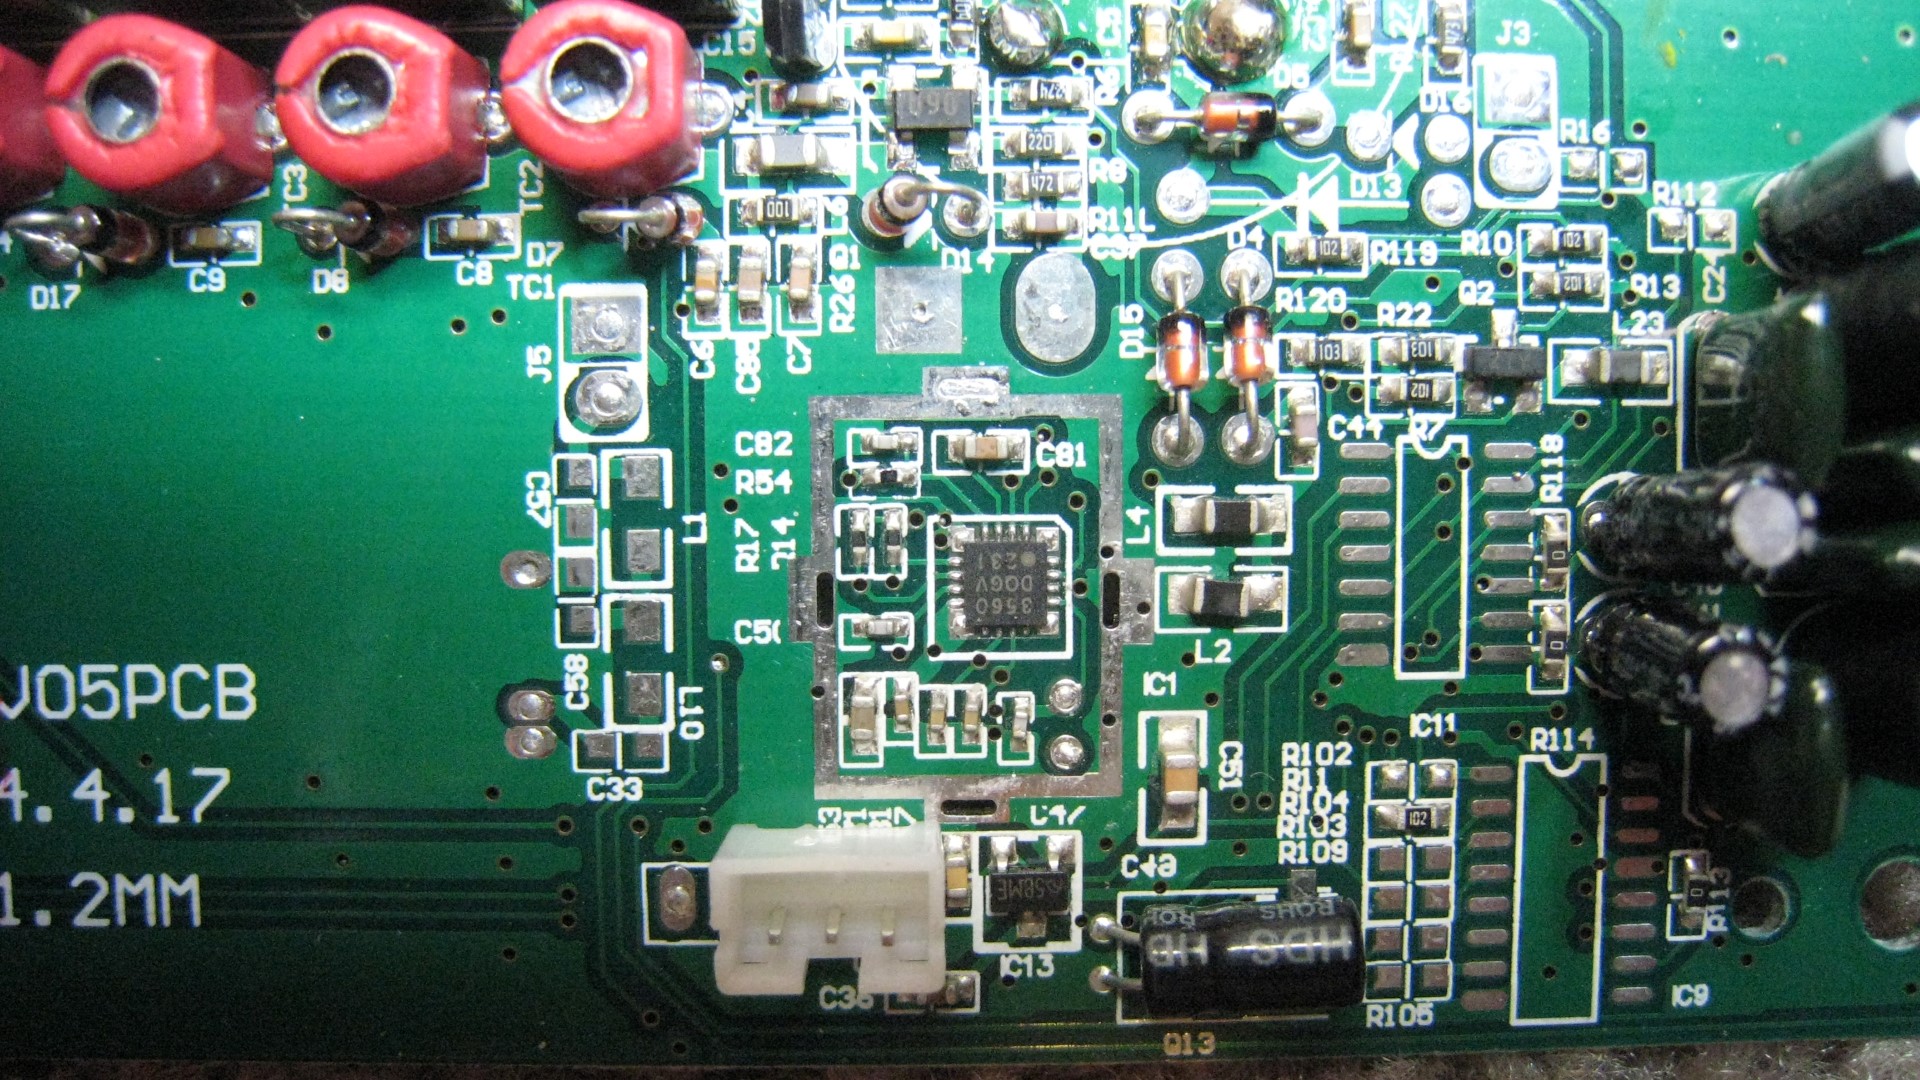
DSP Chip – Note Where Shield Should Be
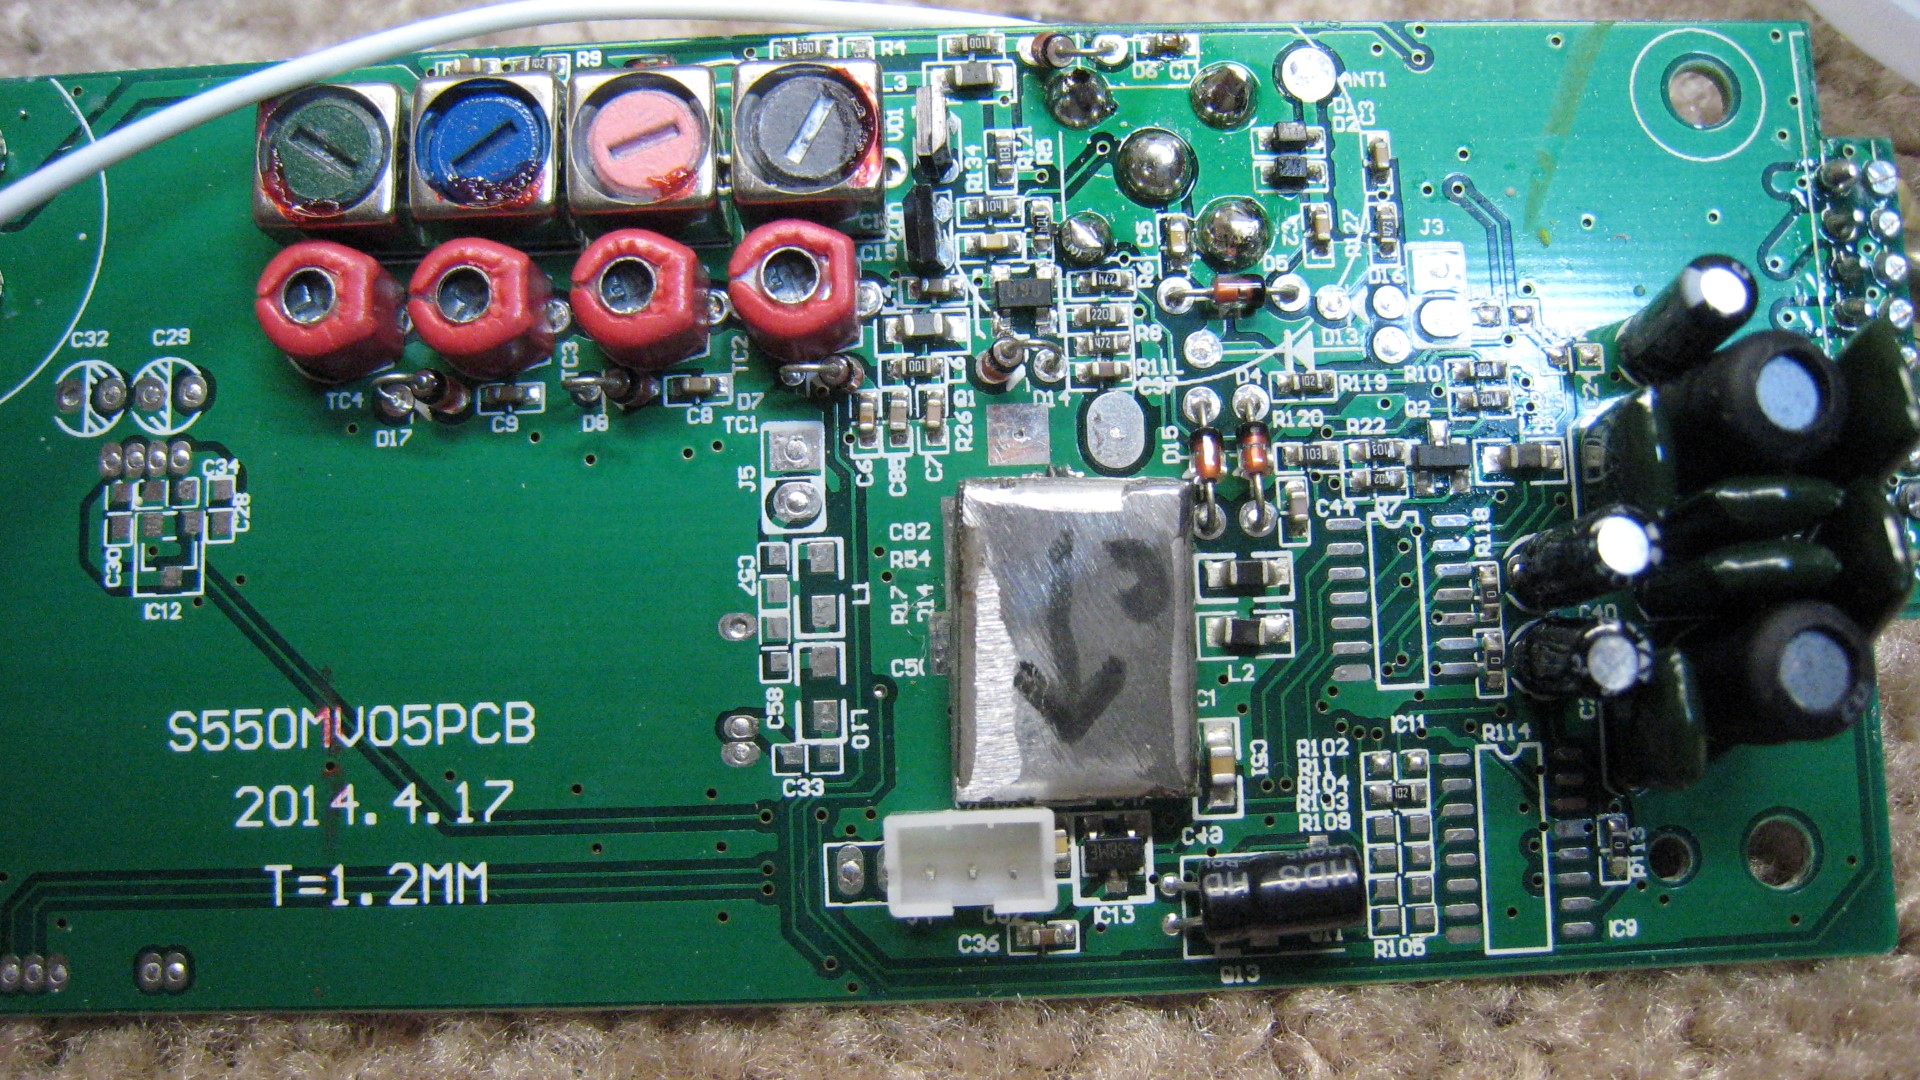
Shield Installed
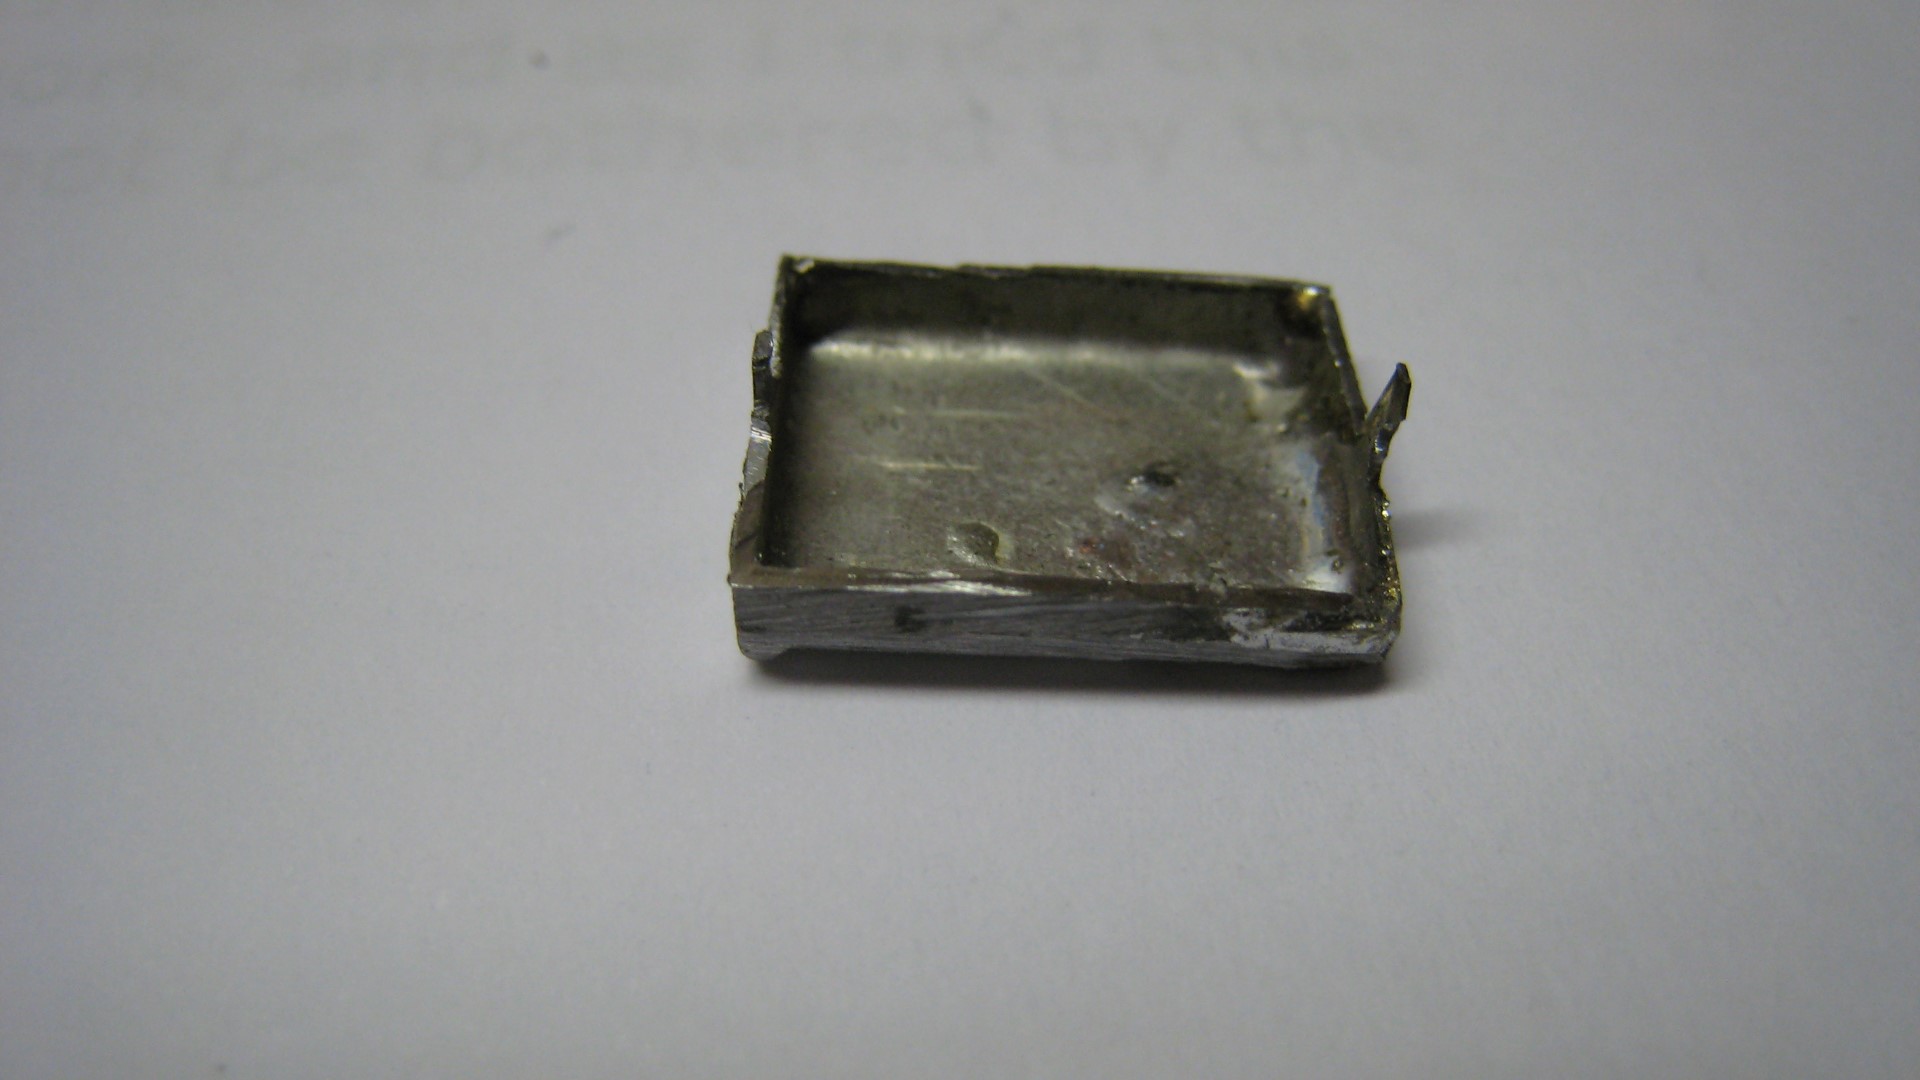
How Much Could This Part Cost?
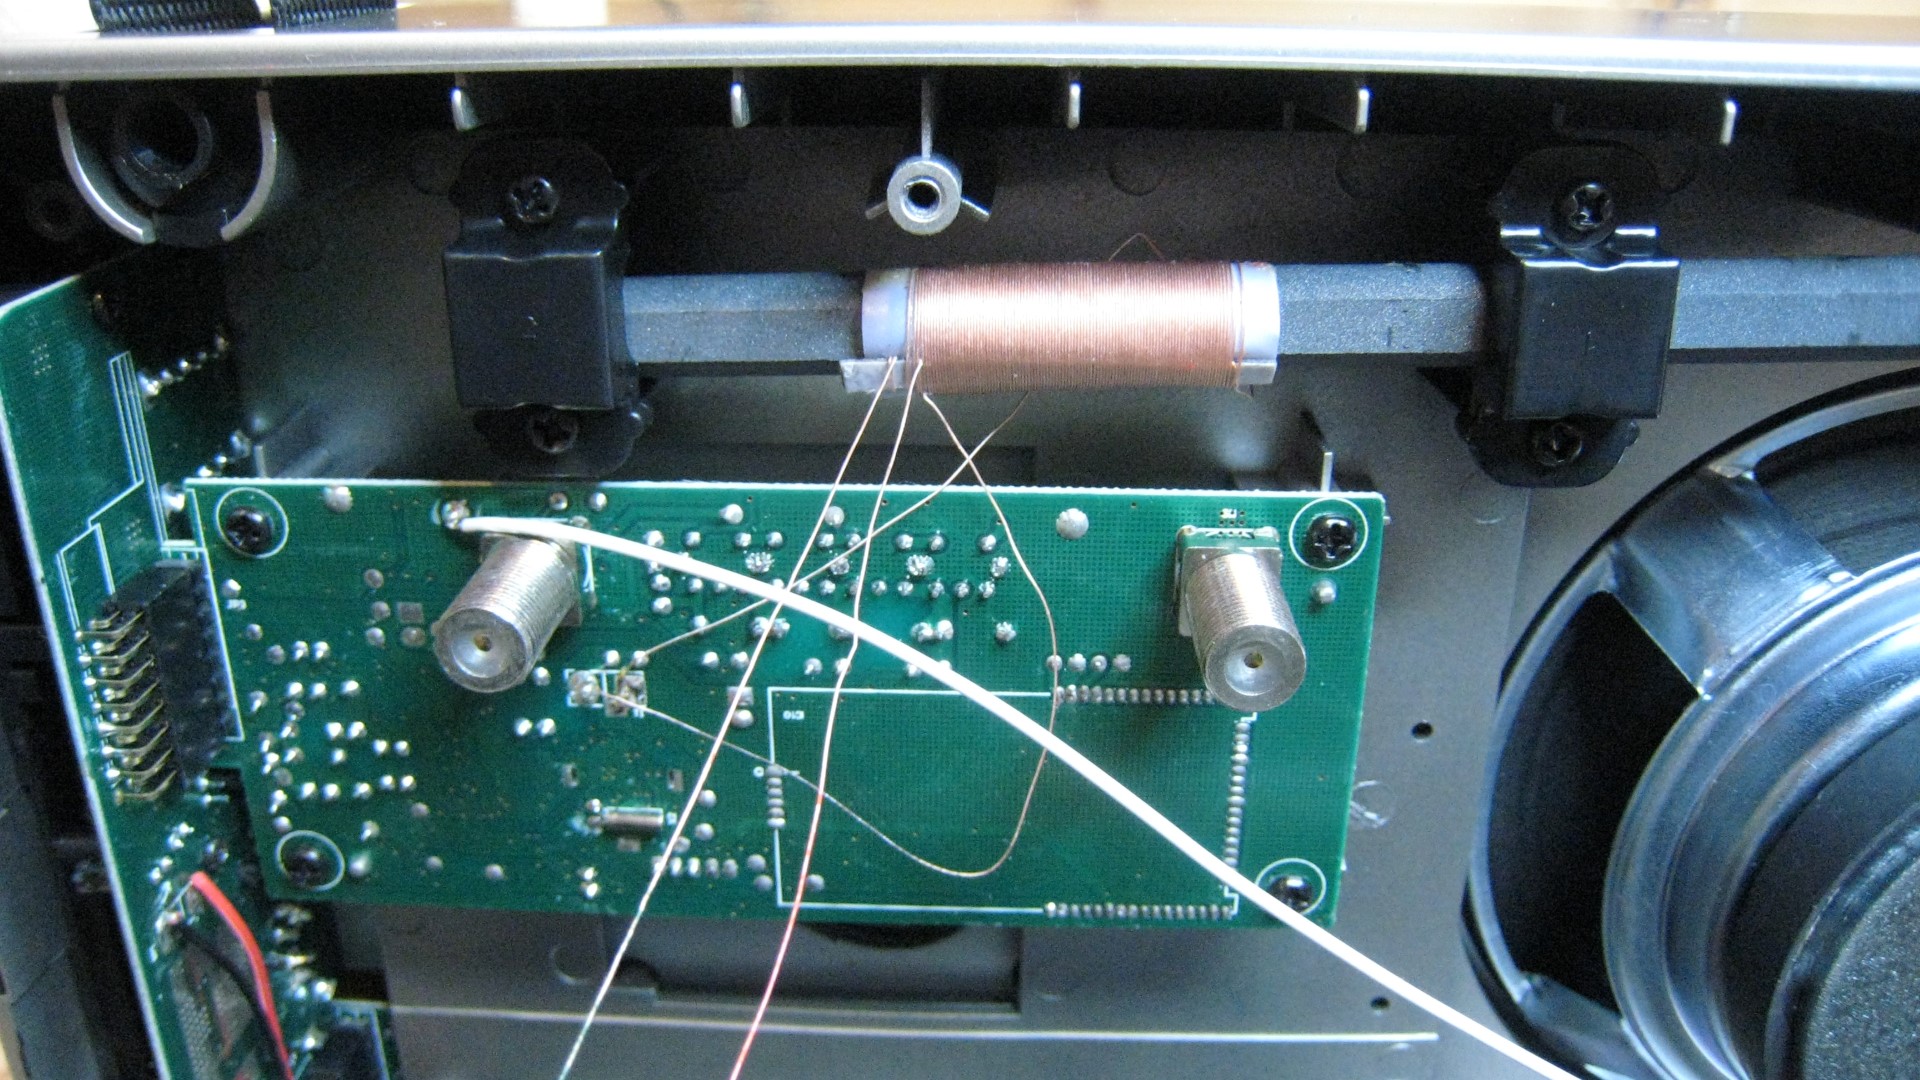
Longer AM Ferrite Rod Antenna: The stock ferrite rod is 5.4″ long but I was able to fit a full 8″ rod into the case…the resulting improvement in AM sensitivity was substantial, raising the Field’s AM sensitivity from slightly above average to excellent and approaching some of my best AM portables. The rod with its twin coil windings were taken from a Sangean PR-D5 which uses the same Si 4735 DSP chip as used in the Field 550 so I didn’t have to be concerned with the inductance of the coil windings…they were designed to work with this chip so a perfect match was assured. I added a small coil of wire (4-6 turns is fine) to the end of the rod (most of it is covered up by the left plastic mounting clamp) to connect to the aux AM Antenna terminals on the back of the radio…this is exactly how it is done in many radios. Note that the coil on the original rod antenna was wound on a loose-fitting sleeve that may simply slide over any other ferrite rod you wish to try…it will probably work fine.
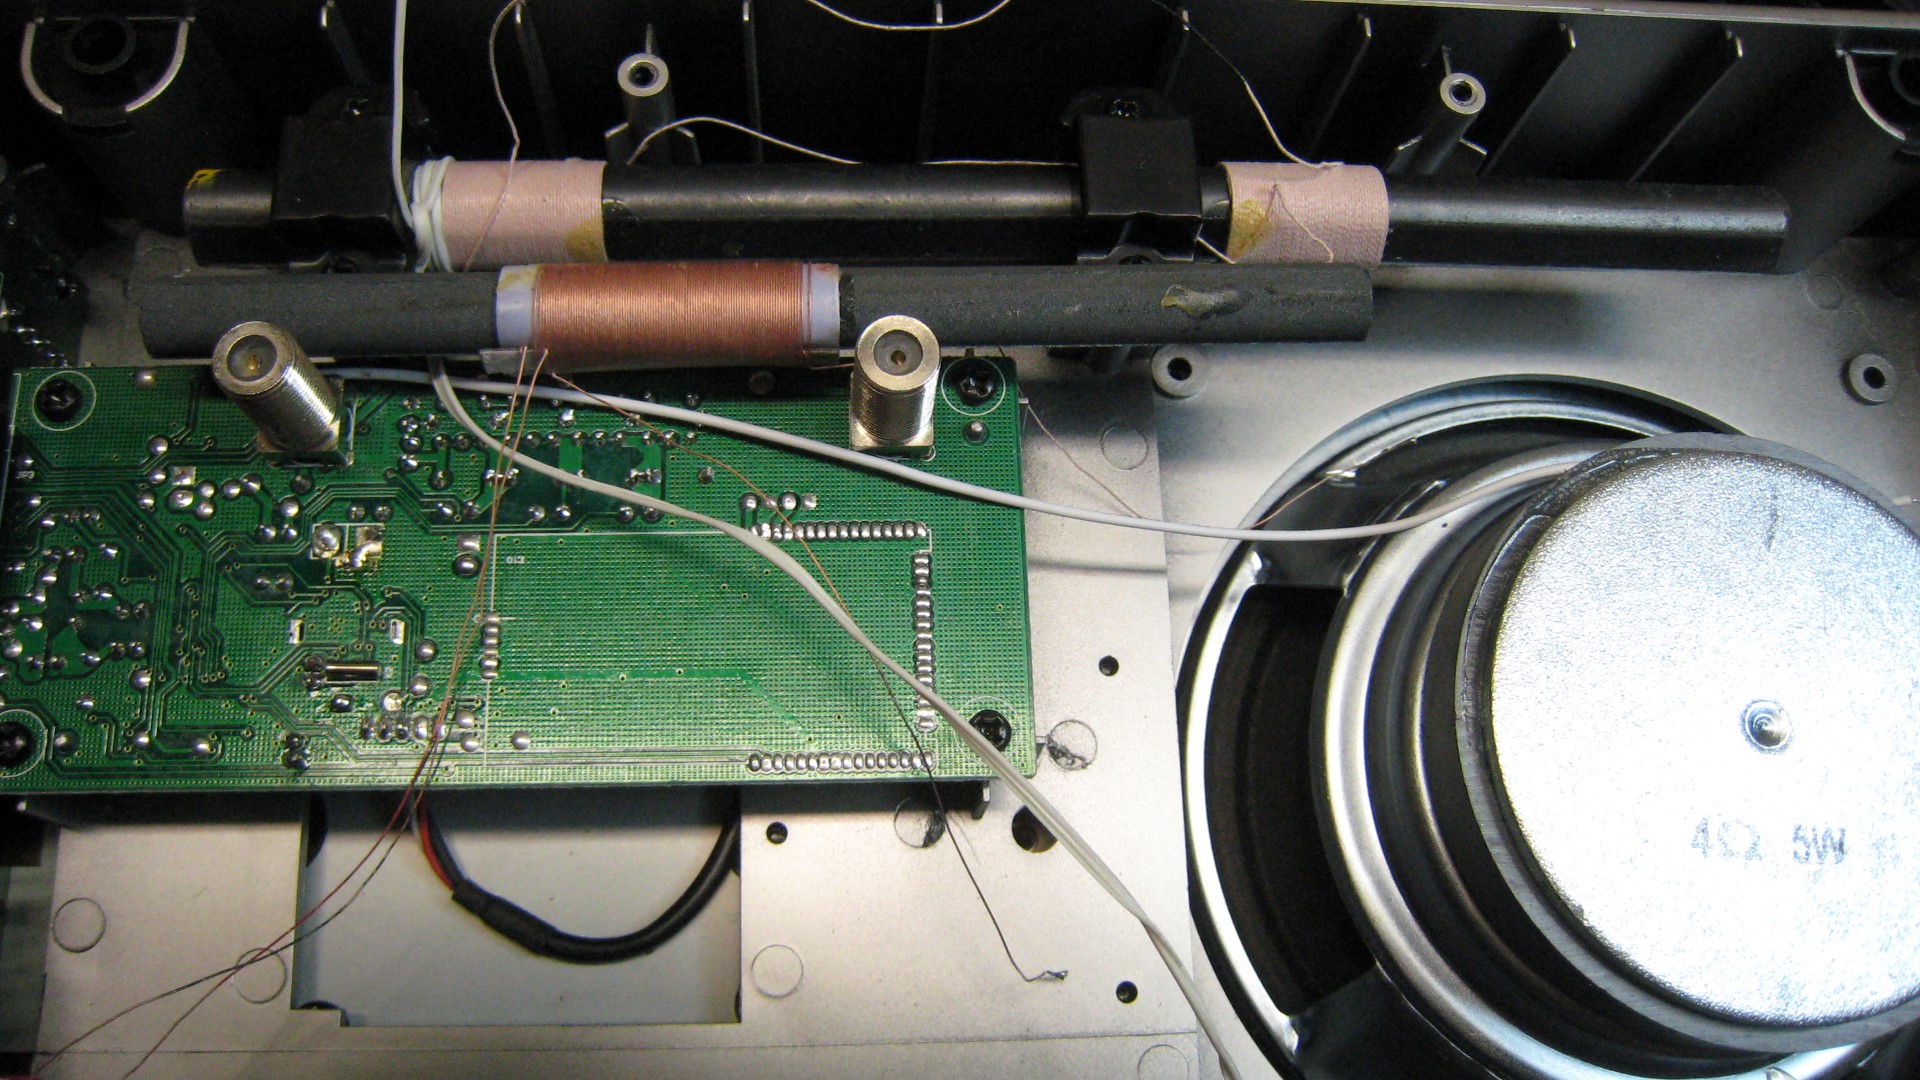
Original vs 8″ Ferrite Rod
Tuning Encoder Gunk: The tuning knobs on the new Field are extremely tight and hard to turn, while on the older S-350DL and 450 Fields you could spin them easily. It turns out this is intentional, caused by a thick goop in the tuning encoder mechanism. I disassembled the encoder and removed the goop using Goo-Gone – Isopropyl Alcohol would not dissolve it. Now I can spin the tuning knob with a fingertip which is MUCH nicer. I can’t understand the benefit to making it so tough to turn. This mod would actually represent a cost saving during manufacture… eliminate the goop!
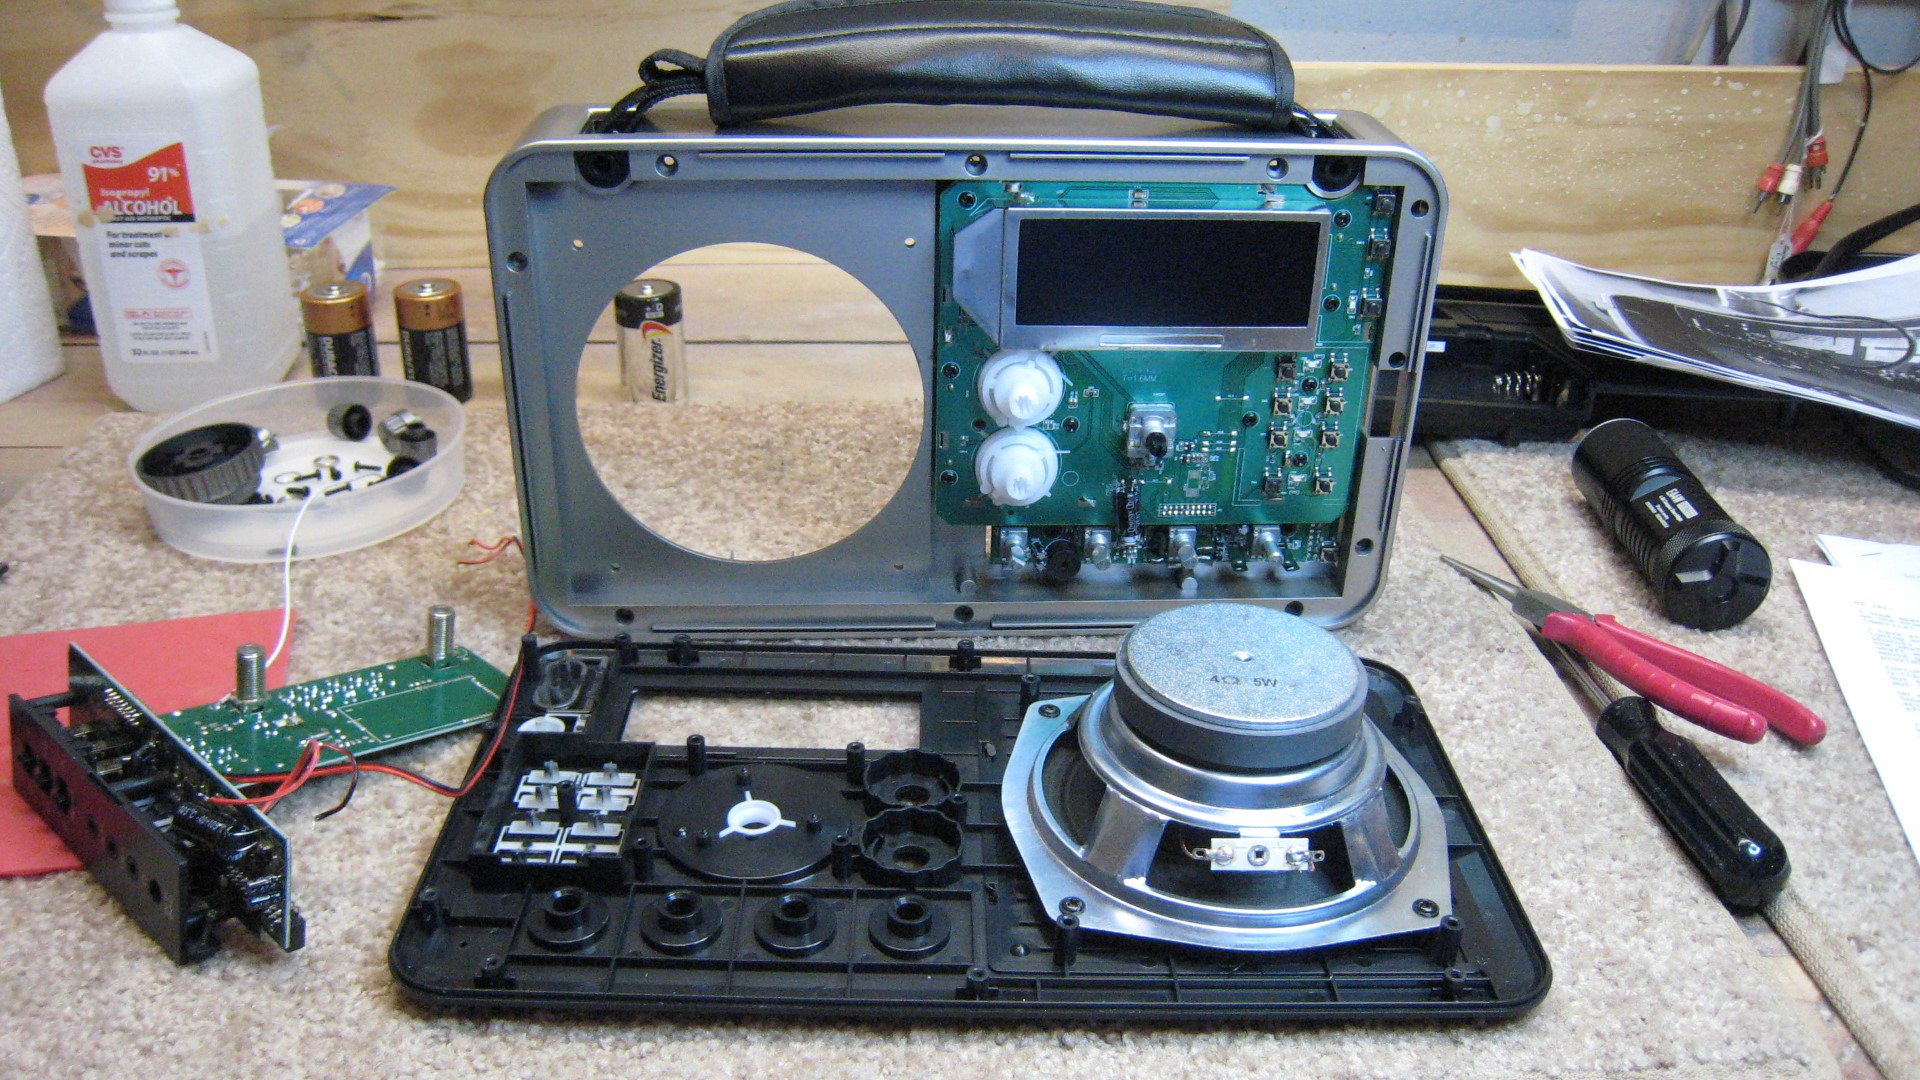
To access the tuning encoder, first do the disassembly as outlined above. Then remove all the front panel knobs and 8 additional screws from the inside securing the front panel to the chassis. The concentric tuning knobs are one assembly…remove it by grasping the large outer knob and pulling it off. For the smaller knobs I used pliers lined with a thick rubber gripper…alternately you can pry them off with small screwdrivers but you will mar the cosmetics of the front panel unless you protect the front of the radio with cardboard or similar. Be Careful!
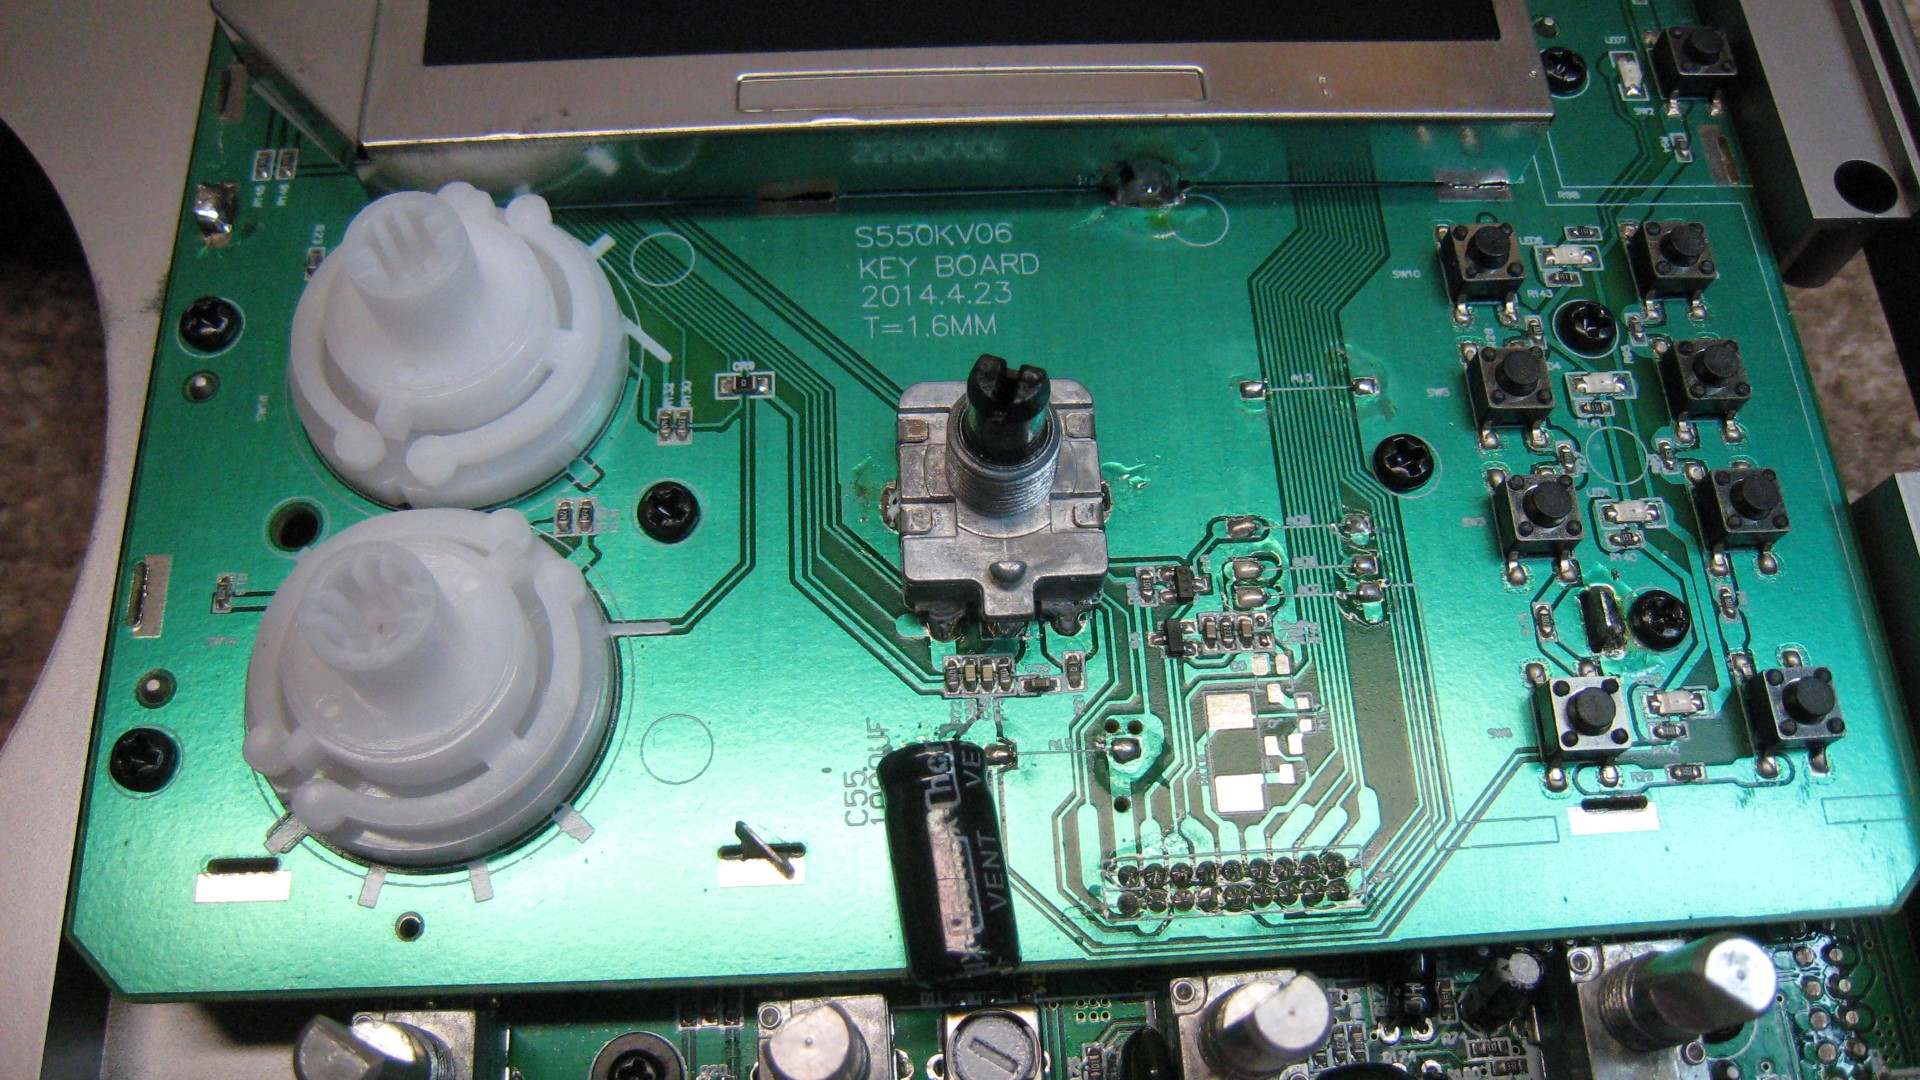
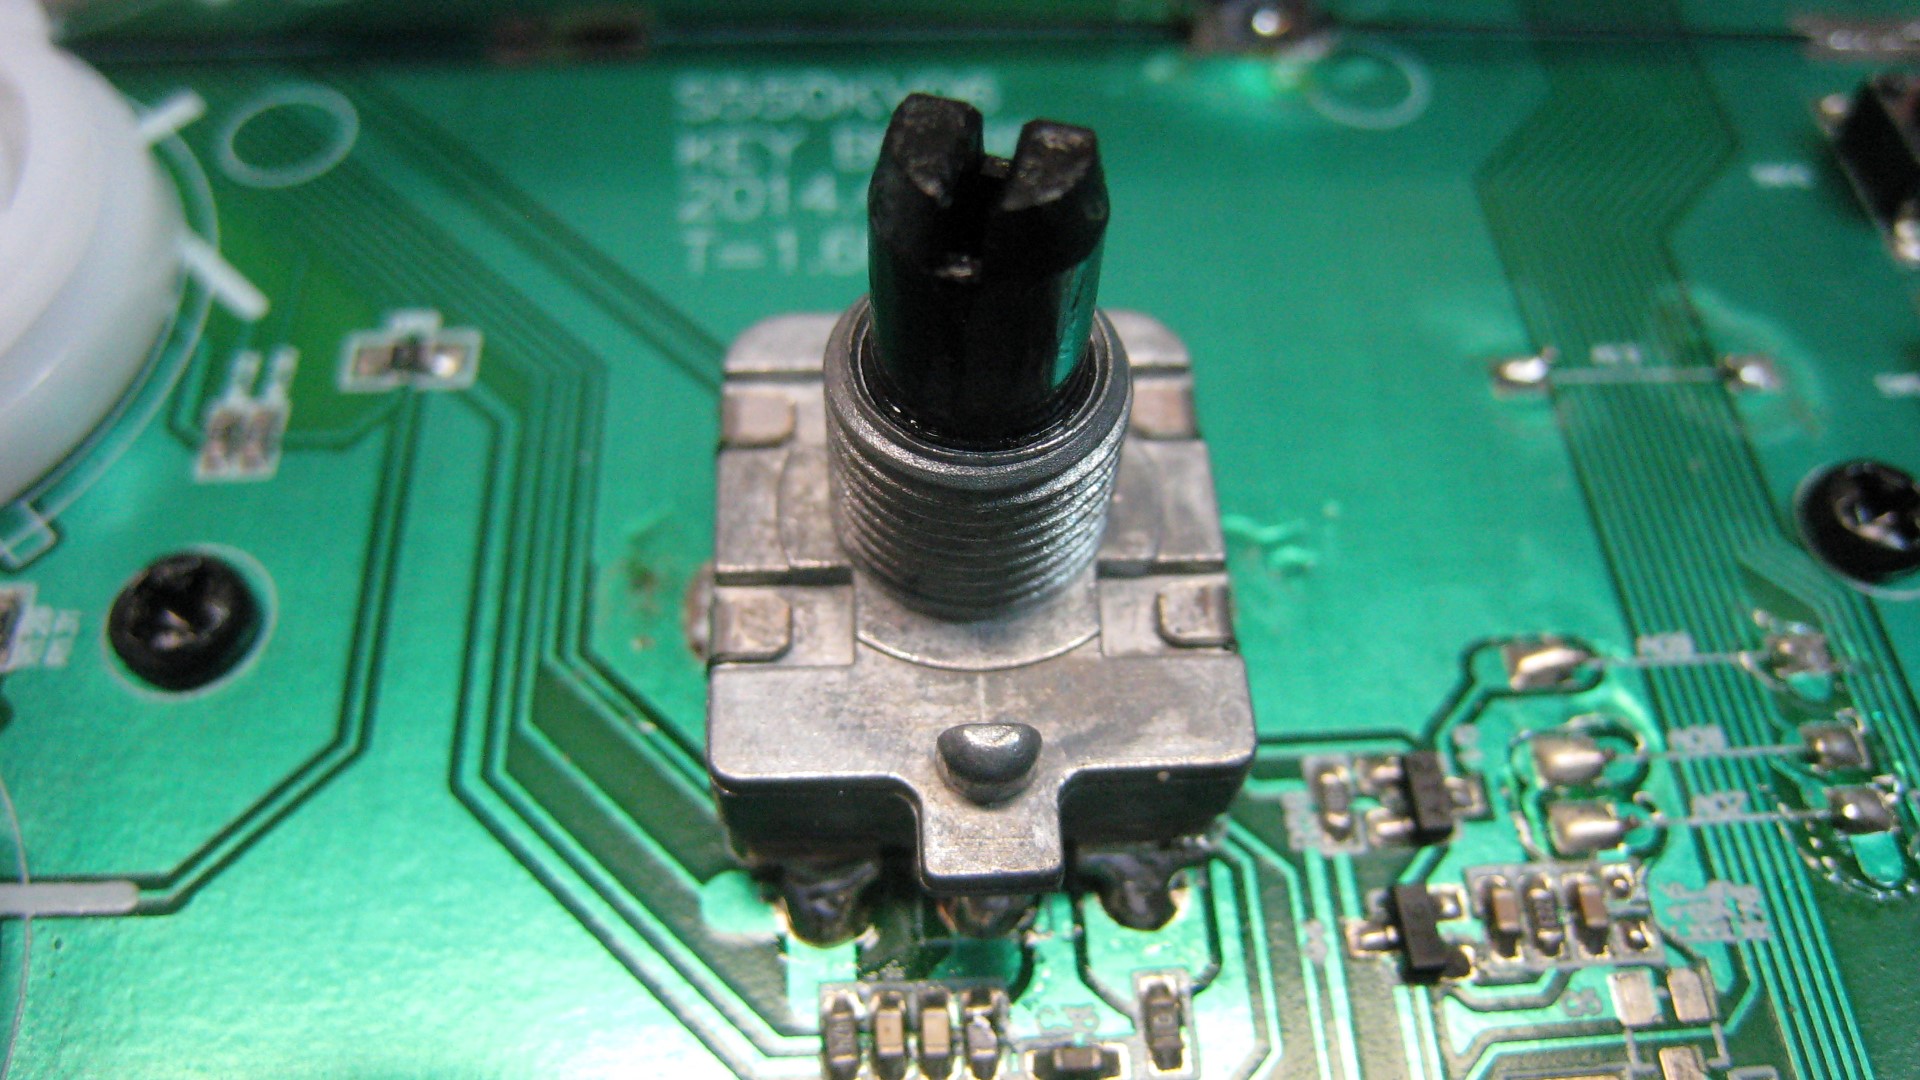
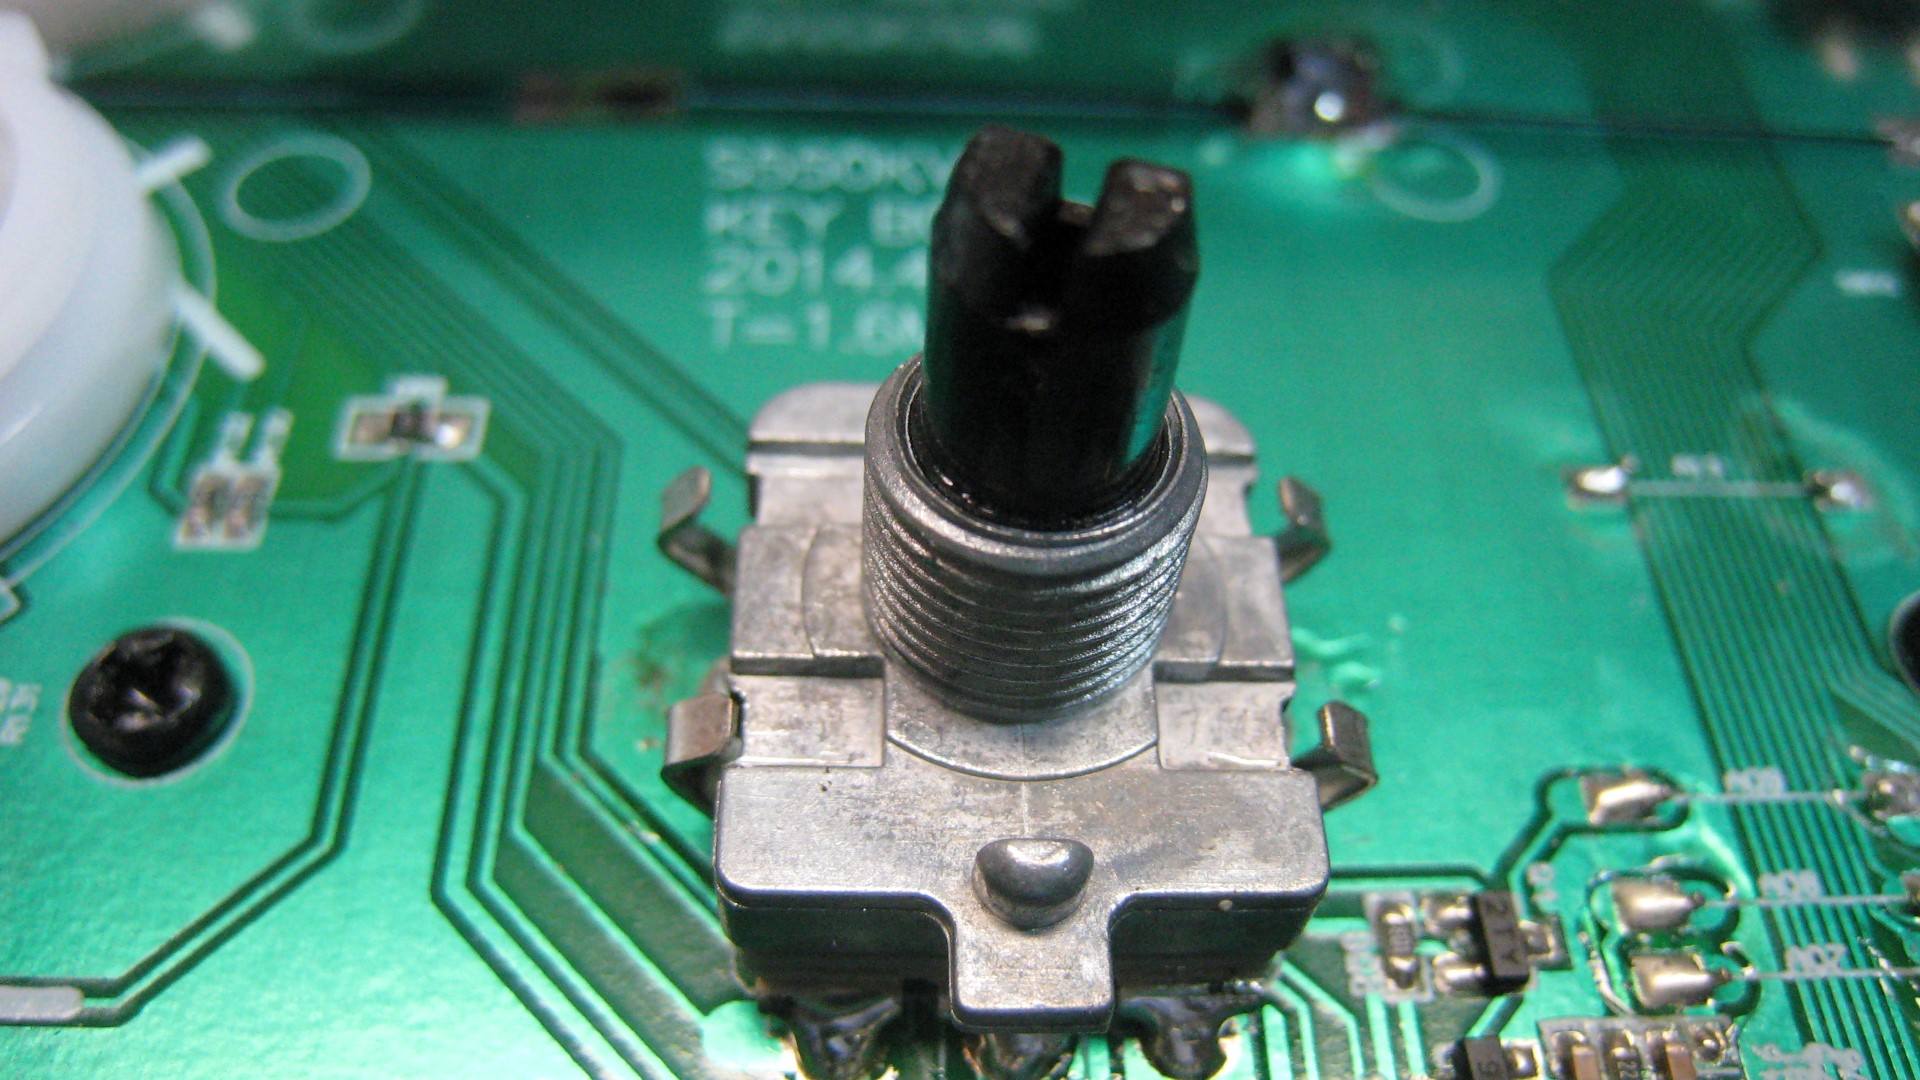
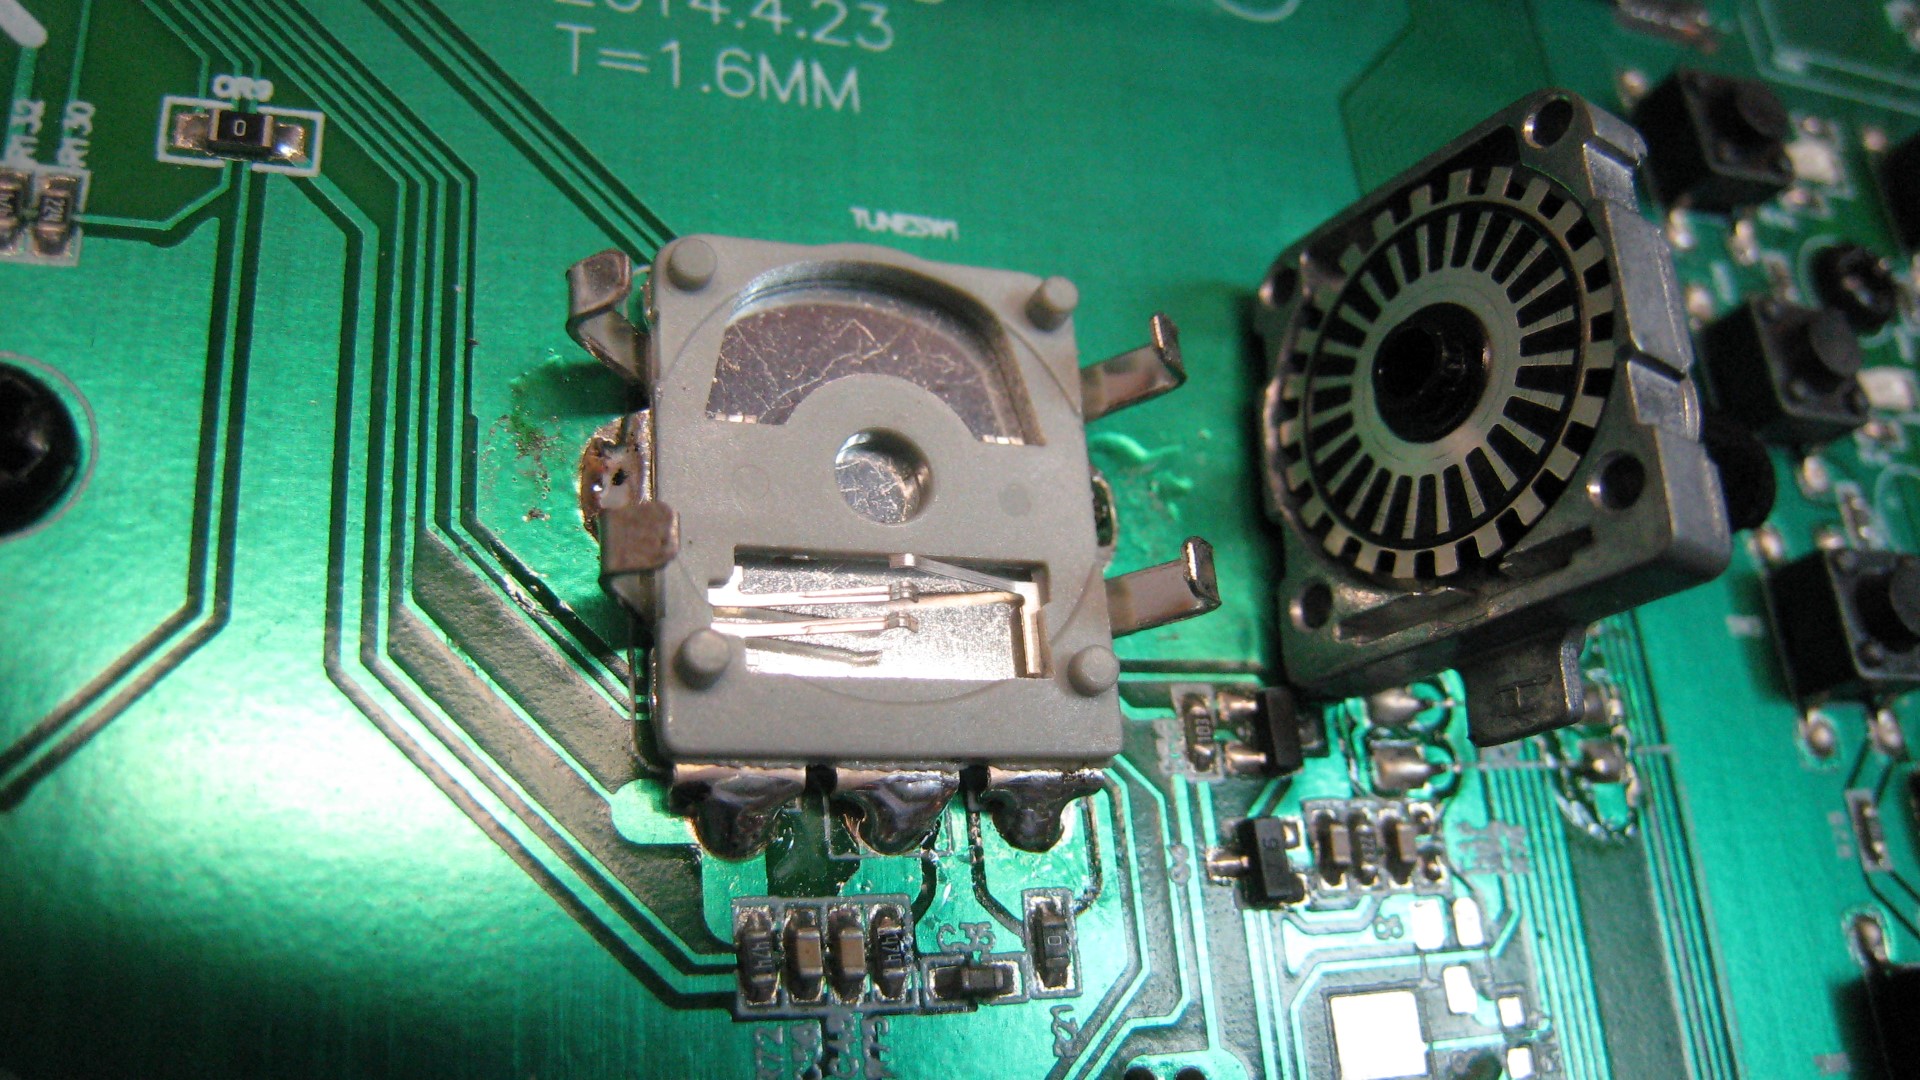
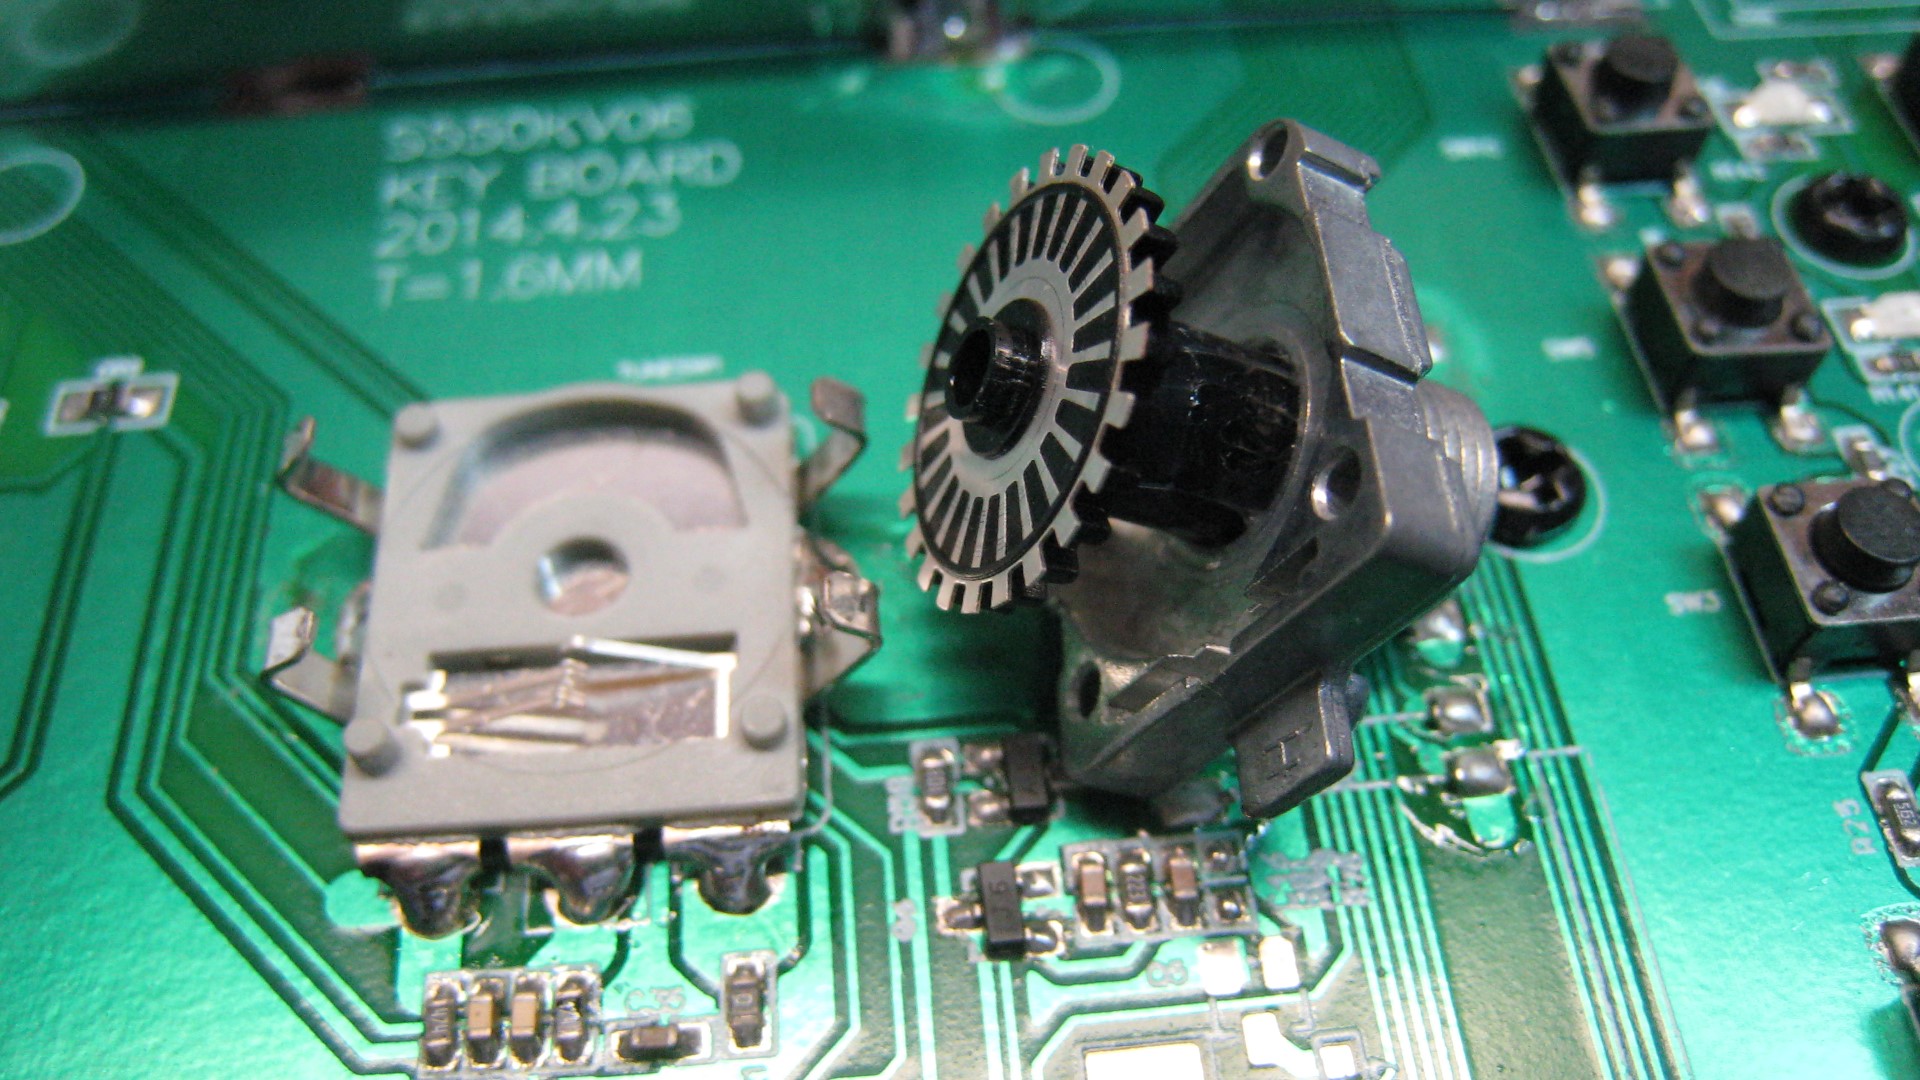
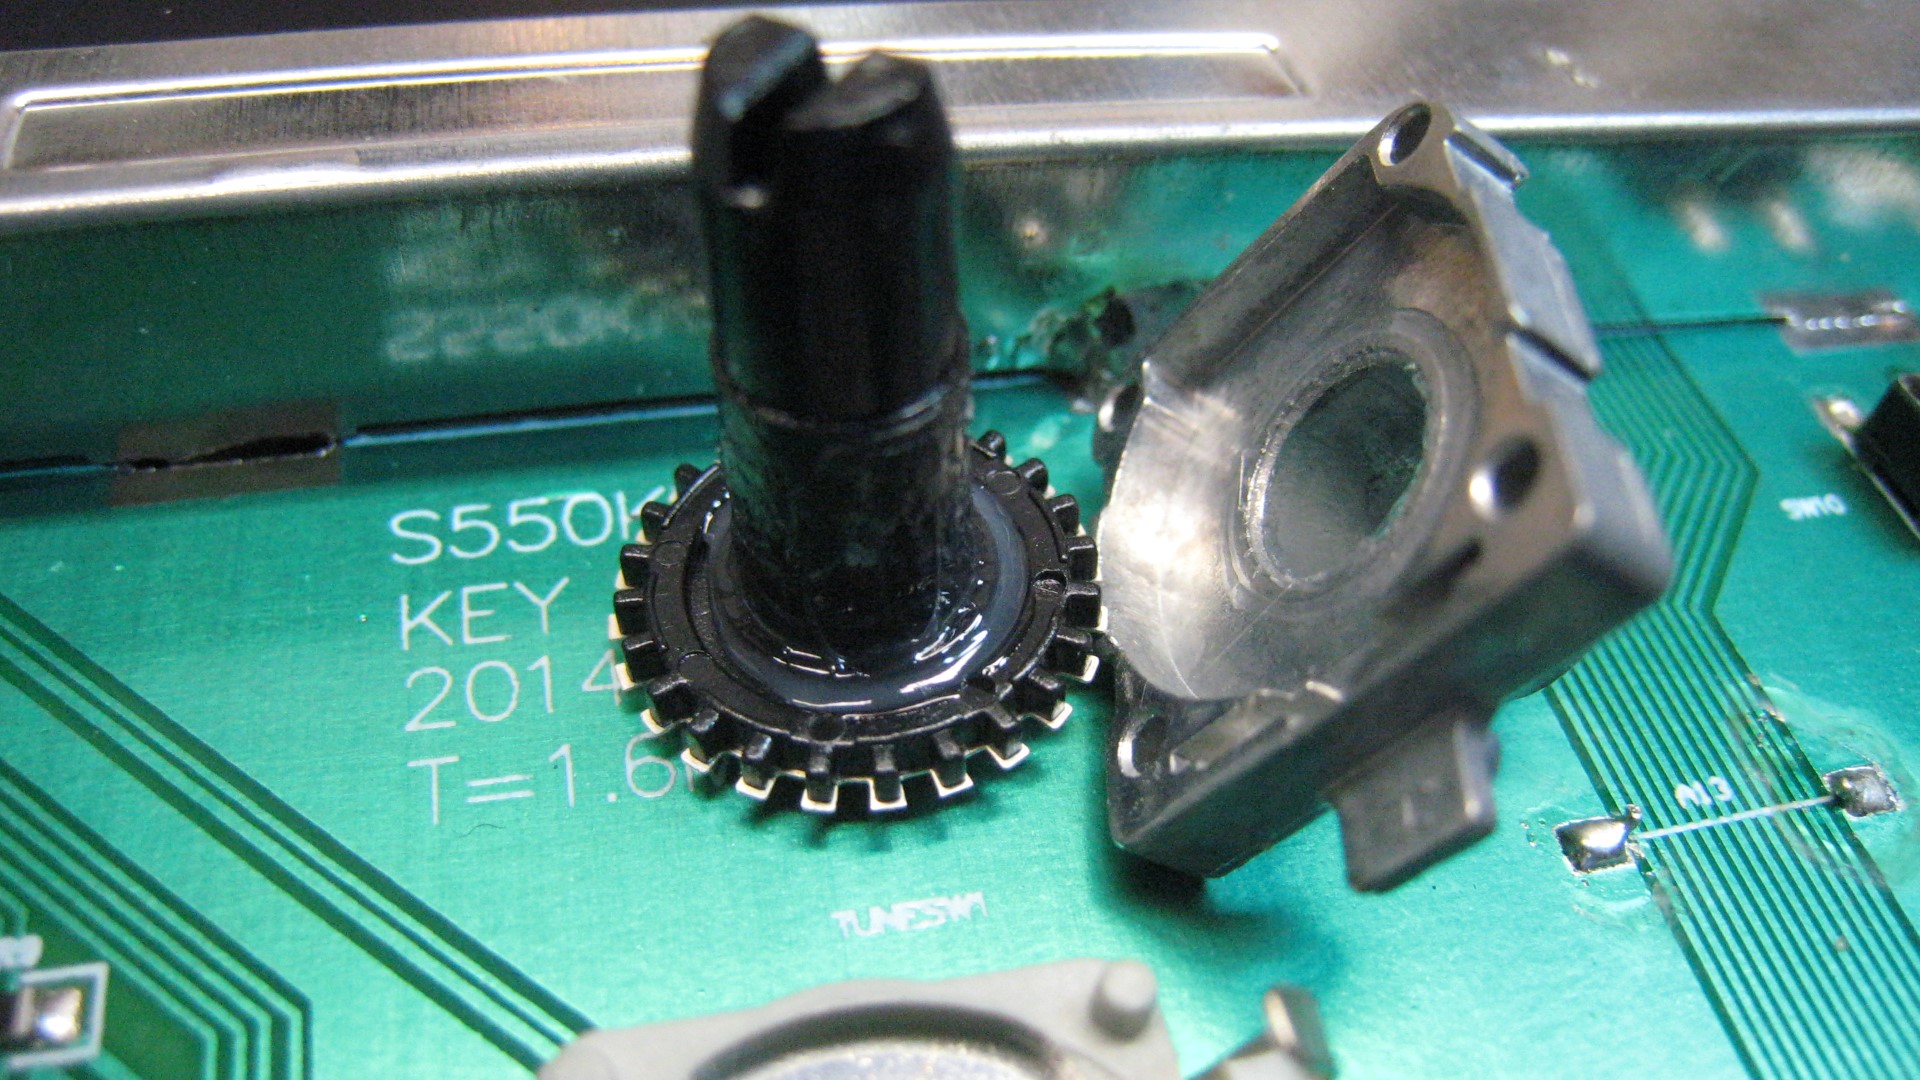
Once the front panel is off you will see the encoder. Gently pry the 4 tabs to the side just enough to remove the knob with the front part of the encoder assembly. Pull the plastic shaft out of the front piece and clean it carefully with Goo Gone or similar. Be sure not to damage the striped contact plate or the metal contacts beneath. I then cleaned it again with 91% Isopropyl alcohol and re-assembled, bending the 4 tabs back to lock the encoder together. It should now spin completely freely.
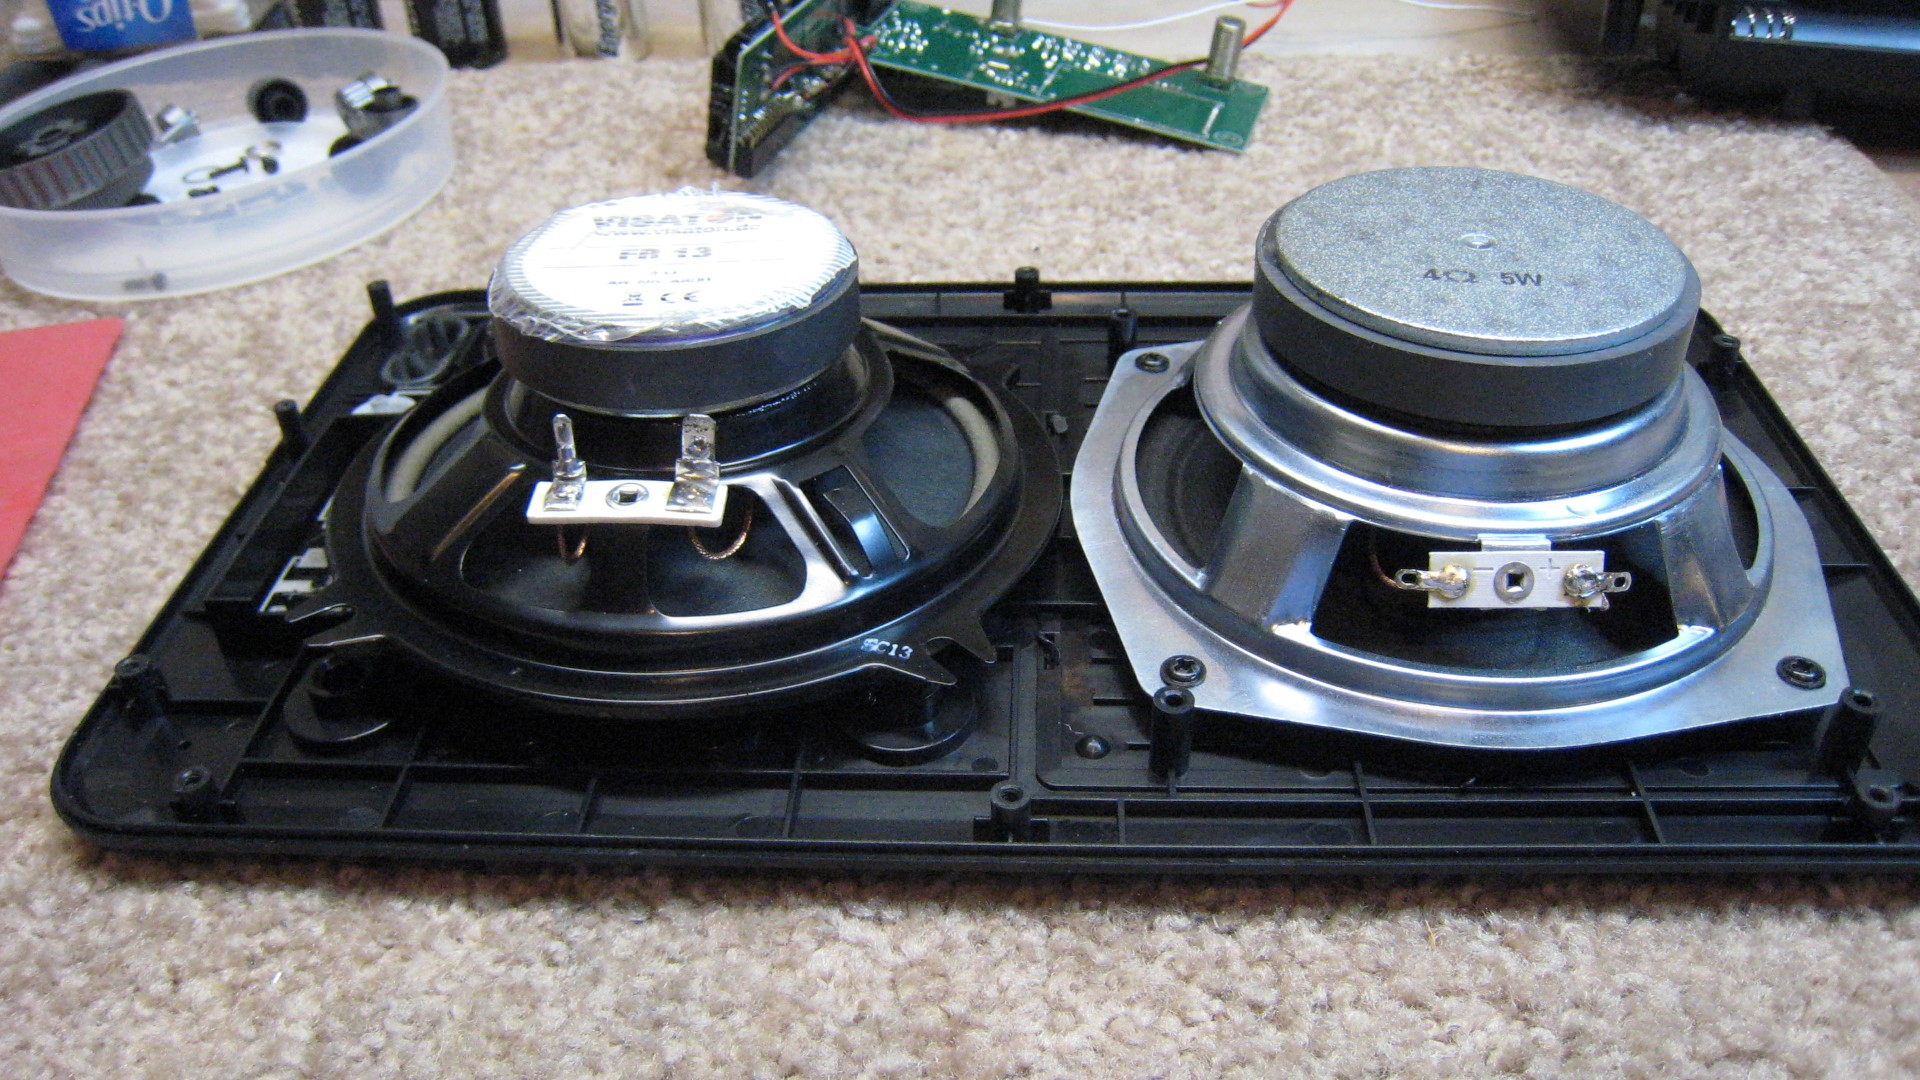
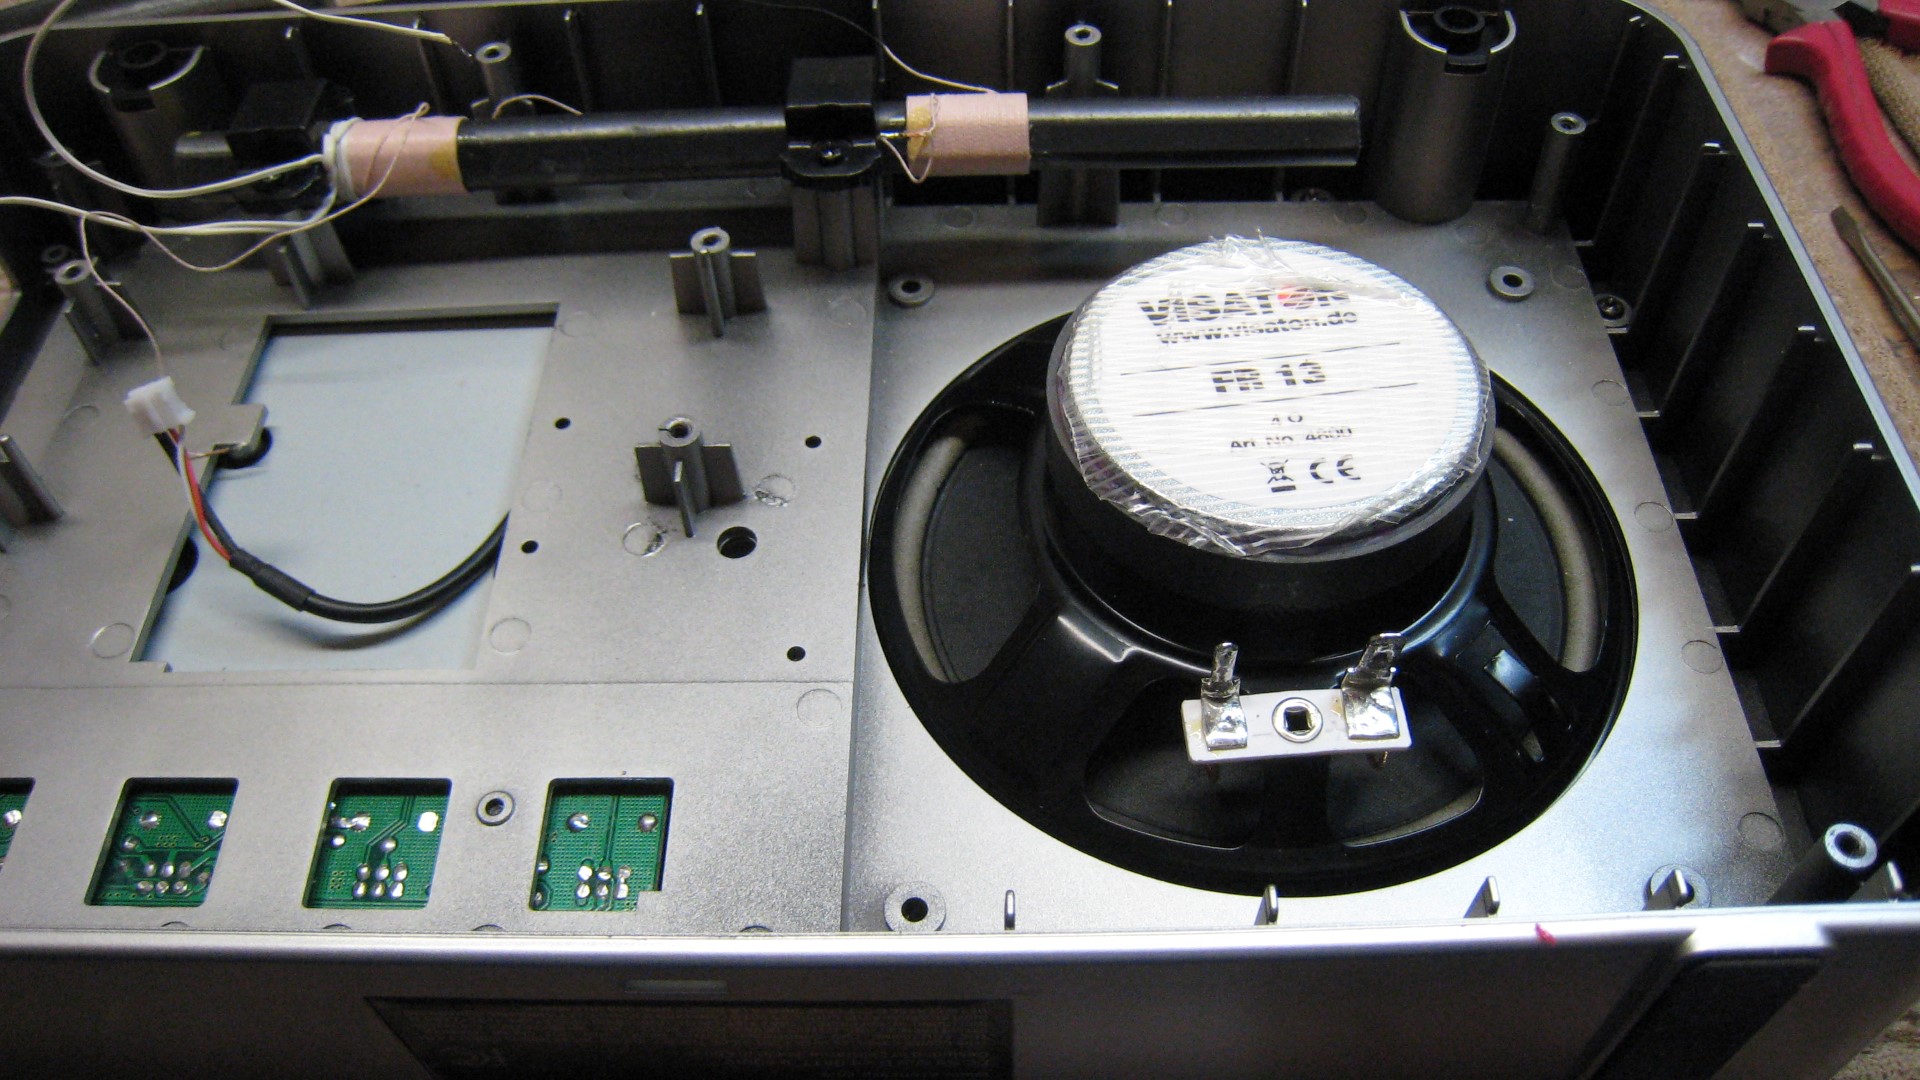
Better Speaker: It seemed that the Field is a bit lacking in the audio department…compared with similarly-sized radios its sound was a bit thin and lacking in bass or warmth. Substituting a better speaker yielded much better audio with a wider and more accurate frequency response. I don’t know how much this would cost Eton…certainly they could do it for less than what one must pay for an aftermarket speaker purchased at retail. The Visatron FR13 I used cost about $16. Its front is a bit thicker than the stock speaker but it fit into the radio just fine. I tightened the 4 mounting screws just until the metal mounting tabs of the speaker began to flex downwards a bit, then locked each of them with a drop of Loctite. Interestingly this replacement speaker looks less robust with a smaller magnet assembly than the original yet it produces a fuller sound without the midrange peak of the original. In the picture showing both speakers, the Visatron replacement is the black one on the left. The photo on the right shows it installed.
Conclusion: I understand that products have to meet certain price points. But in the case of the deleted shield which would cost extremely little or eliminating the goop in the tuning mechanism which would actually save money it’s hard to justify those choices. Perhaps the better speaker would be harder to get past the bean counters but I’m not even sure the speaker I used is actually more expensive to manufacture than the original…it actually looks like it is more cheaply constructed – yet it sounds better…maybe it’s just a better design. The longer ferrite rod makes such a big improvement I’d hope that it could be worked out.
The modified Field is very sensitive on AM and is now very close to the best portables I have in that regard. It’s sound is considerably improved although still not quite as full bodied as the CC-SW or vintage GE SR’s. The tuning knob can now be spun easily with just a light touch of the fingertip and is much nicer to use than the stiff, gouped-up version in the stock radio. An interesting note – apparently the CC-SW uses the identical tuning encoder and it is now coming with goup! So my older CC-SW has beautiful, free tuning like the modified Field but current production has a much tighter tuning feel. Perhaps C. Crane will realize this and somehow remedy the situation…or you can do it yourself, although I caution you that disassembling any radio will probably void its warranty. As with all mods proceed at your own risk.
And a last word to all manufacturers about soft muting. GET RID OF IT! No one who knows how a good radio should behave likes it…no one. The developers of the DSP chips have to learn that this fake noise reduction actually makes the radio less listenable, and the manufacturers who use the chips should learn how to control DSP’s extra functions as well as possible to make the radio work the best it can, defeating or reducing functions like soft muting until they hopefully disappear. And if you can eliminate muting while tuning you’ll eliminate another irksome characteristic which appeared with early digital radios, then was remedied, and now seems to have returned. We’ve seen great advances in the DSP chips since they were first introduced a few years ago…let’s hope there will be continued improvement.

You must be logged in to post a comment.